It is crucial to resolve QuickBooks error 15215 as it can obstruct an ongoing update process in QuickBooks. Users who are trying to get the most recent update for their QuickBooks payroll service may find this error really annoying. They just can’t move ahead with their QuickBooks update process, which kills their time and affects their operations as well.
You just can’t skip the error, as an outdated QuickBooks payroll service can cause various discrepancies in your payroll processes. In case you are trying hard to get rid of the QuickBooks error code 15215 but fail every time, this post can offer you an ultimate guide for the error resolution.
Meaning of QuickBooks Error Message 15215
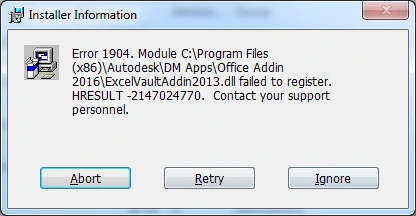
When the error prevents users from installing the latest payroll updates, an error message accompanies this issue. You may notice the following error text on your screen:
QuickBooks Error 15215: Unable to Verify the Digital Signature.
When updating the QuickBooks payroll service or desktop version of the program, this error message can occur due to the system’s junk files. It is not the only factor, but there are several possible reasons that can promote error 15215 in QuickBooks. Here, we will discuss them all with their suitable solutions.
Main Factors That Give Rise To QuickBooks Payroll Update Error 15215
Some of the most common reasons that can make QuickBooks error 15215 disturb an update process are:
Misconfigured Internet Explorer
Internet Explorer is the supported internet browser from Intuit. To support Intuit’s processes, it is crucial that the Internet Explorer settings are configured correctly. If not, It can result in the error code 15215 in QuickBooks.
Improper QuickBooks Installation
When QuickBooks installation remains incomplete or gets damaged/corrupt, downloading the latest updates on it won’t be possible.
Virus/Malware Infection
A hovering threat of malicious applications on the QuickBooks data file of the program can also hinder the QuickBooks payroll update process.
Damaged QuickBooks Software
In case the QuickBooks Desktop software is damaged, update errors like QuickBooks error 15215 can come into existence.
Background Applications
Sometimes, the applications that are running in the background can interfere with the QuickBooks update, thereby causing various update error codes.
Does QuickBooks Desktop Error 15215 Show Some Signs/Symptoms?
Yes! When the error occurs, you may notice various signs or symptoms that can give you an idea about the nature of the error. These signs are:
- An error message that explains what has happened actually, wherein you can also notice the error code 15215.
- Soon after the error occurs, it crashes the Window active on your screen.
- Hanging Desktop, which is showing no response towards the inputs provided to it.
- QuickBooks becomes corrupted with the error code 15215.
- Desktop, mouse or keyboard inputs, Windows, and the application all become suddenly sluggish.
How Should I Act When QuickBooks Desktop Update Error 15215 Occurs?
After gaining the information explained above, you will find yourself in a more aware state regarding the payroll update error 15215 in QuickBooks. Thereafter, you can implement the following solutions to eliminate the persisting issue:
Initial Method: Reboot Your Computer Having QuickBooks Installed On
Rebooting your system is one of the most basic yet effective solutions for resolving a wide range of technical issues. Therefore, you should try this as well in the beginning before you move to the next solution. Simply click on the Restart button and wait for it. Thereon, you can try updating the QuickBooks application and check the error. If you are still seeing it, move to the next method.
Second Method: Install The Pending Updates Manually
If you are having trouble installing the latest updates, you can go with the manual process for updating the QuickBooks Desktop application. You need to follow these steps for an update:
- Navigate the QuickBooks Desktop software to reach out to the Update QuickBooks option and confirm that the product is chosen.
- Next, click the change tab, choose QB product, and choose the update option.
- Advancing in the procedure, select the location to save the download file.
- Once the location is confirmed, choose the Save option and look for the file you have downloaded.
- Thereon, your next action should be clicking on the Install the Update tab twice.
- You can now restart your Windows and move to your accounting program to check if the latest QuickBooks updates are downloaded or not.
Third Method: Run QuickBooks As Windows Administrator Using Relevant Credentials
When you run QuickBooks with admin credentials, it gives QuickBooks the authority to Windows to run its tasks smoothly. Besides, it lets QuickBooks utilize the necessary resources as needed, thereby preventing QuickBooks error 15215. Here are the steps:
- Before you start, make sure that QuickBooks is closed. If not, do it yourself before jumping to the next step.
- Next, right-click on the QuickBooks icon, and then a drop-down list will roll out.
- From the drop-down menu, select option at the top, Run as administrator.
- Moving ahead, you will face a choice – Do you want to allow this program to make changes to the computer?
- Click Yes to confirm, and it will provide QuickBooks with the required permissions.
Try updating QuickBooks with the added permissions, and if it does not resolve the QuickBooks error 15215, move to the next solution.
Fourth Method: Configure Settings in Internet Explorer To Fix 15215
If you are having trouble installing the QuickBooks application, it may be due to the improperly configured Internet Explorer settings. To fix it, you need to apply the following changes:
- Before you initiate this procedure, close the QuickBooks application.
- After that, go to the Internet Explorer browser to start the configuration.
- Here, you need to click on the Tools option to locate the required settings.
- Thereafter, select the Internet Options icon, followed by clicking on the Advanced option.
- Next, click on Advanced Settings to open the settings you need to modify.
- Here, you may locate the options, such as Use TLS 1.0, Use 1.1, and Use TLS 1.2. If not, you might be using an outdated Internet Explorer, and you need to update it.
- Now, you need to checkmark the box for the Use TLS 1.0 option. Make sure that all the rest of the options are unchecked.
- After confirming, click OK, and the modified settings will be saved, and you may now quit the Internet Explorer Internet options window.
- After applying these settings, restart your system and try updating the available updates.
Now, after setting up Internet Explorer, check if the QuickBooks error code 15215 is fixed or not.
Fifth Method: Restart Microsoft Windows In Selective Startup Mode
Users struggling with the payroll update error 15215 in QuickBooks may find this procedure useful. It prevents the third-party applications (conflicting with the update process) from running, thus ensuring that the updates are installed without facing any hurdles. Below is how you can switch to this mode:
- Before you initiate the actual procedure, close the QuickBooks Desktop window.
- Now, on your Windows 8 or 10, press the Windows + R keys simultaneously.
- Click inside the Run box and thereafter, type MSConfig in it.
- Make sure that you have typed it correctly, and then click the OK button.
- It will open the System Configuration Utility.
- You need to allow the configuration window to open, and here, you can choose the Selective Startup mode.
- Check and confirm that all the boxes for Load Startup are not marked.
- Once you are done with these settings, click the Save button and hit OK.
- Now restart your computer and open QuickBooks by double-clicking on its icon.
- Here, you can download the latest payroll tax table to resolve the QuickBooks error 15215.
- Once done, you can switch back to the Normal Startup mode and restart your computer to finish.
Winding Up!
This post elaborates on different solutions to fix QuickBooks error 15215 based on their different causes. Hope you have resolved this update error till now by implementing them accurately. However, if you are unable to make these solutions work due to technical difficulties, connect with us to avail of the required help.
FAQ's
Ques 1: How can I prevent QuickBooks error code 15215 from taking place?
Ans. To avoid the payroll update error like 15215, make sure that you have an active payroll subscription. Besides, ensure that you are connected to a stable Internet, and QuickBooks is updated to the latest release. Also, check your Firewall settings to make sure that they won’t interfere with an update process.
Ques 2: Why should you resolve QuickBooks update error 15215 immediately?
Ans. An outdated version of the QuickBooks application can cause several other discrepancies in the program. Besides, you won’t be able to run your payroll processes accurately. Therefore, you need to look into the matter and respond swiftly.
Ques 3: How do I acquire the right help when error 15215 in QuickBooks obstructs an update?
Ans. You may reach out to the professionals by choosing any of our chat, email, or helpline numbers. It will connect you with a trained technician who can guide you with the relevant solutions and that too in a prompt manner.