Author: admin

Home > Articles by: admin

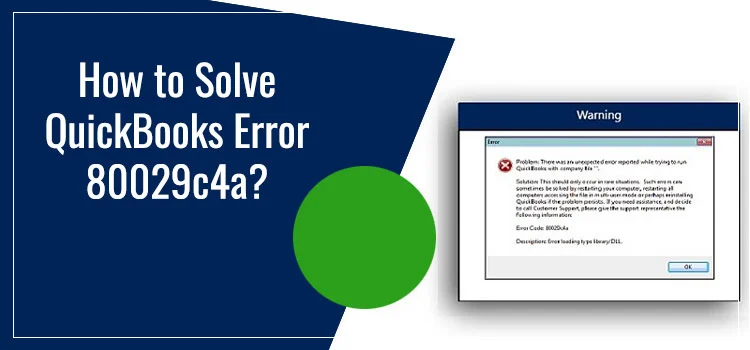
QuickBooks Error 80029c4a is an unexpected error that arises when the user tries to launch QuickBooks or company file. This error mainly arises when the QuickBooks company or installation files are damaged or corrupted. Error 80029c4a is also known as run-time error that is caused by many reasons.

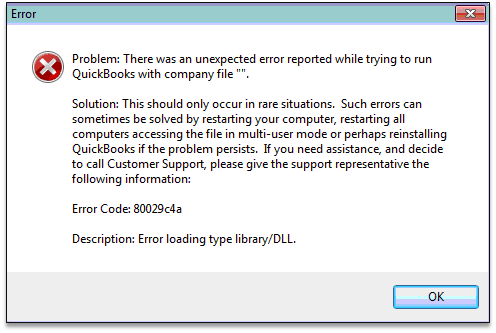
When the error occurs, you may not be able to access the QuickBooks application. You will experience the below-stated error message on your screen:

“Problem: There was an unexpected error reported when trying to run QuickBooks with the company file.”

quickbooks error 80029c4a ( Error Message

There is a myriad of factors that can make the error code 80029c4a in QuickBooks desktop roll out on your screen. Why this error occurs and what procedures can fix it are all covered in this intuitive post. Let’s explore!

“Get quick assistance in fixing error 80029c4a in QuickBooks by connecting with our experienced technicians via call at 1-855-603-0490”.

Why Does QuickBooks Error 80029c4a Occur?

QuickBooks error message 80029c4a is a common error in the program that can come into sight due to several reasons. When you know them, then troubleshooting becomes easier:

  • When the QuickBooks installation directory has a corrupt file.
  • Inappropriate or damaged installation of the QuickBooks application.
  • Corruption in your Windows Operating System or an erroneous Windows registry can also promote error 80029c4a in QuickBooks.
  • Accidental deletion of some of the QuickBooks installation files from Windows.
  • Virus or malware infections can also make QuickBooks error message 80029c4a show up on your screen.
  • Damaged components that are required for the smooth installation of the QuickBooks software.

How Do I Determine if QuickBooks Error 80029c4a Has Occurred?

Below are some of the common signs and symptoms you may experience on getting the error:

  • The system freezes several times when working on it.
  • The data file in QuickBooks is damaged or missing.
  • An error message shows up on the screen right after the arrival of the error.
  • Windows OS does not perform well.
  • An active QuickBooks window crashes.
  • The system gets collapsed due to this erroneous condition in the program.
  • The sluggish response of the system when provided with the mouse or keyboard inputs.

Methods to Eradicate QuickBooks Error Message Code 80029c4a

Now that you have the required information related to the error, let’s discuss some of the most effective solutions that can help eliminate the concerning error code. Here we go!

Solution 1: Run A QuickBooks Window Repair

Damaged QuickBooks Windows is one of the most apparent reasons behind the error. In such a case, it is worth trying to run a QuickBooks window repair. Follow the below-given steps:

  • First thing first, close QuickBooks Desktop software.
  • Next, press the Windows button on your keyboard.
  • Thereafter, you need to open the Control Panel on your system.
  • Here, select Uninstall or change the program.
  • It will show up on the list of the installed programs, wherein, you need to select QuickBooks.
  • In the next step, you need to select the Uninstall/Change program.
  • Now from within the QuickBooks installation window, click Next.
  • Also, select the Repair button and click on it.
  • Moving ahead, click the Repair button and wait until the process completes. After that, click the Finish button.

These steps can repair the damaged QuickBooks Windows to eliminate the persisting error code 80029c4a. If the error continues, try a different solution as discussed below:

Solution 2: Make Sure That Your Antivirus Applications Are Quarantined

Sometimes your antivirus applications can unintentionally block QuickBooks from loading the essential files. In such a case, you need to check your antivirus for the quarantined files. To do so:

  • Uninstall and reinstall the QuickBooks application in the first place and then launch it on your Windows OS.
  • Now if your antivirus application has quarantined files, allow permissions to go through your Firewall.
  • You can locate most of these files in C: Program Files Intuit QuickBooks (Year).

Solution 3: Clean Install QuickBooks Software

In the first place, you need to reinstall QuickBooks using the clean install method. Make sure that you are logged in as an admin and then follow the below-explained steps:

  • Update the QuickBooks to the latest maintenance release.
  • Now from underneath the File menu, locate Close Company or Logoff.
  • Here, you need to select File and then hit Exit.
  • When doing so, you need to ensure that no company is open on your Desktop screen.

Once done, verify if the QuickBooks enterprise error 80029c4a is fixed or not.

Read Also : QuickBooks Error 80070057

Solution 4: Utilize The Windows System File Checker

Windows system file checked can determine the possible reasons behind the error:

  • In the first place, you need to open the Start menu and then type Command in the search box.
  • Next, press Ctrl+Shift keys together on your keyboard and then click Enter key.
  • Once done, click Yes in the permission dialogue when you are prompted to do so.
  • Moving ahead, type SFC/Scan now and click Enter.

If the error continues, move to the next solution and perform the listed steps with the utmost care and attention.

Solution 5: Run Reboot.bat File

In case the error is still unresolved, you can run the reboot.bat file to eliminate the issue:

reboot
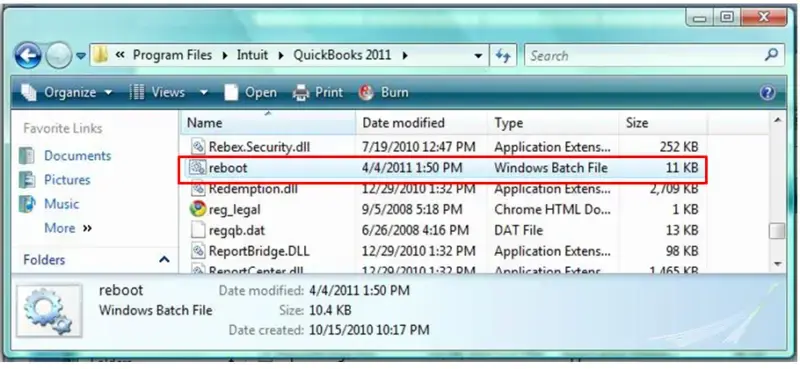
  • Close QuickBooks in the first place before proceeding any further.
  • Now navigate to the folder, wherein, you want to execute the reboot.bat file.
  • Thereafter, right-click on the QuickBooks Desktop icon to move ahead.
  • From the drop-down menu that opens, click on Properties.
  • Next, select Open File Location.
  • Right-click on the reboot.bat file and select Run as System Administration.
  • Don’t close the window that appears on your screen next. It will be closed automatically after reboot.
  • Wait for the reboot.bat utility completes its task and then restart your computer.

In Conclusion!

These are some tried and tested solutions that can help in eliminating the QuickBooks desktop error 80029c4a. If you are having trouble overriding the error using these solutions, just reach out to our QuickBooks professional experts using our chat or email assistance intended to resolve multi-faceted QuickBooks issues. The real professionals will take the matter into consideration and help you with the most relevant solutions.

Isn’t it quite disruptive to find yourself in a situation where you fail to access the QuickBooks data file? You might be thinking, what’s the actual reason behind this? The users mainly caught themselves in such a situation due to QuickBooks Error 6129, 0. Failure in the connection of the database server is one of the reasons that might lead to this error. Unfortunately, this error prevents the users from accessing their data files, which might hamper their workflow. 

However, if you are also chasing Error 6129, 0 in QuickBooks, this is the right destination you are looking for. Review this entire post thoroughly and find the best ways to overcome this company file error.  

Are you finding it difficult to access your company file due to QuickBooks Errors 6129, 0 and need instant help? Call us anytime anywhere and consult with our professionals instantly without causing further delays for quick resolution. 

A Clear Insight Into QuickBooks Error Code 6129, 0 

The users might confront QuickBooks Error Code 6129, 0 anytime while accessing their data file with the error message “QuickBooks Pro has encountered a problem and needs to close. We are sorry for the inconvenience.” Another possible reason behind this error is that the QuickBooks Database Server Manager has no permission to access the file. 

Whenever the users confront this error, they won’t be able to resume their ongoing business tasks. So, it’s important to resolve the issue and regain access to the data file by implementing the resolution methods explained further in this post. 

QuickBooks Error 6129 0

Prominent Causes That Might Give Rise to Error 6129, 0 QuickBooks

Before diving into the troubleshooting part, knowing the root causes behind Error 6129, 0 QuickBooks is essential. So, to give a clear picture, you must look at the pointers listed below. 

  1. Sometimes, the entries present in the Windows Registry are damaged or corrupt. 
  2. In other instances, it may happen when the data file is upgraded to a new version of QuickBooks Desktop using a Windows non-administrative profile. 
  3. It may evoke when there are some connection issues between the client domain and server. 
  4. Another reason could be the damaged or corrupted files the .ND file extension. 
  5. The inappropriate shutdown of your computer during the power outage may also be responsible for this error. 

What are the Signs Representing QuickBooks Company File Error 6129, 0?

Here, we have illustrated some common signs and symptoms that will help you determine the occurrence of QuickBooks Company File Error 6129, 0. 

  1. Whenever the users end up with QuickBooks Error 6129, 0, they won’t be able to access their company files. 
  2. You may observe the sudden freezing or crashing of the QuickBooks application at the onset of the error. 
  3. In some cases, you may notice that your Windows operating system starts behaving inappropriately and performing sluggishly. 
  4. Every time, the QuickBooks Error Code 6129, 0 occurs, they will be displayed with the error message on their screen. 

Most Effective Ways to Decode QuickBooks Error 6129, 0 Instantly 

Are you sick and tired of getting the proper resolution method to tackle QuickBooks Errors 6129, 0? In that scenario, you don’t have to worry any longer, as we have discussed all the best feasible ways to kick out this error. So, look at all the solutions described below and use the one according to the cause of the error. 

Resolution Way 1: Allot a New Name to the Network Data File (.ND) For QuickBooks 

Sometimes, the users can repair the damage in the Network Data file in QuickBooks by changing the file name. Thus, it would help the users prevent the QuickBooks Error Code 6129, 0. 

  • To repair the file, you must look for the .ND file in QuickBooks. 
  • Once you get the .ND file, right-click on it and pick the Rename option. 
  • You are supposed to change the name by including the “.OLD” suffix at the end of the file name and hit the Enter key from your device. 
  • After this, try opening the QuickBooks data file and check whether you still receive the QuickBooks Error 6129, 0. 

Resolution Way 2: Transfer Your Company File to a Distinct Location

Sometimes, the issues with the company file location might give rise to Error 6129, 0 in QuickBooks. In that scenario, you must try changing the company file location by following the steps below to overcome the issue. 

  1. Begin the process by generating a new folder on your device. 
  2. After this, you must shift your company file into that particular folder. 
  3. It will be best to run the QuickBooks application on a single computer, as you can perform the above steps easily. 
  4. However, if you are accessing the same data files on multiple computers, follow the steps below.
  • Initially, you must hit the Windows key and navigate to Programs > QuickBooks > QuickBooks Database Server Manager
  • In the next step, choose the Scan Folder option to go ahead. 
  • If you notice that no folder carries your data file, browse to the highlighted “Add a new folder” option. 
  • Thereon, go to the Scan button and wait until the scanning process ends. 
  • End the process by opening the data file. 

Resolution Way 3: Use the Clean Install Tool and Database Server Manager From QuickBooks Tool Hub

Follow the process below to run the clean install tool and database server manager to resolve the QuickBooks Company File Error 6129, 0. 

Stage 1: Steps to Run the Clean Install Tool 
  1. Commence the process by downloading and installing the QuickBooks Tool Hub on your device. 
  2. Once you have installed the QuickBooks Tool Hub, open it by double-clicking on its respective icon. 
  3. After this, navigate to the highlighted Installation Issues tab and hit QuickBooks Clean Install Tool. 
  4. With this, the clean install of the QuickBooks Desktop application will begin on your device. 
Stage 2: Operate the QuickBooks Database Server Manager 
  1. Firstly, you must launch the QuickBooks Tool Hub on your device. 
  2. Thereon, move toward the highlighted Network Issues tab, followed by QuickBooks Database Server Manager. 
  3. You will notice that the communication between both software and the server will improve. Along with this, it will also become easier to overcome the network-related issues. 
  4. At last, wait for the process to complete and then relaunch your device. 
Summarizing the Above!!

Fixing the QuickBooks Error 6129, 0 can be challenging if you don’t get proper resolution methods to fix them. So, we hope that by reading this comprehensive post, you can easily tackle the error and regain access to your data file. However, if you still require expert suggestions regarding this issue, you can get help from our professionals. They will listen to your query and offer you with a sure-shot solutions. 

FAQ's

Ans. You can prevent the QuickBooks Error 6129, 0 from occurring in the future by generating the backup file and updating QuickBooks Desktop and Windows to the supported versions. Also, you must ensure that you log in to QuickBooks with Windows Administrative credentials. 

Ans. Yes, the users can overcome the QuickBooks Company File Error 6129, 0 by turning off the antivirus in safe mode. For that, you must perform the steps given below. 

  1. Begin the process by relaunching your device in Safe Mode. To do so, you must hit the F8 key from your keyboard and then choose the Safe Mode For Networking option.
  2. After this, disable the Running antivirus software and construct a new data file when you get the Desktop screen.
  3. Ensure you configure the system in normal mode and relaunch your system and the data file.

Ans. No, your company file data won’t get hampered by running the QuickBooks Clean Install Tool. Therefore, if you feel so, keep the backup data file to avoid further discrepancies. 

Ans. The users might come across QuickBooks Error 6129, 0 for several reasons, such as issues with the Windows operating system. Sometimes, this issue is generated while using an unsupported Windows version or an inappropriate QuickBooks installation. You can resolve this issue by following the methods explained in this article. 

Ans. If nothing in this post helps you fix QuickBooks Error 6129, 0, then it’s best to get help from our experts. You can drop a mail or consult our experts via the live chat facility for instant help. 

Creating the first invoice in QuickBooks? This post will teach you how to create your first invoice in QuickBooks online or desktop version. You can create invoices from estimates and scratch, which you can further share with your customers via mail. Generally speaking, depending on the type of transaction with your customer, you can create an invoice in QuickBooks in different ways.

Part A. Create An Invoice in QuickBooks Desktop

If you are using the desktop version of QuickBooks, then let’s take a look at different ways that you can follow to create an invoice in QuickBooks desktop;

  1. Without Sales order or estimate
  2. Creating an invoice for a sales order
    A). Through Sales Orders Window
    B). Through Invoice Window
  3. Creating an invoice for an estimate
    A). Through Estimate Window
    B). Through Invoice Window

A.1. Creating Invoice Without Sales Order or Estimate in QuickBooks Desktop

If you want to create an invoice in QuickBooks without creating a sales order or an estimate, below are the straightforward steps you can execute;

Create an invoice in quickbooks

  1. Firstly, on the home screen or the customer menu list, click on the “Create Invoices” option.
  2. Then, from the “Customer: Job” drop-down list, select your customer or customer job. If you have not listed the customer or customer job, click on the “Add New” option.
  3. After that, you will be asked to provide the relevant information at the top of the form, i.e., data invoice, bill to/ sold to, and terms.
  4. Now, select the items in the detail area. Note: After selecting or adding the item, the description, unit cost and amount will be added automatically based on the information you provided in estimates.
  5. To apply a discount for the invoice, its mandatory to have a discounted item.
    • On the home page of the QuickBooks desktop screen, navigate to the lists menu.
    • After that, select the product from the list and right-click on the free space.
    • Then, click on the “New” option and click on the “Type” drop-down arrow, and select the “Discount” option.
    • Now, enter the item name or number and provide a brief description.
    • Provide the discounted amount or percentage under the “Amount or %” option. You can also directly enter the discounted amount in the sales form.
    • After that, click on the “Account” drop-down list and select the income account you want to use to track discounts allowed to customers.
    • Moving ahead, provide an appropriate item tax code and click on the “OK” option.

At last, end this process by clicking on the “Save and Close” option.
Congrats! You have now successfully created your first invoice on QuickBooks desktop.

A.2.Creating Invoice for Sales Order in QuickBooks Desktop

Let’s discuss the methods that you can perform to create an invoice in QuickBooks for sales orders;

A). Through Sales Orders Window

  1. Firstly, navigate to the sales orders in the main tab on the homepage of QuickBooks.
  2. After that, click on the “Create Invoice” option.
  3. Now, a prompt-up message will appear on your screen.
  4. Select the “Create Invoice for All of the Sales Order(s)” option if you want to add all items from the sales order to the invoice.
  5. If you want to add only some selected items to the invoice, select the “Create Invoice for Selected items” option.
  6. Thereon, provide each item’s quantity in the “To Invoice” column. On the other side, if you don’t want to add any listed items, then keep the quantity as zero.
  7. Finally, click the “Save and Close” option to save the changes.

Following the above-mentioned steps, you have successfully created an invoice in QuickBooks through the sales orders window.

B). Through Invoice Window

  1. On the home page of the QuickBooks desktop, click on the “Customer” menu option and select the “Create Invoices” option.
  2. Click on the Customer: Job drop-down list and select your customer.
  3. After that, select one or more sales orders that include the item you want to add to the invoice.
  4. Now, make the necessary changes in invoices related to quantity. In the list of items, add quantity in the “To Invoice” column for each quantity. It should be noted that if you don’t want to add any listed items, then put the quantity as zero.
  5. At last, save the invoice by clicking on the “Save and Close” option.

A.3. Creating Invoice for Estimate in QuickBooks Desktop

To clarify, an estimate is a quote you provide to your customer for the products and services. These estimates can only be converted to sales orders or invoices if the customer decides to purchase your product/ service. When a customer accepts your estimate, they agree to pay a fixed amount.

If you want to create an invoice in QuickBooks desktop for these estimates, then there are two different ways, which are as follows;

A). Through Estimate Window

Given below are the steps that you can execute to create an invoice in QuickBooks through the estimate window;

  1. Firstly, open the estimation in the QuickBooks desktop application.
  2. After that, click on the “Correct Invoice” option at the top of the estimated form.
  3. If you have enabled the progress invoicing feature, you may get a prompt message asking about the quantities and items to be added to the invoice.
  4. Thereon, the invoice will appear on your screen.
  5. Here, make the necessary changes in the invoice as per the need.
  6. At last, save the invoice by clicking on the “Save & Close” option.

B). Through Invoice Window

  1. On the QuickBooks desktop home screen, click on the “Create Invoices” option.
  2. Now, click on the Customer: Job drop-down list to see all the available estimates.
  3. Select the estimate which you want to add to the invoice. QuickBooks only allowed users to select up to 1 estimate at a time for creating an invoice.
  4. After that, an invoice will appear on your screen. You can edit the necessary changes as per the need.
  5. Once you complete the above steps, click on the “Save & Close” option.

Part B. Create An Invoice in QuickBooks Online

Let’s take a look at the methods that you can perform to create an invoice in QuickBooks online;

  1. Converting an estimate to invoice
  2. Creating a new invoice from scratch

B.1. Converting an Estimate to Invoice in QuickBooks Online

Now, we’ll guide you on how you can convert an estimate to an invoice in QuickBooks online.

  1. To begin with the process, click on the click on the “Sales” option available at the top left side on the dashboard of QuickBooks online.
  2. Under the sales option drop-down list, click on the “Customers” option.
  3. Now, click on the “Transaction List” option and scroll down to find the estimation.
  4. After that, click on the “Estimate” option to open it.
  5. Moving ahead, click on the “Create Invoice” option available at the top right side of the screen.
  6. Now, you can choose whether you want to convert the entire estimate or only a small portion.
  7. After that, click on the “Create Invoice” in the green color box.
  8. Thereon, QuickBooks online will open the invoice and automatically fills in the information from the estimate. Here, you can also make some changes as per the need.
  9. If you want to share the invoice with the customer via mail automatically, click on the “Save and Send” option. Whereas, if you are not ready to share the invoice, you can click on the “Send and Close” option.

You can easily carry out the steps mentioned above to create an invoice in QuickBooks online.

Also can Read – QuickBooks Not Responding

B.2. Creating a New Invoice From Scratch in QuickBooks Online

If you want to create an invoice in QuickBooks online without creating an estimation, below are the steps you can carry out to perform the same task;

  1. First and foremost, click on the “New” option available at the top left side of the screen. 
  2. Under the “Customers” heading, click on the “Invoice” option. 
  3. Now, click on the “Customer” insert field box and select your customer under the drop-down list.
  4. Thereon, provide the required details for the invoice and then click on the “Save” option. If you want to share the invoice immediately, click on the “Save and Send” option.

That’s how easy it is. By following the above steps, you can easily create an invoice in QuickBooks from scratch by completing the above-listed steps.

To Summarize

Congratulations, through this post, you have successfully learned how to create an invoice in QuickBooks desktop and online. If you want to know more about any of the features in QuickBooks, then you can get help from our QuickBooks experts. Our experts are available 24*7 around the clock to resolve your queries.

Are you unable to log into your banking website in QuickBooks Online due to QuickBooks Error 179? If yes, then you have reached the right spot. The users might encounter the error when they failed to sign into the banking website due to wrong login credentials. Whenever the error pops up, it represents the following error message stating:

“Bank error 179 even while not being logged in”.

QuickBooks Error 179 (Message)

On the occurrence of the error, users won’t be able to login to their banking website and thus it obstructs them from performing the bank related tasks.

What are the reasons that promote QuickBooks Error 179?

At times, QuickBooks users might get stumbled upon QuickBooks Error 179 due to the following reasons.

  • There might be the possibility that you haven’t updated the bank login credentials in QuickBooks.
  • Sometimes, it may trigger when you have signed in to your banking website using multiple devices.
  • If you have forgotten to log out from the previous QuickBooks session you might come across QuickBooks Error 179.
  • One of the reasons may be choosing the wrong bank account while linking your bank account to QuickBooks Desktop.

How can you Identify QuickBooks Error 179?

Below we have described some of the signs and symptoms using which you can easily identify QuickBooks Error 179.

  • You may notice that your company file is either damaged or corrupted.
  • It may also occur if the QuickBooks is not responding to the commands and starts freezing automatically.
  • Sometimes it may appear when you are working on QuickBooks, it will automatically fill the null values in the fields.
  • Also, the QuickBooks Error 179 may trigger when the Windows starts displaying the alert message that the Windows has been corrupted.

Effective Solutions to Eliminate QuickBooks Error 179

We understand how frustrating it is when you won’t be able to login to your banking website in QuickBooks due to QuickBooks Error 179. Therefore, to help you out we have mentioned some of the simple tricks to overcome the error without any hassle.

Method 1: Double-check your bank login credentials

At times, users might come across QuickBooks Error 179 while login to a banking website via wrong login credentials. Therefore, to resolve the issue, you must cross-check the username and password of your banking website. Follow the instructions below to verify the same.

  • To initiate the process, access the online login page of your bank using the preferred web browser.
  • Now, enter the bank login credentials associated with the QuickBooks. Further, tap on the login/sign-in option.
  • Once you have successfully logged into your bank account, move ahead by updating the login details to fix the error.
  • If you have added the incorrect login details, then you need to reset the password to get into your QB account.

Method 2: Updating Bank Login Details in QuickBooks

  • In the first stage, open the QuickBooks Online application.
  • Click on the Banking option from the left side of the Banking panel.
  • After this, select the account in which you are facing QuickBooks Error 179 and then click the Edit icon.
  • Now, tap on the Edit Sign-In option and then add the login credentials of your online banking.
  • Finally, opt for the Update option and try reconnecting your account once again. If still you are unable to login to your banking website due to the error, then move ahead towards the next troubleshooting method.

Method 3: Repair your Windows Registry to fix QuickBooks Error 179

At times, the users might encounter QuickBooks Error 179 due to the corruption in the Windows Registry. Therefore, to get rid of this error, you need to repair the Windows Registry. For that, you have to perform the steps listed below:

  • To begin the process, click on the Windows icon and type “Command Prompt” within the search column.
  • By doing so, it will take you to the Command Prompt window. In this window, you have to type “regedit” and then press the Enter key.
  • Now, the user  is supposed to choose the Error 179 key.
  • After this, you need to save the key details on your desktop.
  • Establish a new file, give a new name having the “.reg” extension and save it.
  • In the end, try to login to the banking website and verify whether the error still persists.

Method 4: Remove the Unnecessary Browsing History and Temporary Internet Files

At times, the website takes more time than the usual time to load the banking website due to the unnecessary browsing history. Therefore, to resolve such issues, it is necessary to clear the browsing history and unwanted temporary files. Follow the steps listed below to do the same.

Users of Google Chrome
  • Launch the updated version of Google Chrome.
  • After this, tap on the three vertically represented dots located at the top-right corner of the screen.
  • Now, hover your cursor over the More Tools option and then select the Clear Browsing data.
  • Ensure that you have chosen the “All Time” option by tapping on the Time range drop-down menu list.
  • Next, you have to tick the checkbox for the Browsing History, Cookies, Other Site data and Cached Images and Files.
  • Lastly, opt for the Clear Data option.

Recent Post – Fix QuickBooks Online Error 6250

Users of Mozilla Firefox:-
  • To initiate the process, tap on the three vertically represented dots and then click on the Options.
  • After this, choose the Privacy and Security tab and tick mark the checkboxes of Cookies and Other Site Data and Cached Images and Files option.
  • In the end, click on the Clear Data option.
Users of Internet Explorer:-
  • Initially, launch the Internet Explorer and then opt for Tools menu > Internet Options.
  • Soon after this, tap on the General tab and then Delete option.
  • Now, tick mark the checkboxes of the Temporary Internet Files and Cookies.
  • Finally, opt for the Delete option.

In a Nutshell

We hope that by performing the troubleshooting methods listed above you can easily resolve QuickBooks Error 179. Even after performing the troubleshooting solutions you are unable to resolve the issue, then you mustn’t worry. You just need to take help from our professionals through the email or chat support facility. Our experts will guide you with the best possible assistance within the least time applicable.

QuickBooks users are very well familiar with its various error codes that disrupt their functioning every now and then. Being a software of accounting and finance, anyone with their account on the same need to run the application almost daily. Therefore, they encounter the issues frequently too. One such problem in the software is QuickBooks error 6189.

QuickBooks Error 6189 (Error Message)

When QuickBooks tries to access the company file in the server desktop in multi-user mode, sometimes error code 6189 arises. This can happen because of many reasons. Although this issue does not create the risk of losing your data, it can work as a hindrance. This is why we are here. We will walk you through the signs to look out for, the reasons that trigger the problem, and how you can fix it. Let’s get started!

Signs To Lookout For To Detect QuickBooks Error 6189

Before the problem gets bigger than it already is, there are some signs and symptoms that you can take notice of. Let us see what they are:

  • If the company file does not open even when you reset QuickBooks Desktop
  • There is no connectivity between the data file and the QuickBooks application
  • Additionally, when you try to access the company file on the latest version of QuickBooks and fail.
  • Also, if the software starts lagging and runs on a slow speed
  • In addition to that, when your desktop screen crashes and shuts down the application

Reasons That Trigger QuickBooks Error 6189

Once you notice any of the signs from the list above, this means QuickBooks Error 6189 has taken over your system. The reasons behind that could be:

  • When your company file folder does not grant the read/write permission.
  • Also, if you used a damaged setup file to install and run QuickBooks Desktop.
  • Additionally, if you have an incomplete installation of the software.
  • If the company file you are trying to access is already running on some other system.
  • In addition to that, if a user is signed in to your QuickBooks account on single-user mode.
  • The error can also occur due to a malware/virus attack.
  • Also, if you do not have the Windows driver that you need to operate QuickBooks.
  • Finally, if your .ND or .TLG file isn’t there or is corrupt.

Simple Fixes For QuickBooks Error 6189

Now that you are clear about the causes let us understand how to overcome those.

Fix 1: Run QuickBooks Tool Hub to Fix Company File

In order to use QuickBooks Tool Hub, there are two sets of steps that you need to follow.

Step 1: Download and Run QuickBooks Tool Hub
  • On your browser, go to QuickBooksToolHub.exe, and there look for the Download button.
  • To initiate the downloading, click on that and give it a couple of minutes. The time it takes to complete the process depends on your internet speed.
  • Thereafter, go to Downloads and look for the file.
  • Right-click on the same, and from the list, select Run.
  • Further, the application will open up on your screen. You now need to install the same.
  • For that, follow the instructions available before you.
  • Also, make sure to agree to the terms and conditions in order to complete the installation.
  • Finally, click on the Run tab to start the application.
Step 2: Use Fix My Program
  • Once QuickBooks Tool Hub is ready to use, click twice on its icon to open it.
  • Here, on the left side, you will see a few categories of QuickBooks issues.
  • Next, to fix QuickBooks error 6189, you need to select Program Problems.
  • After that, you will see the Quick Fix my Program tab right there.
  • Hit the same, and this will detect the program and resolve it for you.
  • Eventually, you can run QuickBooks Desktop and resume your work.

Fix My Program

Fix 2: Shift Company File To Local Storage

Having your company file in a removable device or online can cause the problem. It is better to move it to the system’s local storage and then try to access the same in multi-user mode.

  • Firstly, if the file is in an external device, connect it to the system.
  • After that, open File Explorer and from the removable device, copy the file to your PC.
  • Furthermore, long press the Ctrl key from your keyboard to open QuickBooks.
  • Here, you will see the No Company Open error window; hit the Open/Restore company.
  • Thereafter, go to the file that you copied and select that.

Read more : Quickbooks Error 6000

Fix 3: Resolve .TLG File Issues

Any issue with your Transaction Log File can also be behind QuickBooks error 6189. Go along the steps to overcome it.

  • Initially, press the Windows key and the E key simultaneously on your keyword. This will open File Explorer on your screen.
  • Thereafter, go to the QuickBooks folder where all your program files are.
  • Next, locate the .ND, i.e., Network Descriptor file.
  • Furthermore, right-click on the same, and from the long list of options, hit the Delete button.
  • After that, go to the QuickBooks icon and open it. A new .ND file will generate automatically.
  • Finally, you can try and access the company file on QuickBooks Desktop.

Fix 4: Edit Company File Folder Settings

To grant read/write permission to the company file folder, follow these steps:

  • On your Desktop, go to File Explorer and locate the QuickBooks company file folder.
  • After that, right-click on the icon and choose Properties from the choices.
  • Furthermore, hit the Security option on the prompt window and select Edit.
  • Next, tap on QB Data Service User and change its settings to Full Control, and hit the Allow button.
  • Finally, save the edits by clicking Apply.

Summing Up

QuickBooks error 6189 occurs on the multi-user mode of the application. This can make users stop accessing the company file. If this sounds similar to you, then this guide is for you. Here, you must have learned everything you need to know to overshadow the problem.

For any further assistance, you can get in touch with us over a call or share your query via email. Our team of experts is always ready to assist you and help you resolve the problem.

Many organizations spend most of their time preparing and processing the payroll as it requires complete focus and dedication. Therefore, to make it easier to manage payroll-related tasks, QuickBooks Payroll Software is the best option you must go for. Therefore, it is essential to update the QuickBooks Payroll timely to grab the new and improved functionality of the application. But, users might sometimes confront QuickBooks Error PS058 while getting the latest payroll updates.

However, it is mandatory to tackle the Error Code PS058 in QuickBooks asap so that you can process the payroll without any issues. Therefore, to help you out, we have come up with this illustrative guide that will assist you in dealing with the error. So, read this blog thoroughly and you will gather all the necessary details require to resolve the issue instantly.

Is QuickBooks Error Code PS058 interrupting you while creating the paychecks? Contact us at @+1-855-603-0490, and our professionals will assist you with some useful tips to eliminate the error immediately.

Signs And Symptoms To Catch QuickBooks Error PS058

In this section, you will learn about the following indications to determine QuickBooks Error Code PS058.

  • The users might observe the continuous flashing with the error message on their computer screen.
  • Sometimes, you might notice that your QuickBooks software stops responding and starts working frequently.
  • It may happen due to the sudden crashing of the Windows operating system.
  • There might be an interruption in the middle of updating the QuickBooks payroll updates.
  • You might experience the sluggish performance of your computer system.

What are the Leading Factors That Prompt QuickBooks Payroll Error PS058?

Whenever the user comes across QuickBooks Payroll Error PS058, the very first question that triggers in the user’s mind is what is the actual cause of the issue. So, to clarify the user query, we will first talk about all the factors that might be responsible for this error. Let’s begin reading all the causes.

  • One of the reasons behind the occurrence of QuickBooks Error PS058 is damaged or corrupt company files. 
  • There might be a high possibility that the Windows Firewall or some other security programs obstruct access to QuickBooks software. 
  • Sometimes, it may happen when the QuickBooks data file isn’t available on the local drive. 
  • Poor or issues with the internet connection can be another reason that might result in QuickBooks Error Code PS058. 
  • You might lead to this error because of using an inactive payroll service key or payroll subscription. 

Now, that you are well-aware of the causes and symptoms giving rise to QuickBooks Error PS058, you must move further to the troubleshooting part.

What Should You Do Before Resolving QuickBooks Error PSO58?

There are certain points that you must consider before fixing QuickBooks Error PS058.

  • Check that you are utilizing a valid QuickBooks Payroll subscription.
  • Examine that you remain connected with an uninterrupted and reliable internet connection throughout the entire QuickBooks Payroll update process.
  • Never forget to generate the backup of your QuickBooks data file before updating the software.
  • Last but not the least, you must ensure that you are using the QuickBooks Desktop version that is compatible with your operating system.
  • Also, you must verify that you have added the Employee Identification Number and Payroll Service key appropriately.

Tested Solutions to Rectify Error Code PSO58 QuickBooks Within No Time

We understand it gets quite annoying for the users continuously receiving Error Code PS058 QuickBooks. So, to help you with the issue, we have listed some appropriate rectification methods to handle the issue with ease. If you know the cause of the issue, you can apply the troubleshooting method accordingly. Otherwise, you have to implement all the methods one by one until the issue is resolved.

Procedure No 1: Cross-Check You Have Added Employee Identification Number Accurately

Most often, the users might confront QuickBooks Error PS058 using the wrong employee identification number (EIN). So, verifying that you have added the EIN accurately is crucial. The process may vary according to the QuickBooks Payroll versions you are using.

  • To start the process, launch the QuickBooks Desktop application on your device.
  • After this, move to the Company tab and hit the My Company option.
  • Now, you must opt for Edit and navigate to the highlighted Company Identification tab.
  • Soon after this, hover your cursor over the Federal Employer Identification No section and cross-check the EIN.
  • If you notice that you need to update the EIN, then update it right away and hit the OK button. Otherwise, you must tap on the OK button directly.
  • At last, choose the Lists tab and pick the Payroll Item List. you must assure that your Account ID signifies the appropriate EIN Number.

Procedure No 2: Look Whether Your Data File Has Any Errors

Look at the procedure below to ascertain whether the company file has any errors.

  • Initially, you must launch the QuickBooks application and press the F2 key to bring up the Product Information window.
  • Now, that the Product Information window is still open on your screen, hit the F3 key on your keyboard.
  • In the next step, you must tap on the Open File option.
  • Thereon, double-tap on the file named QBWin.log file.
  • Once the QBWin.log file opens, hit the Ctrl + F keys together to launch the search bar.
  • Afterwards, add “Error” within the search bar and hit the Enter key.
  • If you receive QuickBooks Payroll Error PS058, act according to the on-screen instructions to resolve the issue.

Procedure No 3: Try to Download the Complete QuickBooks Update Once again

Sometimes, the improper installation might instigate QuickBooks Payroll Error PS058. In that scenario, you must try downloading the update again by implementing the instructions below.

  • To start the process, you must ensure that you have shut down all the active programs on your device.
  • After this, launch the QuickBooks application and move to the Employees tab.
  • Next, you must opt for the Get Payroll Updates and proceed further.
Get Payroll Update
  • Verify that you have placed a tick-mark next to the Download Entire Update option.
  • Thereon, hover your cursor over the Download Latest Update button.
  • You must wait until you have successfully downloaded the update, and you will be notified with a message stating, “Download is Complete”.
  • In the end, relaunch your device and try to get the latest QuickBooks payroll updates.

Procedure No 4: Verify the Your QuickBooks Payroll Subscription and Payroll Service Key

As stated above, using an invalid payroll subscription is one of the major reasons that might lead to QuickBooks Error PS058. So, to fix the issue, it is important to look at the payroll subscription status by implementing the steps enumerated below.

  • To commence with, launch the QuickBooks Desktop on your device.
  • After this, move to the Employees tab > My Payroll Service > Manage Payroll Service key.
  • When you are on the Add Payroll window, look that you have entered 12 digits of the Payroll Service key.
  • Now, you must hit the Next button followed by Finish.
  • Proceed further by tapping on the Help tab, scrolling down towards the Manage My License section, and choose the Sync License Data Online.
  • Afterwards, you must reactivate your inactive Payroll Subscription by following the instructions given below.
    • Go to the QuickBooks Employee menu and choose the My Payroll Service.
    • Then, hover your cursor over the Account/Billing Info.
    • You must add your Intuit credentials to sign in to your QuickBooks account successfully.
    • Move to the Status section, tap on the Re-subscribe button, and go through the on-screen prompts to wind-up the process.

Procedure No 5: Try to Run the Reboot.bat File

Below, we have explained the stepwise instructions to run the reboot.bat file on your computer.

  • First of all, launch the Task Manager on your keyboard using the shortcut keys “Ctrl + Alt + Del” keys together.
  • Thereon, you must move to the Processes tab and navigate to QuickBooks along with its related processes.
  • Afterwards, click on the “End All the processes” one by one.
  • Press the Windows key on your keyboard, insert “reboot.bat” into the search area, and hit Enter key.
Run the Reboot.bat File
  • Now, you must run the file and wait until the process ends.
  • Relaunch your device and verify whether the QuickBooks Payroll Error Code PS058 still exists.

Procedure No 7: Get the Latest QuickBooks Desktop Update Download Online

You must perform the following step-by-step instructions to download the latest QuickBooks Desktop update online.

  • In the beginning, you must download the qbwebpatch.exe file from the QuickBooks Support page.
  • After this, you are supposed to store the downloaded setup file on your computer with QuickBooks.
  • Now, you must wind up the installation of the patch file and then try to update the tax file via CD/flash drive.

Procedure No 8: Make Use Of RegCure To Fix The Issue

If still you are encountering the QuickBooks Error Code PS058, then try to fix the issue using RegCure. For that, you must carry on with the instructions outlined below attentively.

  • First of all, launch the Task Manager on your computer.
  • After this, you must look for QBupdate.exe and qbdagent.exe from the program list.
Task Manager
  • If you get the following files in the list, you should close them.
  • Now, go to the Desktop, tap on the Start menu, and put “reboot.bat” into the search area. Then, hit the Enter key to proceed further.
  • In the next step, find and double-tap on the file named “DOS type shell”.
  • Thereon, you have to wait until it shut down on its own.
  • At last, relaunch your device and then try to get the latest payroll updates on your device.

Ending Note!!

With this comprehensive guide, we assure you that now you have gained immense knowledge to rectify QuickBooks Error Code PS058. If you still have any doubts in your mind, you can have a conversation with our highly-trained professionals via live chat facility. Our experts will guide you with the best tips to rectify the issue in the best possible manner.

Frequently Asked Questions (FAQ’s):-

Q1. What Should I do to avoid QuickBooks Error PS058 from occurring in the future?

Ans. In order to avoid QuickBooks Error PS058 in the future, generate regular updates of the company file, and stay connected with a good internet connection. Also, you must verify that you are using a valid payroll subscription.

Q2. What Do You Understand by QuickBooks Error Code PS058?

Ans. QuickBooks Error Code PS058 belongs to the PSXX series of error that mainly evoke while updating the payroll to the latest released version. There might be the possibility that it may occur due to a poor internet connection or an invalid payroll subscription.

Q3. Which is the payroll version that is currently available in QuickBooks Desktop?

Ans. The payroll version that is presently available is 11732003 on QuickBooks Desktop 2022 and 11733003 on QuickBooks Desktop 2023, which is effective from January 1, 2023, to June 30, 2023.

Q4. How can I activate the payroll in QuickBooks?

Ans. You must follow the on-screen instructions to activate the payroll in the QuickBooks application.

  • Firstly, tap on the Settings option and then go ahead.
  • Next, move to the Subscriptions and Billing located beneath the Your Company heading.
  • Now, search for QuickBooks Payroll and choose the Subscribe option.
  • If you don’t have a credit card on file, you will be asked to add the Payment Details.

Q5. What are the major causes of Error Code PS058 in QuickBooks?

Ans. The users might encounter Error Code PS058 in QuickBooks due to plenty of factors, including damaged or corrupt data files, issues with the internet connection, or using an incorrect payroll subscription.

Organizations often find the task of manually entering the transactions a bit challenging and time-consuming. But now, with the QuickBooks Online application, they don’t have to enter the data manually. Once you link your bank account with the QuickBooks Online application, you can easily download the latest bank transactions. Also, you can use the QuickBooks Online Banking facility to make payments. However, to get more details regarding how to set up and use online banking in QBO read this post thoroughly. 

Looking for an expert’s advice to set up QuickBooks Online Banking? Contact us at 1-855-603-0490 and have a one-to-one conversation with our professionals for sure-shot solutions. 

Stepwise Instructions to Setup and Use QuickBooks Online Banking

Below, we have illustrated the proper stepwise instructions to set up and use QuickBooks Online. 

Level 1: Linking Of Your Bank Account 

  1. In the initial phase, you must move to Transactions or Bookkeeping whichever option is available. 
  2. After this, browse to the Bank Transactions tab and proceed further.
  3. However, if this is your first bank account, choose the highlighted Connect account option. However, if you have already generated the account, hit the highlighted Link Account option.
  4. After this, you must follow the steps instructed on the screen to connect a bank account. 

Level 2: Manually Uploading of the Transactions:- 

You must perform the following steps to upload the transactions in QuickBooks manually. 

For Accounts Linked to Online Banking 

  • In the first place, move to Transactions and hover your cursor over the Bank Transactions
  • Now, you must pick the blue tile for the account you wish to upload the transactions. 
  • Afterwards, choose the Link account drop-down arrow and opt for Upload from file option. 
  • In the next step, click on Drag and Drop or select the File option. Later on, pick the file that you have downloaded from your bank. 
  • Furthermore, hit the Continue button and select the QuickBooks account into which you wish to import the transactions. 
  • Follow the instructions on the screen to compare the columns on the file with the appropriate fields in QuickBooks. Later, hit Continue to proceed further. 
  • You are supposed to choose the transactions you wish to import and then choose the Continue option.
  • Now, tap on the Yes option, and if you accept the transactions, tap on the Done option. 

Level 3: Review, Organize and Tally the Transactions

Once you have determined that all the transactions are in QuickBooks, you are supposed to classify them in the appropriate books of accounts. Before matching the transactions, you need to pick the right category using the steps given below. 

Categorization of Income (money that was already paid to you):-

This column will show you where the money came from, such as sales, customer payments, and refunds. However, you may also get money when you sell a fixed asset, receive a bank loan, or invest some money into the business. 

Categorization of Expenses (Money paid to others):-

Herein, you can elaborate on how the money was spent, for example, through office supplies, meals, payroll, taxes, and fixed assets. For instance, if you pay the payroll on your own, in that case, it would be considered as an expense for your business. 

Once you have categorized the transactions, you must tally them with your existing transactions. For this, you must apply the instructions in the same manner as illustrated below. 

  1. Firstly, you must look for the downloaded transaction having the Match option in the Action column. 
  2. Afterwards, write down the Date, Description, Payee, and the amount you have spent or received
  3. Now, you must pick the downloaded transaction to broaden the view. 
  4. Go through the Matching Records found in QuickBooks. Herein, these are the same matching
  5. transactions you have already included in QuickBooks. 
  6. Thereon, pick the link beside every match to grab more information. 
  7. You must ensure that you have compared the transactions appropriately. 
  8. Furthermore, you must examine the Deposit to, Payment method, or Bank Account fields on forms for transactions already recorded in QuickBooks. 
  9. If the transactions match accurately, shut down the open transaction. 
  10. At last, hit the Match option, and with this, QuickBooks will know that the downloaded transactions are the ones that were previously added. 

Level 4: Directory Go to the Banking Dashboard 

Once you are successfully linked with QuickBooks, you’ll see the banking dashboard. In addition, the Banking tab will provide the following options.

  • For Review: This section represents the newly downloaded and unclassified transactions. 
  • Categorized:- It represents all those transactions which are previously categorized into their respective fields. 
  • Excluded:- Herein, you will get those transactions that have previously been removed from processing. 

However, if you wish to include a transaction, hit the Add option beneath the Actions column. 

Level 5: Removal of the Transaction 

For instance, if you find out that there is any duplicate transaction or a personal expense that you wish to remove from the list, you can exclude them. After excluding that transaction, you won’t find the same within your books of accounts. Go through the following instructions to exclude the transaction. 

Exclude a Transaction In QBO through Web

  • Firstly, browse to the Transactions menu and then hit the Bank Transactions. 
  • Afterwards, choose the For Review tab and mark the checkbox for the transactions you wish to exclude. 
  • End the process by hitting the Exclude option. As a result, you will see that the transaction will shift automatically to the Excluded tab of the Banking page. 

Level 6: Setting Up of the QuickBooks Online Banking Rules

Follow the stepwise instructions listed below to set up the bank rules. 

First Stage:- Establish a Bank Rule 

  1. To prepare a bank rule, navigate to the Settings menu and click the Rules option. 
  2. After this, navigate to New Rule and include a name within the “What do you want to call this rule?” Field. 
  3. Thereon, choose the Money In or Money Out option by hitting the Apply this to transaction drop-down menu. 
  4. In the next step, go to the All Bank Accounts option and set the rule conditions. Users may also generate a single rule with up to 5 conditions. Later, set and include the following and pick the + Add a Condition
  5. Now, you must mention whether the rule links to the Description, Bank text, or Amount field. Later on, choose the Contains, Doesn’t Contains, or Is Exactly to decide how QuickBooks applies the rules. 
  6. You need to pick the settings for the rules and then opt for Transaction Type, Category, Who you paid, Tax, Who It Was for, and Tags to apply. 

Second Stage:- Go Through the Recognized Transactions 

The users can also verify which downloaded transactions were determined by a bank rule. For that, you must go to the For Review tab and pick the Recognised option from the All Transactions drop-down menu. As a result, it will list all those transactions that were determined by a bank rule. Moreover, you will also get a “Rule” label added to the QuickBooks. 

Level 7:- Reconciliation of An Account

Now, you are supposed to review all your accounts in QuickBooks and ensure that they tally with your bank and credit card statements. In short, by reconciling the account, you will tally each transaction in QuickBooks with the one listed on the statements. If you notice that everything lines up, then it indicates that your accounts are balanced appropriately. 

Level 8:- Examine the Reconciliation Report

Once you have successfully reconciled the accounts, you must review the reconciliation report that the QuickBooks application has generated for you. It is important to reconcile the accounts to determine the discrepancy between the two accounts. 

Wrapping It Up!!

We assure that you can now easily set up and use QuickBooks Online banking. However, if you need help with using online banking, you can talk to our experts for immediate help. They will guide you with useful tips to help resolve the issue instantly. 

FAQ's

Ans. Before you try to set up QuickBooks Online banking, you must go through the following points.

  • Verify whether your bank sustains the Open Banking. You are supposed to go through the list of participating banks. 
  • Also, you must ensure that you have set up VAT to add it to your transactions. 
  • Besides this, you must ensure you are well-connected with a stable internet connection. 

Ans. The users might end up with QuickBooks Online Banking not updating issues for the following reasons.

  • You have entered the correct login details associated with the QBO account. 
  • There is a possibility that your banking server is down. 
  • In other instances, it may happen due to improper internet access. 

Ans. Yes, the users can easily access the bank feed option for multiple bank accounts in QuickBooks. However, you must copy that ou are supposed to link every account individually. 

Ans. Go through the instructions below to exclude a transaction in QuickBooks Online for Android devices.

  • Initially, navigate to the Menu option and choose the highlighted Transactions option. 
  • Choose the Review Transactions option and then pick the transactions you want to remove. 
  • After this, hit the Exclude button and Confirm to end the process. 

Ans. If the above QuickBooks Online Banking tutorial doesn’t help you set up QuickBooks Online banking, you can consult our experts via live chat. They will assist you with some useful tips to figure out the issue instantly. 

QuickBooks Online Essentials 2024 – Pricing and Features

QuickBooks Online Essentials is a mid-level solution from QuickBooks Online, which is intended for users with slightly more complex accounting needs than Simple Start. Intuit has devised this accounting solution with excellent user-friendliness so that users can navigate through various features and utilities with ease. Besides, it is a cost-effective accounting solution that gives its users with a great value. When choosing QuickBooks Online Essentials 2024 for your business, you need to gather some important knowledge about the product to make the enablement easy. Here, we are going to discuss important aspects related to the product, such as Pros, Cons, Pricing, Prerequisites, and several others. 

More About QuickBooks Online Essentials 

QuickBooks Online Essentials is a web-based application from Intuit that you can access remotely to manage your accounting tasks. It allows up to three users to work with your financial data with processes such as income-expense tracking, managing account payables & receivables, and several others. In addition, you can generate financial reports, which is crucial for tracking growth and making decisions that can take the graph of your growth up. Furthermore, it allows a seamless integration with your accountants to make tax time smooth sailing for your business. 

What Is QuickBooks Online Essentials Price? 

QuickBooks Online Essentials is a monthly subscription-based service you can access by paying $60/month. However, by taking a three-month subscription at once, you can get 50% off the monthly subscription fee. It means you can access QuickBooks Essentials for $30 for the first three months. QuickBooks Online Essentials free trial period is also available for 30 days and you can enable the trial period without even entering your credit card details. You can cancel your trial period at any time if you don’t want to continue with this QuickBooks Online accounting solution. 

How To Start Using QuickBooks Online Essentials? 

When you are well-versed with your QuickBooks Onlines Essentials, the product can work wonders. However, getting started with the product can be quite an overwhelming process. Worry not! It is not as hard as you think. After QuickBooks Online Essentials login, you can set it up and start using it with ease. Below is how: 

  • Navigate through the tool’s dashboard to become familiar with it. 
  • Provide your company-related information as prompted and save it. 
  • Set up sales settings and also customize your sales forms. 
  • Import your business information, such as a list of customers, vendors, stocks, employees, etc. 
  • Connect your financial institutions (credit/debit cards) with QuickBooks Online Essentials. 
  • Also, connect your payroll software and set up processes. 
  • Integrate third-party apps to empower your product.  Set up GST and taxes and get started. 

These are some crucial steps that complete your onboarding process with QuickBooks. 

Comparing QuickBooks Online Essentials With Other QBO Products 

QuickBooks Online is certainly one of the most used online accounting applications in different parts of the world. One of the most acknowledged benefits of the product is its scalability. It means you can move to a more powerful product as you grow in your business. It offers different plans and products to meet your needs, which are compared with QuickBooks Onlines Essentials below: 

QuickBooks Online Essentials Vs Simple Start

QuickBooks Online Simple Start is the most basic pricing plan of the QuickBooks Online program, suitable for entry-level businesses. It allows one user and costs you $30/month as its subscription cost. Simple Start offers basic accounting features, such as income and expense tracking, bank connection, and check & balance sheet printing. 

QuickBooks Online Essentials, on the other hand, includes all the features of Simple Start, with some additional ones, such as time tracking, invoice management, unpaid bills, etc. When you feel the need to scale up from QuickBooks Simple Start, Essentials is the suitable plan for you. 

QuickBooks Online Essentials Vs Plus

QuickBooks Online Plus is a superior plan when compared with the QBO Essentials. The monthly subscription fee for Plus is $90/month. For an additional $30, you will get many additional features, such as inventory tracking, cost of goods and services (COGS), and activity tracking (by class, project, and location). You can enable up to five users in QuickBooks Online Plus to work with your company file. 

If you are using QuickBooks Online Essentials and need a powerful inventory management solution, then QuickBooks Online Plus is the right deal for you. 

QuickBooks Online Essentials Vs Advanced

QuickBooks Online Advanced is the most superior plan of all. You will notice a great hike in its pricing, which is $200 per month. However, you will get robust accounting features in return, such as advanced reporting and a dedicated customer service representative ready to assist you 24/7. You can add up to 25 users and gain better efficiency in your business accounting management. Deploying this solution into your business accounting can help you generate the reports that can pave the road to your success by assisting in informed decision-making. 

QuickBooks Onlines Essentials costs about a quarter of the Advanced plan of QuickBooks Online. If you think that your business needs a dedicated expert to guide your employees with their queries and technical hurdles. 

QuickBooks Online Comparison Chart For Its Different Pricing Plans

To get a birds-eye view of the QuickBooks Online products, you can follow this comparison chart, which explains the features and pricing of different solutions:


 Self-EmployedSimple StartEssentialsPlusAdvanced
 Visit QuickBooks Self-EmployedVisit QuickBooks Simple StartVisit QuickBooks EssentialsVisit QuickBooks PlusVisit QuickBooks Advanced
Pricing$20$30$60$90$200
Users Included113525
Send invoicesLimited functionality
Connect Bank Accounts
Print Balance Sheet
Print Checks
Manage Unpaid Bills
Track Time & Add to Invoices
Track Inventory & Cost of Goods Sold (COGS)
Track Activity by Project, Class & Location
Advanced Reporting
Fixed Asset Accounting
Dedicated Customer Service Representative

QuickBooks Online Essentials Features

Now that we have seen an intelligible comparison between the QuickBooks Online pricing plans let’s navigate through the list of the QuickBooks Onlines Essentials features:

Income and expenses

Income and expenses are the most important indicators of your financial health. QuickBooks Online Essentials 2024 lets you track and record your income and expenses so that you remain aware of where your business is growing. It also helps you determine the profit or loss of your business. 

Invoice and payments

You can create professional invoices and send them to your customers to avoid chasing after the payments. Also, you can make payments to your vendors from within the program by adding your credit or debit card details. 

Tax deductions

Tax calculation is one of the most crucial and complicated tasks of your business at the same time. It is imperative to calculate your taxes accurately and pay them to remain compliant with the tax authorities and run your business smoothly. QuickBooks Online Essentials has got you covered with this important job. 

General Reports

Financial reports let you dive into the key metrics of your business growth. You can determine your strengths and shortcomings and thus make informed decisions. The Essential pricing plan lets you generate general reports so that you get the stories behind the numbers. 

Receipt Capture

Receipt Capture is an incredible feature that lets you capture and upload bills to QuickBooks Online, extracts the information from it, and creates a transaction for you to review. Thereafter, you can make changes to it if required. 

Mileage Tracking

The mileage tracking feature in QuickBooks Online Essentials allows users to track the miles traveled for business purposes. Adding business miles to the tax forms can help you in saving your taxes as well. 

Includes 3 Users

You can add up to three users in the Essentials plan and also define their access permissions to your crucial financial data. Also, the online version of QuickBooks lets your employees work with the most up-to-date financial information to boost efficiency and keep confusion at bay. 

Bill Management

The Bill management feature helps you enter and track your bills and record your bill payments. Also, you can record outstanding bills with their amounts and due dates. Thus, you are always aware of what you owe. Furthermore, you can also make partial bill payments with the help of this feature. 

Cash Flow

Cash Flow management lets you track the payments made into or out of your business account, referred to as inflows and outflows, respectively. It includes the tracking of the account payables and receivables. 

Sales and Sales Tax

Essentials has this feature of calculating your sales taxes using your invoices and receipts. Besides this, it also notifies you when your tax payment is due. Thus, it ensures timely tax payments and prevents you from late payment penalties. 

Pros and Cons of QuickBooks Online Essentials 

QuickBooks Online has different pricing plans designed specifically to meet the varying business accounting needs of the business. It is obvious that a plan can be a perfect fit for one business, whereas the same plan can fail in meeting the needs of other businesses. QuickBooks Online Essentials also has its advantages and merits, as explained below: 

Pros of QuickBooks Online Essentials 

QuickBooks Online Essentials has a myriad of advantages to offer to businesses once deployed carefully with full compatibility and system requirements. Have a look at the features that can take the graph of your business growth up.

Better Financial Management 

Essentials makes it super easy to track, record, and manage your financial data over the user-friendly interface of QuickBooks Online. It means you can minimize the manual work and achieve more with the powerful accounting features.

Automation Features 

Automation features are the real game changer in QuickBooks Online Essentials. It automates most of your processes, especially the recurring ones, thereby saving you time and effort. Automated payments of recurring invoices are one such feature that reduces your stress and gives you more freedom. 

Helps You Remain Tax Compliant

Tax seasons can be hectic when you have to start everything from scratch. However, QBO Essentials calculates your taxes automatically, gives you reminders when they are due, and thus ensures that the tax compliances are fulfilled. 

Real-Time Financial Reporting 

QuickBooks Online Essentials plan offers insightful financial reports so that you can dig deep into your business accounting and get the information you need. Based on the business performance and trends, you can do your business budgeting and forecasting. QuickBooks online login makes reports accessible to you. 

Integration With Powerful Tool 

Business accounting management includes a wide range of tasks, including payroll, time management, invoicing, payments, taxation, and several others. As your business grows, you will need dedicated tools to handle the complexities related to these tasks. QuickBooks Online Essentials allows you to integrate the program with powerful third-party tools to empower your business accounting processes. 

Cons of QuickBooks Online Essentials 

QB Online Essentials has many applauded features. However, it has some shortcomings, too. Some of the main limitations of this pricing plan are: 

A Bit Pricey 

QuickBooks Online Essentials is a bit pricey when compared to similar products in the market. However, it is evidently one of the most used accounting applications because of the features it makes accessible to the users. 

Inventory Tracking Missing 

The essentials plan from QuickBooks Online has an inventory tracking feature missing. If your business needs to track the inventory on a real-time basis, you will have to look for an alternative to the Essentials plan. 

Limited Customer Support

If you have subscribed to this QuickBooks Online plan, you may experience a lag in customer support. Besides this, the assistance hours are also limited in this plan, and to get fast assistance, you will have to upgrade to the superior plans. 

QuickBooks Online Essentials Customer Service

When using the features offered by QuickBooks Essentials Customer Service Number, you may experience many hurdles. Expert assistance is required to overcome those hurdles. In such a case, you can start chatting with a QuickBooks expert to get help. Live Chat support is available Monday to Friday from 8 AM to 9 PM ET, whereas on Saturday, you can connect from 9 AM to 6 PM ET. Alternatively, you can also make a visit to the QuickBooks Online community page and place your queries there and get them answered. 

If you want to connect through the QuickBooks Online Essentials helpline number, the support hours are M- F, 9 AM to 8 PM ET. However, you may find it difficult to connect with an expert through the helpline as it has limitations to cater to the support requests in a greater volume. If you need immediate assistance, we can help you with your QuickBooks Essentials issues. 

Frequently Asked Questions (FAQ’s)

Ans: QuickBooks Online version is suitable for those who want to keep an eye on their accounting processes remotely. Also, businesses that need real-time collaboration with their employees while updating their data can find it a useful accounting tool.

Ans: QuickBooks Simple Start is good to go until you need basic accounting features and don’t need an inventory management feature in your accounting solution. However, if you need to track and manage inventory, you will have to upgrade to the QuickBooks Online Essentials. Moreover, if you have up to three users to work with your accounting program, Essentials is the right solution.

Ans: QBO Essentials is a user-friendly application that is easy to set up and operate. First, you need to navigate through the dashboard, and then you can add your company information. Once done, you can choose your preferences and import your financial data from the old accounting system.

Moving ahead, you can add your bank and credit cards to enable transactions from within the tool. These are some basic steps to get started with the QuickBooks Online Essentials. On having an issue with these steps, you can connect to our representative and get help.

Ans: QuickBooks Online Essentials can accommodate a maximum of 3 users at once. If you need to add more users, you need to upgrade to QuickBooks Online Plus. You can add a maximum of 250 accounts to your Charts of Accounts, whereas the number of groups you may tag is limited to 40 only.

Ans: QuickBooks Online has different plans to cater to the varying needs of the businesses. However, if you are not sure which version of the program will suit your business, navigate through the available features while keeping your business accounting needs in mind. If you are still finding it difficult, connect with our online consultants, and they will guide you with the best QuickBooks Online product.

Are you stressed about keeping your company data safe from getting into the wrong hands? Worry Not!! Now businesses can keep their crucial company data safe by generating the QuickBooks Online backup. Once you establish the backup online, it will create a duplicate copy of your file. Thus, it will safeguard the data if it gets deleted accidentally. Furthermore, stick to this blog until the end and accurately accomplish the backup process.

Are you looking for the appropriate steps for QuickBooks Online Backup? If yes, consult with our professionals anytime and resolve your issues instantly.

What is the Data That you can Back up in QuickBooks Online?

Here, we have listed all the data you can back up in QuickBooks Online. Let’s begin exploring them.

Transaction Data  Complete List Of Data Other Data
Payments Tax Agencies Preferences
Bills & Bill Payment Currencies Entitlements
Credit Memos Payment Methods Attachments
Journal Entries Budgets Inventory shrinkage and adjustments made to backup as journal entries. 
Invoices Terms Exchange Rates
Estimates Accounts Intuit Payroll Info Backup as Journal Entries. 
Purchases & Purchase Order Tax Codes and Tax Rates Company Details
Time Activities Vendors (except the tax fields)  
Refund Receipts Departments  
Transfers Employees (except their SSN)  
Deposits Items  
Sales Classes  
Receipts    
Credit Memos    
Vendor Credits    

What is the Data That You Can’t Backup in QuickBooks Online?

In this section, we mentioned the data you can’t back up in QuickBooks Online.

  • QuickBooks Online Payments info
  • Audit Log Entries
  • Reconciliation Reports
  • Account-based billable expenses
  • Custom Reports
  • Delayed Credit and charges (although associated invoice are backed up)
  • Account-based billable expenses
  • Item-based billable expenses with markup
  • Customer types and price rules
  • Bank feeds and their links to transactions and bank rules
  • Customer types and price rules
  • Recurring transactions
  • Custom form templates

Simple Process To Conduct QuickBooks Online Backup

Turning off the Online Backup and Restore application is necessary to initiate the QuickBooks Online Backup Process. With this, QuickBooks will automatically generate the backup of your data. Once you are all set, it will eventually track the modifications you have made to the company data.

Enable the Online Backup and Restore the Application

  • Start the process by choosing the Settings menu.
  • Afterwards, head towards the “Back Up Company” and proceed further.

Note:- There might be the possibility that you have to login to your Intuit Account and hit the Authorize to move further.

Generating the One-Time Backup Manually

If you wish to conduct the QuickBooks Online backup file during your important task, you can prepare the manual backup anytime. For that, you must carry on with the instructions outlined below.

  • Initially, move to the Settings menu and hit the Back Up Now option.
  • Soon after this, hover your cursor over the Add Company option.
  • After that, choose the company you wish to backup by clicking on the Search for a company drop-down menu.
  • Thereon, hit the Next button, followed by Connect.
  • Navigate for the company you wish to backup and choose the Action drop-down menu to hit Run Full Backup.

Store Your Backup File in DropBox or Google Drive

The users can save their backup into Dropbox or Google Drive when you link their account. For this, you must use the steps given below attentively.

Link Your Google Drive or DropBox Account

  • In the beginning, move to the Settings menu and hit the highlighted Back up Company option.
  • After this, you must hover your cursor over the User menu and proceed further.
  • Thereon, you must pick the location where you wish to store the backup file.
  • Furthermore, head towards the Link Google Drive or Link Dropbox option.
  • Thereon, go through the instructions on-screen to allow QuickBooks to establish the backups.

Procedure to Create Backup Via QuickBooks Online Backup Service

Before proceeding further, you first have to logged into the QuickBooks Online Backup Service. Thereon, once you obtain the Account ID and Password, you need to install the Online Backup Client program using the steps below.

  • In the beginning, you must download the setup file of the QuickBooks Online Backup Client program from its official website. 
  • After this, once the download ends, you must install it on your device.

For Windows 7 or Vista:-

  • The users must right-click on the MSI file and choose the Run As Administrator option.

Windows XP Users:-

  • You must hit the Run option to initiate the installation process.
  • If you get a Security Warning regarding running the QuickBooks Online Backup, tap on the Run button.
  • In the next step, navigate to the Next option in the QuickBooks Online Backup Setup Wizard. Then, follow the instructions given on the screen to install the program.

Stepwise Instructions to Use Intuit Data Protect and Backup QuickBooks Online

You can also use Intuit Data Protect and Backup QuickBooks Online as an alternative backup method.

  • Primarily, launch Intuit Data Protect on your device and then choose Back Up Now. 
  • To launch Intuit Data Protect, look for its icon on your system tray. Mainly, you will locate this icon beside the system clock
  • Once you get the Intuit Data Protect icon, right-click on it and choose the Open Intuit Data Protect option. 

Simple Process For QuickBooks Online Backup Restore

You must access the backup file to recover data from a particular date and time. The QuickBooks Online Backup restore is time-consuming as it may take up to 1 hour to complete the restoration process. However, the less the company data will be, the less time it will take to restore the backup.

  • To start the process, navigate to Settings and pick the Back Up Company option.
  • You are supposed to look for the company to which you wish to restore the backup.
  • Once selected the company name, choose the Restore option by clicking on the Action drop-down menu.
  • After that, you must pick the date from the Date Field section and then choose the time you wish to restore.
  • Now, browse to the “Ready to restore your backup?” section, include “Agree,” and hit the Next button.
  • Soon after this, if you get the list of recommended actions, go through them first. Once you have completed everything from the list, opt for “Refresh to Continue”.
  • Conclude the process by hitting the Start Restore option.

Execute the QuickBooks Online Backup Download Process

In this blog section, we have discussed how to perform the QuickBooks Online Backup Download process.

  • First of all, launch the QuickBooks Online software and log in as an administrator.
  • Thereon, tap the “Start Download” button and click the “Run” or Grant option from the Security Warning window.
  • After completing the QuickBooks Online Backup Download process, hit the “Run” button. With this, it will initiate the online backup client installation.
  • Thereon, tap the Next button to install the application within the default location.
  • After that, you must keep hitting the Next button on the different installation screen until you add the account ID and password.
  • After including all the details accurately, select the OK button.
  • Eventually, with this, your installation process gets completed.

Drawing to a Conclusion!!

We hope that now you can easily conduct the QuickBooks Online Backup process. However, if you are facing any difficulty while doing the backup, you must consult with our professionals anytime via live chat. You will receive useful tips to overcome the issue right away.

Frequently Asked Questions (FAQ’s)

Q1. What would happen after restoring the backup of QuickBooks?

Ans. Once you have successfully restored QuickBooks, it will automatically use the data backup file to establish a new file. It will replace your existing data file with the backup company file. 

Q2. Where can I find the QuickBooks backup files on my computer?

Ans. You can locate the QuickBooks backup files on your computer in the local disk. To search for the File in the local drive, follow the path “C: >> Users >> Public >> Documents >> Intuit >> QuickBooks >> Company Files.”
 
Q3. How can I send the backup copy of QuickBooks Online to my accountant?

Ans. To send an accountant the backup copy of QuickBooks Online, follow the steps below.

  • Launch the QuickBooks application and navigate to File> Backup Company > Create Local Backup option.
  • Ensure you have chosen the Local Backup and save the File where it is easily accessible.
  • Thereon, send the backup file to your CPA/ tax via a secure portal.

Q4. What should you do to safeguard your company data?

Ans. Every time you change the data files, the data will automatically be saved into two drives. The data is copied to a third-party drive. In short, if any of the drives got damaged, the data remained safe with the rest of the two drives. Moreover, automatic backups are also prepared every night.

Also Can Read:-

QuickBooks is the inevitable accounting software that caters to the need of SMEs across various industries. It helps them to keep their financial data organized. Using the application is extremely easy. All you need is to log into the software by using your admin credentials. Though, What happens, if you lose your admin password? In such a scenario, you need to Reset QuickBooks password so that you can continue your work. If you are the one who is looking for the process to reset your QB password, then this blog is for you. Retrieving the admin password from the QuickBooks is not an easy task, so make sure you read the complete blog.

Encountering Problems while using an automated password reset tool for QuickBooks desktop? No need to worry. Just Talk to our specialist by dialing @+1-855-603-0490 and Know More.

Importance of QuickBooks Password

Before jumping to the technical part of the tool, let us understand the importance of QuickBooks passwords. Being the prominent player in the market, QuickBooks does not compromise data security. It uses all the preventive methods to protect the data against cyber security. To access your financial data, you need to enter the password. It proves the authenticity of the user and adds an extra security layer. Usually, the QB offers two types of passwords, namely, the admin password and the user password. The admin password provides full access and control over the application. On the contrary, the user password is set for the individual user to log into their own account.

What Does the QuickBooks Password Resetting Means?

Irrespective of the account type, you might need to reset your QuickBooks password. The term QuickBooks password reset simply means changing the user or the admin password. It also implies recovering the old password. The resetting of password procedure might vary from version to version. Before changing the password, you must consider the below-mentioned points.

  • You must create a strong password for your account.
  • The length of the password must be at least seven characters.
  • It must contain at least one numeric, one upper case letter. It must be noted that the passwords are case-sensitive.
  • Make sure that no space is used in the password.
  • Also, make a unique password that you can remember easily but, at the same time, it is hard to crack.

Different Ways to Reset QuickBooks Password

Recovering the QuickBooks password is a complex process that involves a number of steps. The user can reset the QB password in two different ways.

Option 1: Manual way to change the QuickBooks password.
Option 2: With the password reset tool for QuickBooks desktop.

What is a QuickBooks Password Reset Tool?

Developed by Intuit, the QuickBooks password reset tool is a unique tool that helps users to reset their password automatically. Since manual resetting of the password is a hectic process that confuses the users. Therefore, make use of the automated password reset tool for QuickBooks desktop to change the password. The tool smoothens the password-changing process. The tool proves to be of great utility in changing the below-mentioned things.

  • Email Address
  • Phone Number
  • License number
  • Postcode
  • Contact Name

How to Use the QuickBooks Automated Password Reset Tool

Hopefully, now, you are very well aware of the tool and its utilization. Considering the security threats, it is advisable for the users to change the QB password every 90 days. With the help of the automated password reset tool QuickBooks desktop, you can easily change the password. However, firstly, you need to learn how to use the tool. In order to make use of the tool, you must have access to the email address that is linked to your Intuit account. Also, you must have the .Net Framework 4.5 to run the reset tool.

After that, follow the below-mentioned steps.

  • Find out which QuickBooks version you are using.
  • Open the Intuit official website and download the Automated Password reset tool QuickBooks.
  • After that, open the download folder of the system and locate the downloaded tool utility.
  • Further, tap on the browse option and select the company file that is locked.
  • Moving ahead, tap on the next button and log into the email account that is linked with QuickBooks.
  • After, you need to enter the security code in the password reset window that is sent by Intuit.
  • Now, you need to create a new password for the QuickBooks company file and press the Next button. Please wait for a while.
  • Further, you need to open the company file and enter the new password.
  • Lastly, you need to press the OK button to access the company file.

Steps to Change the QuickBooks Admin Password By using the Automated Password Reset Tool

There are two options through which you can change the QuickBooks admin password, namely:

  • Automated password reset tool for QuickBooks desktop
  • By Answering the Security Question

We have explained the step-by-step procedure of both methods below in this blog.

Option 1: Automated password reset tool for QuickBooks desktop

Before implementing these steps, you must have downloaded and installed the tool on your system. The steps for the same are already described above in this blog. After that, the steps that need to be taken into account are as follows:

  • The foremost step is to download the QuickBooks Automated Password Reset Tool from the official website.
  • After that, choose your QuickBooks version. Also, make sure that the last opened company files version is also installed on your system.
  • Moving ahead, you need to fill out all the necessary information, such as business information or QB license number and phone number.
  • Furthermore, you need to accept the license agreement.
  • When asked, you need to validate your email id, user name, mailing address, and zip code.
  • Further, enter the license number. Run the utility after downloading it.
  • Now, choose the company file you wish to reset the password.
  • Type the newly created password and re-enter it to confirm the password.
  • Lastly, tap on the reset password option to change the QB admin password.

Option 2: By Answering the Security Question

You can change the QuickBooks password by answering the security question. The steps for the different versions may vary. However, the general steps are mentioned below:

  • Open the QuickBooks Desktop Login Screen.
  • After that, tap on the I forgot my password option and answer the security questions.
  • Moving further, tap on the OK button. Once QuickBooks confirms your identity, it will send the reset password link to your registered email id. There might be the chance that you are provided with a set of instructions to change the admin password.
  • Whatever option you send, follow the instructions in the respective field.
  • Now, enter the new password. It must be noted that the new password is unique and easy to understand.
  • Once you have created the new password, enter the QuickBooks company file with the new password.

Key Takeaways

QuickBooks is an important accounting application that holds crucial information about your business. At times, the users forget the password due to any reason, or they want to change the QuickBooks password for security reasons. The user can easily change the QB admin password with the help of the free automated Password reset tool QuickBooks. Hopefully, this blog clears up all your queries regarding the tool. However, if you are still having some queries, you can call our QuickBooks Support experts and get it fixed immediately.

Frequently Asked Question

1 – Do the QuickBooks Company files get affected if I reset My QB password?

A – No, your QB data file will not be get affected by resetting the QB password. The resetting of the QB password will only change the password of the file.

2 – What are the features of the QuickBooks desktop password reset tool?

A – The QuickBooks desktop password reset tool is a powerful tool that is used to crack the password of QuickBooks. The unique features that the users can enjoy while using the password are:

  • You have easy access to important financial information.
  • The file may be readily extracted from the QBB backup.
  • It’s simple to guess the admin password.

3 – Can I get support for understanding and using the automated password tool?

A – Yes, our experts are well-trained in dealing with all types of errors or technical glitches. All you need is to dial our helpline number or email your query to us on our official email id.

4 – Why is QuickBooks asking for a password again?

A – The application needs the password before allowing you to grant access. Whenever you are logged out of the company file and the application and want to use the company file again, QuickBooks will ask for the password.

5 – Can I use the same password for the QuickBooks online and for the Intuit account?

A – Yes, you can use the same password for the Intuit account and for the QuickBooks online. However, if you reset the password for one account, it will get reset for both accounts.

Posts pagination