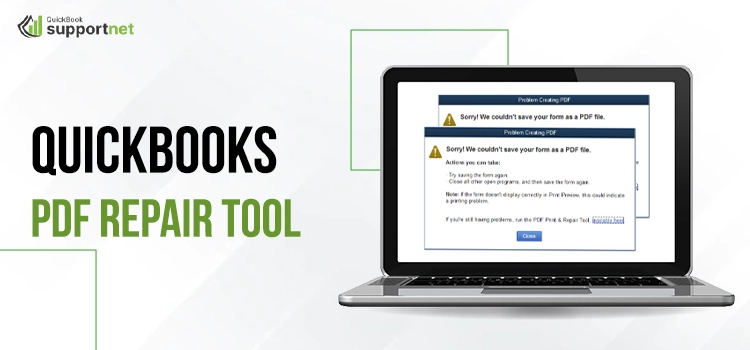
QuickBooks is a top-notch accounting software known to help businesses with its incredibly powerful accounting features. Print is one of the most applauded features in the program, which enables users to print their documents, such as forms, invoices, and several others. You can print them from within the QuickBooks itself. Additionally, the QuickBooks printing errors and PDF repair tool allows users to resolve the common issues they can encounter while printing their documents.
However, due to the lack of proper awareness, most of the users fail to utilize this amazing tool effectively. This is why our post explains all the important aspects related to this tool. Navigate until the end to learn more about the tool.
A Brief Description of QuickBooks Printing Errors and Pdf Repair Tool
Intuit’s QuickBooks printing errors PDF repair tool helps users to resolve the common issues with QuickBooks files when they convert them into PDF files for printing purposes. You can run this tool from within the QuickBooks Tool Hub. Tool Hub is like a tool launcher for different error categories in the program.
Therefore, you need to install the QuickBooks Tool Hub in the first place, and then you can put QuickBooks print repair to use. On initiating the tool, it will scan and rectify the issues related to the print file.
What Are The Scenarios Wherein You Can Utilize PDF Repair Tool QuickBooks Desktop?
You might still be wondering in what conditions you can utilize the print repair tool. Well, the below-given list can give you more clarity on this matter, thereby eliminating your doubts:
- When you are experiencing trouble printing reports, invoices, or checks.
- Issues with the print formatting at the time of printing.
- Problems in locating or saving a PDF file can also be resolved with this tool.
- The Device is Not Ready error message reflecting on your screen.
- Issues with the PDF Converter installation procedure.
- The tool can be effective when you are not able to get a preview of the PDF file.
- There are some error codes as well, such as 30, 41, or 20, that need you to run the PDF Repair Tool QuickBooks.
- Put the tool to use immediately if the printer is producing blank prints.
- When QuickBooks is not able to make PDF files.
Should I Run The PDF Repair Tool QuickBooks Desktop Immediately Once A Print Error Is Identified?
There are various factors that can promote PDF and print problems in QuickBooks Desktop. However, you need to check if you need to run the tool or not. Before you finally run it, check the following pointers in the first place:
1: Check if The Printer Is Turned On or Not
First things first, the printer should be plugged into a power source, and the power button should be turned on. Therefore, this is the first thing to need to confirm before you print something.
2: Check If System Rebooting Helps
A simple system restart can be the answer to some complex technical issues. Therefore, don’t miss considering this important step before you proceed any further with other solutions.
3: Try Printing From A Different Application
The next thing you need to check is if you are able to print from a different application or not. If the printer works in the case of a different application, it means the problem lies within the QuickBooks application itself. If not, some troubleshooting is required with the printer.
4: Keep An Eye On The Error Message
When you are facing a printing issue and an error message appears on your screen, take a good look at it to determine the possible reason behind the problem. For instance:
- If a windows error dialogue box opens, there is an issue with your Windows.
- However, if it is a QuickBooks error dialogue box, you need to download QuickBooks pdf repair tool, install it on your system and then run it to override the issue.
5: When Reports Are Printable, But You Can’t Print Transactions
There are instances when you can print a report in QuickBooks but face difficulty in printing the transactions. In such a scenario, you need to change the form template.
These are some issues that can’t be resolved using the QuickBooks print and pdf repair tool but need your manual intervention.
What Makes Users Encounter Printing Errors in the QuickBooks Application?
When encountering a QuickBooks printing errors, you may wonder why you are getting this problem. There is no single answer to this question, as multiple issues in QuickBooks can give rise to this error. In such a case, you need to highlight them all so that you can fix the problem efficiently:
- A damaged or corrupt installation of the MSXML (an important Windows component).
- The printer uses XPS service for printing; however, when this service gets damaged, you will get a printing issue.
- If printer drivers are missing or not supported.
- Windows Print Spooler service (an essential service that tells computers to print) is not working.
- The printing process can also be hindered by the interference caused due to Firewall or antivirus applications.
- XPS Document Writer is running with insufficient Windows User Access Permission.
How To Bring Print and PDF Repair Tool QuickBooks In Use?
After navigating through the important aspects of the QuickBooks Print and PDF Repair tool, we have reached the most crucial section of this content. It is about using the tool to repair the print issues. As we have already discussed, the print repair tool can be accessed from within the QuickBooks Tool Hub; therefore, the procedure will start by installing the tool hub. But before that, make sure that the system requirements for the tool are met.
What Are The Specific System Requirements For QuickBooks Print Repair Tool?
First things first, check and confirm that the system requirements for the print repair tool in QuickBooks are satisfied, which are given in the following list:
- Confirm that your system has 1GB RAM and a minimum of 512MB hard disk space.
- The recommended screen resolution for the tool should be at least 1024*768.
- The processor of the computer should be 266 MHZ or faster.
- All the versions of the Windows operating system are supported, so you can use any of them.
- Moreover, your Internet connection should be strong and stable.
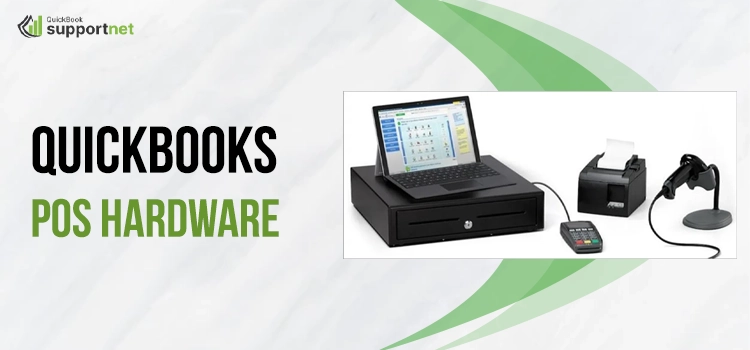
Also Read – QuickBooks POS Hardware
Steps To Download, Install and Use QuickBooks PDF and Print Repair Tool
The below-stated steps can help:
Step 1: Download QuickBooks Tool Hub and Install It On Your Device
- Close the QuickBooks application and then download the latest version of the QuickBooks Tool Hub from Intuit’s official website.
- Download the file to a location you can easily keep in mind and access the file with the utmost convenience.
- Now, open the executable file (QuickBooksToolHub.exe) to start the installation.
- Follow the installation instructions as prompted on your screen.
- Next, agree to the terms and conditions when you reach this page after following all the required steps.
- Once installed, double-click the QuickBooks Tool Hub icon on your system to open it.
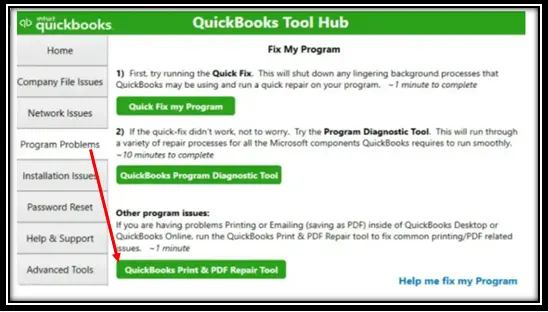
Step 2: Run QuickBooks PDF and Print Repair Tool.
- When in QuickBooks Tool Hub, navigate through the list of error categories and locate the Program Problems.
- Next, you need to select Program Problems, as it will enable you to run the QuickBooks PDF repair tool.
- When it appears, run the tool, and it will determine and fix the potential issues related to the print feature in the QuickBooks application.
Once done, restart QuickBooks and try to print a document or save it as a PDF to check if the persisting error is resolved.
In Short!
If you need to print documents or save them as PDFs in the QuickBooks application, then QuickBooks PDF and print repair tool can be very useful for you in eliminating print or PDF-related issues. This post covers the procedures to download, install and utilize the tool. If you have further queries, get them answered by connecting the expert QB professionals.
Frequently Asked Questions
1: What Are Some Common Issues Related To The QuickBooks Print And PDF Repair Tool?
A QuickBooks PDF and Print Repair tool can resolve the issues related to printing documents or saving them as PDFs. However, there is an additional layer of the problem that can be even more annoying. It is the error related to the tool itself. When running this tool, you may encounter several issues. Connecting with an expert can provide you with the right solutions.
2: What Are The Other Solutions To Fix Print and PDF Issues in QuickBooks?
If you are still experiencing the print error even after running the Print and PDF tools in QuickBooks, then you need to perform some additional solutions, which are:
- Restart your system and then reset your temp folder permissions.
- Check and verify if you can print to your XPS.
- Delete the file containing the printer and then rename it.
- In nothing works, create a new form or template.
3: Is it possible for QuickBooks PDF Repair Tool to recover deleted or lost PDF files?
Yes! QuickBooks PDF repair tool not only repairs the damaged PDF file but also recovers lost or deleted PDF files in QuickBooks.