Maintaining seamless cash flow management while running a business is not about a five-finger exercise. It’s tough and challenging for business professionals to keep a continuous watch on cash-flow statements, income statements, and other financial activities. That’s why business people have started associating with the General ledger report QuickBooks. Curious to know what it’s all about? Continue reading..!
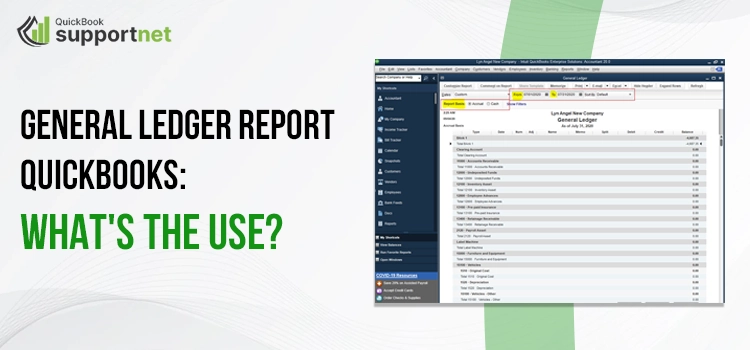
General Ledger Report In QuickBooks: What’s All About?
The General ledger QuickBooks reports is nothing but a primary QuickBooks accounting record. It helps in one’s business by focusing on unseen dispensaries, resulting in an unbalanced account balance sheet. With this accounting record, business managers or financiers can easily maintain the business cash flow by managing all the transactions from all the accounts of a particular time period.
The QuickBooks application automatically creates the transactions mapped to the ledger accounts. And the financial statements using these ledger account statements help business people in watching their business performance and financial growth.
Also, managing transactions and cash-flow management using the General ledger detail report QuickBooks helps professionals with accurate records, clarified reports, and better financial understanding.
How to Run a General Ledger Report in QuickBooks Desktop?
Continue reading to learn how to run a general ledger report in QuickBooks Desktop software. But first, look at the basics of the QuickBooks General Ledger.
Payroll –The payroll accounting system manages the employee’s payments, salaries, and other financial operations. The payroll records are also associated with the QuickBooks general ledger report with detailed information about all the employee checks and payroll taxes.
Accounts Receivable-The finance of any business will be balanced if everything is entered correctly in the general ledger report, including the unpaid bills from clients and daily records of your company’s sales and revenues.
Accounts Payable-The unpaid bills of your company’s purchases must be tallied in the general ledger reports of QuickBooks to maintain the cash flow smoothly
Read Also :- QuickBooks Portable File: How To Create, Restore & Use
Generate QuickBooks General Ledger Report
- Start this quick procedure by first logging into your QuickBooks account and moving to the Menu.
- In this Menu, move to the left navigation panel and select the Reports tab.
- From here, you are required to click All alternative and navigate to the bottom of your computer screen.
- Here, you will see the For My Accountant option that you need to click and move to the sixth option from the top to choose the General Ledger option.
- After this, select the transaction date range based on choosing between Cash or Accrual.
- Finally, click the Run Report alternative and start generating the general ledger report in QuickBooks Desktop.
Steps to Create a New General Ledger Report In QuickBooks Account
The procedure is simple and quick for creating a new general ledger report in QuickBooks account. Navigate with the directions given below:
- To initiate creating the new account for general ledger QuickBooks, you need first to open your QuickBooks online application.
- After this, move to the Accounting tab, and click the Chart of Accounts option to choose the Next option further.
- Now, from the drop-down Menu, hit the Account type and continue to choose the Account option.
- Along with this, select the Detail Type and continue to enter your Beginning Balance by selecting the Save & Close buttons.
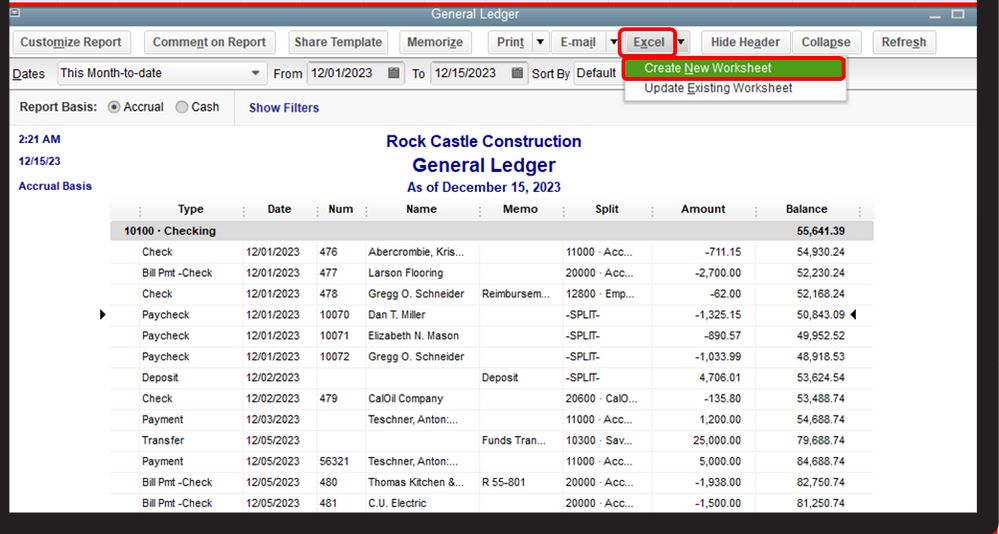
Printing Procedure of QuickBooks General Ledger Report
The printing procedure of QuickBooks general ledger report is also an easy task if you follow the given steps carefully.
- Select the Print Reports option by launching your QuickBooks Online application.
- In the next step, hit the Transactions Reports alternative to continue selecting the General Ledger tab.
- After this, just enter the month and year by leaving the other spaces blank only.
- Now, preview the report and click the Print or Begin Printing option.
How Beneficial Is General Ledger Report In QuickBooks?
Unquestionably, the general ledger report QuickBooks is one of the most essential accounts in the QuickBooks accounting software. The following benefits will tell you more about how useful this general ledger report account is.
Seamless Financial Statements Preparation
Creating Financial statements and balance sheets is quite challenging if we think of it without a general ledger report in QuickBooks. It guarantees the data accuracy of your transactions and other financial activities in the QuickBooks ledger account.
With this general ledger detailed report, you can prepare the trial balance where the accurate amounts will display. The income and the balance sheets are the two essential sheets of the financial statement, and in this way, the trial balance helps you prepare a seamless financial statement.
Conduct Internal Audit Easily
Indeed! Conducting internal audits is an essential duty to run a particular business successfully. It not only helps business professionals with better finance understanding but also lets them know the growth status of their company.
However, while conducting an audit, the financial records must be accurate, and that’s how the general ledger report in QuickBooks helps business people. The accurate transaction records in the general ledger reports offer in-depth details of all your accounts and avoid issues related to misstatements.
Tax Filing With No Stress
Tax filing is a stressful duty, and business professionals are stressed out even more without a proper financial management system. But, with the detailed and accurate general ledger detail report QuickBooks, the job is no more tough. While submitting the tax, you require accurate data on invoices and bank statements, and the hunt for these documents is another challenging task.
However, preparing a detailed general ledger report with all such required data and records will be much easier for tax filing and returns.
Better Business Understanding
When you record your business financial transactions separately under various accounts with QuickBooks general ledger report, it results in a better understanding of your business financial management. With this detailed report, you can also differentiate the data based on your debtors, creditors, revenues, sales, and expenses.
Also, when you focus particularly on different accounts and their data, you can easily balance and manage both the debit and credit sides of all your accounts without any accuracy issues.
Easy Detection of Unusual Transactions
You never know when any unusual transaction will happen and starts bothering you. Well, unusual transactions happen a lot of time throughout the accounting period of any business. But isn’t it tough to keep a continuous watch on such transactions? It is.
That’s why you need to categorize the transactions using the general ledger report QuickBooks and identify the unwanted plus unusual transactions. As a business professional, you must keep a check on such transactions as it may lead to a worsening situation.
Read Also:- FreshBooks Vs. QuickBooks: Which One is Better For Your Business
Different Types of General Ledger Report In QuickBooks Accounts
You can find three types of general ledger report QuickBooks accounts in the QuickBooks software as mentioned below:
Liabilities Account
It’s essential to keep a check on the amounts you owe to outsiders or individuals from your company only. The liabilities of QuickBooks general ledger accounts can also be categorized in terms of current and non-current categories. You can find the liabilities details on the right side of your balance sheet.
Asset General Ledger Account
The assets of your business are the resources generated by your company. These assets help business professionals generate a smooth cash flow and further convert into cash equivalents. All the data and categories related to your business assets, including current and fixed, are listed on the left side of your balance sheet.
Shareholders Equity
The shareholder’s equity is the asset that is present even after all your business debts and liabilities are settled. The shareholder’s equity includes treasury stocks and share capital retained earnings.
Make the Best Use of General Ledger Report In QuickBooks..!
In this whole discussion, you have learned about how useful the general ledger report in QuickBooks is and helps business people in tracking their business’s financial status. So, let this report QuickBooks general ledger account help your business and bring the most productivity. If you need further information about this excellent QuickBooks feature, consult our professionals via Live Chat Support.
Frequently Asked Questions (FAQs)
Question 1 – How General QuickBooks ledger reports are helpful?
The following are the notable perks of the general QuickBooks ledger reports:
- Financial statement preparation
- Detection of unusual or unauthorized transactions
- Evaluation of your business’s financial growth
Question 2 – What does the general ledger detailed report mean?
The general ledger QuickBooks detailed report is all about the details of beginning balance, ending balance, and transactions of your business. The report helps business professionals, and financers keep a smooth watch on all the transactions taking place during the business’s accounting.
Question 3 – How can I search for transaction details in QuickBooks?
Follow the given steps and find your transaction details:
- First of all, hit the Reports button from the left Menu of your QuickBooks software
- Now, in this step, you are required to enter Transaction Detail by Accountant in the search space.
- Here, you will find a report opened on your screen where you need to click the Customize button.
- After this, click the Filter section to select your transaction accounts and continue refreshing the page.
- Finally, click the Run Report option once you find the required transaction details.