Author: admin

Home > Articles by: admin

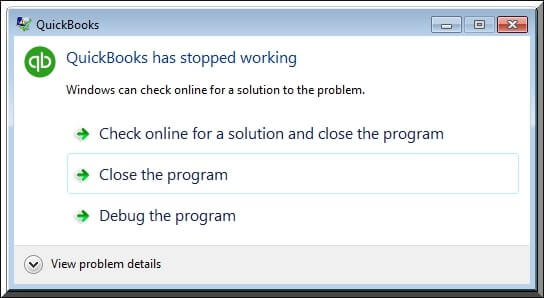
QuickBooks software has smoothened the business accounting process, but it also has several bugs that can disturb your working with it. You have opened QuickBooks, and it QuickBooks stopped working or not responding. Such issues can be so frustrating because you have a lot of work pending and the software is also stopped working. To get rid of this problem, you have to go through various methods mentioned in this blog.

The error is identified with its multiple reasons that are responsible for its occurrence. An alternate and quick way to fix this error is to call the QuickBooks not responding and get the essential solutions.

QuickBooks Not Responding Message

What are the Causes Behind QuickBooks Not Responding Error?

QuickBooks Not Working is a standard error that occurs because of various reasons listed below.

  • A hard drive is damaged
  • Missing or damaged QBWUSER.INI file
  • Crashed Windows Operating System
  • The company file is long
  • Invalid Installation file
  • Corrupted Program files on Hard Drive
  • Low system resources

Symptoms of QuickBooks Not Responding Error

The following indications can help you to identify not Responding error QuickBooks, and you will start looking for ideal solutions to fix this error.

  • The system is shut-down automatically
  • QuickBooks, not Opening problem repeatedly appears on your computer screen
  • The system is freezing and not responding to any command
  • QB software doesn’t open

Steps to Troubleshoot QuickBooks Not Working Error

QuickBooks can be problematic and irritative for you to tackle. You will be getting below quick fixing tips to remove this error and make the QuickBooks well again.

Method 1 – Download And Run QuickBooks Refresher Tool

  • First, close ‘QB software.’
  • Next, start downloading ‘QuickBooks Refresher tool.’
  • ‘Save’ the downloaded file on your computer
  • When the download process completes, press the ‘Run’ option to execute the ‘QBRefresher tool.’
  • It will diagnose the running problem of ‘QuickBooks’ and carry out resolving procedures

QuickBooks Not Responding

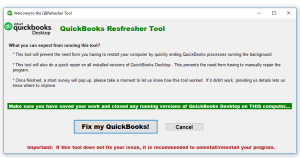
  • Finally, open ‘QuickBooks’ to check whether the issue is resolved or not.

Method 2 – Use Quick Fix My Program From The QuickBooks Tool Hub

Download and Run QuickBooks Tool Hub

  • First, close ‘QuickBooks software.’
  • Download ‘QuickBooks Tool Hub’
  • ‘Save’ the downloaded file on your PC to access it easily
  • Open the earlier ‘Downloaded file.’
  • Accept ‘terms and conditions and follow on-screen tips to install
  • After completing the installation procedure, put a ‘double-click’ on the icon to open ‘QuickBooks Tool Hub’.

Run Quick Fix My Program From Tool Hub

  • Users have to choose the ‘Program Problems’ in ‘QuickBooks Tool Hub.’
  • Choose the ‘Quick Fix My Program’
  • After this, Open ‘QuickBooks Desktop’ and then open the data file.

Run QuickBooks Install Diagnostic Tool from Tool Hub

  • Open ‘QuickBooks Tool Hub’
  • Users must check ‘Installation Issues’ in the ‘Tool Hub.’
  • Choose the ‘QuickBooks Install Diagnostic Tool’
  • Let the tool ‘Run’ and it will take up to ‘20 minutes’ or more.

Run Clean Install in QuickBooks Desktop

The clean install tool will assist you in renaming the old installed file. It allows the user to add new files.

  • First, open the ‘QuickBooks Tool Hub.’
  • After this, choose the ‘Installation issues’
  • Next, choose the ‘Clean Install Tool’ and then press the ‘OK’ option.
  • Select the ‘QuickBooks Latest Product Version’ followed by clicking ‘Continue’.

Method 3 – Make A New Admin User In Windows To Fix The Bug

  • First, click the ‘Start’ button and then open the ‘Control Panel.’
  • After this, press ‘Add or Remove User Accounts’ link
  • Once the ‘Manage Accounts’ dialogue box opens up, press ‘Create A New Account.’
  • Then, type the ‘Account Name’ and choose ‘Create Admin Account.’
  • Finally, Click on the ‘Create Account Button’ to create a new user account in Windows Operating System.

Method 4 – Assign A New Name to QB.INI File

  • Rename’ the ‘QBWUSER.INI file’ to fix the internal issue when you try to open QuickBooks Desktop
  • Rename the ‘EntitlementDataStore.ecml file

Method 5 – Run QuickBooks System Repair Tool

  • First, ‘Download QuickBooks Repair Tool’
  • ‘Save’ the downloaded file in the local folder
  • Next, shut-down all ‘existed open program’ followed by installing the tool
  • It will take around ‘20 minutes’ to run a scan in the complete device
  • Once the tool has repaired the ‘Program’, ‘Restart’ the ‘Console’ and go.

Method 6 – Restart the System By Deactivating Antivirus Program

  • First, ‘Restart’ the System
  • Confirm that ‘Antivirus’ is switched-off temporarily
  • Finally, contact the IT department to remove this issue.

Method 7 – Open The File From Another Location

  • Hold ‘Windows+E key’ to open up a new window on your screen
  • Search and find the data file with ‘.qbw extension.’
  • Do a Right-Click on it and choose the ‘Copy’ option
  • Go to ‘C: Drive’ and create a ‘new folder.’
  • Name the folder as ‘QBTEST.’
  • Open a ‘New Folder’ and ‘Paste’ the file in it
  • Open ‘QuickBooks’ by holding the ctrl key.’
  • Choose ‘Open’ or ‘Restore’ an Existing Company option
  • Open the ‘QBTEST’ folder and check if an error exists in it.

Ending Words!!

We hope with the help of this post you can now easily operate QuickBooks without receiving QuickBooks has stopped working issue. If you are still facing difficulty while running the application, connect with our QuickBooks Enterprise Professionals through live chat.

Frequently Asked Questions (FAQs)

1: What are the various instances of QuickBooks has stopped working?

QuickBooks has stopped working is a common error in the software. You may get various instances of this error on web as stated in the below-given list:

  • when opening company file
  • After login
  • When sending email
  • When printing
  • After update
  • When backing up
  • When updating company file
  • QuickBooks open but not showing
  • QuickBooks messaging has stopped working.

These are some common issues related to QuickBooks program users report every now and then.

2: How to prevent QuickBooks not responding issue from taking place?

QuickBooks has stopped working is definitely one of the most annoying errors that prevent you from proceeding further with an on-going task. Sometimes, all it takes a simple restart to resolve this issue; whereas, sometimes you need to perform proper troubleshooting solutions to eliminate it. However, it is wise to take preventive steps to keep this error at bay. To avoid this problem:

  • Make sure that you are using the latest updated version of the QuickBooks program.
  • Verify that the regional settings in the program are configured properly.
  • The Windows regional settings of the QuickBooks should be configured to US Locale.
  • Use a stable Internet connection to avoid network timeouts.

3: Why is it crucial to use the updated version of QuickBooks?

Using an outdated version of the QuickBooks makes your software prone to multifaceted glitches. Intuit releases new updates periodically wherein, all the known issues of the program are resolved. Besides, you may also access the improved features by downloading the latest updates.

Furthermore, it alleviates the compatibility issues in the program. Using the new updated QuickBooks ensures that you are using the least erroneous version of the program. If not updated, you may get various issues such as QuickBooks has stopped working.

4: Why do you end up with QuickBooks not responding error when printing?

QuickBooks enables users to print their documents from within the program. However, at times users might strike with QuickBooks not responding error when printing. As a result, it stops users from printing invoices, forms, etc. There are multiple reasons that can lead to the printing error in QuickBooks. 

5: What happens when QuickBooks not responding after update?

The reason for QuickBooks not responding after an update varies in different conditions. Below are some reasons that we are enlisting, and you must check out!

  • There is a corrupted hard drive.
  • Damaged program files and/or QuickBooks Desktop installation.
  • QBWUSER.INI file might be damaged, corrupt or missing.
  • Conflict in some program.
  • Installation Error.

A software perfect for managing your accounts, QuickBooks is the most user-friendly application designed for you. This can be used by businesses to keep a check on the payroll or for individual budget planning. You can choose from its two available modes: QuickBooks multi user mode and single-user mode, according to your needs.

This software is man-made, and therefore it does break down sometimes. One issue that many QuickBooks users face is its multi user mode. When an operator switch from single-mode to multi-user, there are times when QuickBooks stop working.

This post is for such users. Here, not only will introduce you to the problems but will also discuss their causes and solutions.

What is QuickBooks Multi User Mode Not Working Error?

QuickBooks multi user mode is for the people who want to work collectively on one single file. This is usually used by huge businesses where an entire team is managing finances. However, it has been noticed that sometimes QuickBooks stops running when the administrator device switches it from single mode. This can happen before of some very common problems that are associated with most QuickBooks errors.

Origin of QuickBooks Multi-User Mode Not Working Error

Keep reading this post further to know the origin of the QuickBooks multi-user mode not working problem.

  • Firewall or antivirus settings not allowing QuickBooks
  • The software is not present on the server
  • An error in the hosting settings
  • When the server does not allow QuickBooks company file to run
  • A problem in Windows permission settings
  • Damages or corrupted DNS settings

Fix QuickBooks Multi-User Mode Not Working Error

Thenceforth, you will find various troubleshooting fixes that can help you eliminate the issue with the multi-user mode of QuickBooks.

Solution 1: Use QuickBooks File Doctor

Just like you visit a physician when you are sick, the QuickBooks file doctor treats the QuickBooks application.

  • The step here is to install QuickBooks file doctor on your desktop.
  • After the download is done, install it by following the instructions available on your screen.
  • Now, open the software, and you will land on the homepage.
  • From the available tabs, click on the Company File Issues section.
  • Thereafter, you will find the green button ‘Run QuickBooks File Doctor.’ Hit that.
  • Once the scan is done, go and check if you are still facing the issue.

Solution 2: Run QuickBooks Database Server Manager

Running QuickBooks Server Manager can also help you resolve the issue. Go along the steps mentioned below:

  • On your PC, go to the Start menu and search for Database.
  • Once you locate the option, enter the window and in the provided space, add your QuickBooks company file folder.
  • Next, hit the Scan button and wait for a few minutes.
  • Lastly, check if the multi-user error is fixed.

Solution 3: Edit .TLG and .ND Files Name

Another solution to fix the issue is renaming the Network Data (ND) and Transaction Log (TLG) files.

  • Initially, open the company file folder of QuickBooks.
  • Here, press the F2 key and wait for the product information window to open up.
  • Now, look for the file information and copy the file location.
  • Thereafter, open the Run box, enter the file location, and hit OK.
  • Next, locate the TLG and ND files and right-click on each file.
  • Change the names and save the edits.
  • Now, see if the multi-user mode is running smoothly.

Solution 4: Check Server Settings

To see if the services on your host server can work properly, pattern yourself after the following steps:

  • Hit Ctrl+R keys on your keyboard simultaneously to open the Run dialog window.
  • To open the Services page, enter Services.msc in the search bar and press the Enter key.
  • Here, locate the QuickBooksDBXX (XX being the version of the software) file and click a couple of times on the same.
  • Furthermore, under the General section, go to Startup Type and change it to Automatic.
  • Also, ensure that the Service status is Running. If not, hit the Start button.
  • Finally, select Apply to save the edits.
  • Now, head to the Recovery window of QuickBooksDBXX Services window.
  • Here, select Restart the service on all three failure tabs, one by one.
  • Again, select Apply and finally hit OK.
  • Repeat the aforementioned steps on with the QBCFMonitorService file in step 2.
Solution 5: Configure the Settings of the Firewall

There is a chance that your firewall is restricting QuickBooks. Here is how you can make this edit:

  • To make changes to your firewall settings, type Windows Firewall in the search bar of the Start menu.
  • Now that the Firewall window of the Control Panel is on click on the Allow an App Through Windows Firewall option.
  • From the scrolled-down list, select Change Settings and choose QuickBooks below the Public list.
  • Save the settings by clicking OK and changing the status to Public.
Solution 6: Add Server to Host File

Adding your server can help Windows to recognize the host file and run it uninterrupted.

  • To perform this fix, open Notepad in your Windows.
  • Here, open the host file from C:\Windows\System32\Drivers\Etc\ direction.
  • Now, under the last IP address, enter the admin server IP address.
  • You can do it with the help of the Tab key on your keyboard.
  • Thereafter, save the document and turn off the application.
Solution 7: Open Workstation to Ping the Server

You need to turn on Network Discovery before you start with the steps.

  • Head to Network and Sharing Center on your desktop from the Start menu.
  • On the left side of the page, click on Change Advanced Sharing Settings.
  • Here, under the Private section, select Turn on Network Discovery and File and Printer Sharing.
  • From here, note down the server name.
  • Furthermore, close the window and open the Run box with Ctrl+R.
  • Put in CMD in the bar and hit OK.
  • In this tab, enter ipconfig/all and continue.
  • Now, you have the hostname. Save it somewhere.
  • It is now time to test your server.
  • Go to the Run window again and type ping_(server name), and that is it.
Solution 8: Generate a New Company File Folder

If you are still struggling to work on QuickBooks multi user modethere is a chance that the issue exists in your company file folder. It can be corrupted or damaged. 

  • To start this process, create a new folder on your host PC.
  • Now, change the permissions of this folder so that Windows has access to the same. 
  • Once done, copy the .qbw to this folder and try running QuickBooks again. 

Final Statement

QuickBooks is a software that is used for individual as well as collective purposes. If you run a business and use QuickBooks for bookkeeping, you must have issues with the QuickBooks multi-user mode. If so, then you can try different solutions from this post to resolve the problem. Make sure you follow each step carefully.

QuickBooks is the most suitable accounting software developed by Intuit. The powerful tool is widely used by all-size businesses of various sectors to manage their financial task. It generates payroll, keeps track of transactions, creates invoices, manages inventories, and much more. However, despite being the most powerful accounting tool with advanced features and functionalities, it is prone to errors. There are various instances when the user faces technical, update, or installation errors while using the software. The most common error that user faces is QuickBooks Error Code 12, 0. If your system too displays the error code -12, 0, then you need to sort this out.

Stuck in QuickBooks Error Code 12, 0? Feel Free to Call @+1(855) 603-0490 & Get Expert Advice.

This blog throws light on causes, symptoms, and various methods to fix the QuickBooks Error Code 12, 0. If you too are facing the same issue while working on QuickBooks, and are looking for simple yet effective solutions, then stick to this blog. Make sure you read the full blog to get the feasible solutions. Let’s get started.

What does the QuickBooks Error Code 12, 0 Mean?

QuickBooks Error Code 12, 0 is a common run time error that usually happens when QuickBooks fails or crashes while running. The occurrence of this error does not mean that the code is corrupted, but it is just that it does not work at run time at that particular moment. Normally, the user receives the QuickBooks Error Code 12, 0 when they are trying to perform certain actions without having the proper administrative rights. Also, if the system settings are configured incorrectly, the user may encounter QuickBooks Error Code 12, 0.

What are the Specifications of QuickBooks Error Code 12, 0?

As mentioned above, the QuickBooks Error Code 12, 0 troubles you when there is a variation in the Windows registry. The basic information related to this error is mentioned in below cited table.

Error Name QuickBooks Error Code 12, 0
Error Code Error (-12,0)
Error Description QuickBooks has suffered a problem and needs to shut down. Sorry for the inconvenience.
Error Occurs in The error usually applies to Windows Vista, XP, Windows 7 & 8.
Software QuickBooks
Developer Intuit

What are the Prominent Causes That Triggers the QuickBooks Error Code 12, 0?

Though, it is a run time error that happens without any warning and can occur at any time. There is no fixed cause for the run time error; however, here in this blog, we have tried to pinpoint some of the most prominent reasons for QuickBooks Error Code 12, 0. The main causes that trigger the error to occur are: 

  • The user does not have the proper admin rights to perform certain actions.
  • There is an improper uninstallation of QuickBooks that results in QuickBooks Error Code 12, 0 error.
  • Someone has unexpectedly removed the files from the directory registry
  • There is an improper registry of windows.
  • If your system is facing a malfunctioning problem.
  • If there is a wrong registry of nonexistence programs.

What are the Symptoms of Error Code 12, 0?

Moreover, before proceeding to the troubleshooting methods, it is very important for the user to identify the error correctly. There are some signs and symptoms that will help the users in identifying whether their system is suffering from the QuickBooks Error Code 12, 0. Let us have a quick look at the symptoms:

  • Sometimes the system freezes.
  • The window responds in a sluggish way. 
  • There is a sudden shutdown of the system to avoid any harm. 
  • The QuickBooks Error Code 12, 0 is repeatedly shown on the screen.
  • There is a sudden crash of the system while running the same program. 

Things That Needs To Be Consider Before Troubleshooting Error

You have successfully identified the QuickBooks Error Code 12, 0. Now, it is high time to start the troubleshooting method accordingly to fix the error issue. However, before starting the troubleshooting method, the users are advised to take care of the below-mentioned points. 

The points are as follows:

  • The user must have the proper administrative rights so that they can perform any action inside QuickBooks.
  • Check whether QuickBooks services are in active mode.

How to Repair QuickBooks Error Code 12, 0?

Now you are aware of the various causes, symptoms, and important facts related to the QuickBooks Error Code 12, 0. Finally, it is high time to know the different error-resolving methods. Let us explore the various troubleshooting methods of QuickBooks Error Code 12, 0 together. 

Method 1: Provide the Permissions

The QuickBooks Error Code 12, 0 usually occurs when the user does not have enough access rights, and they are trying to perform some action. The best way to resolve the error is to give the necessary permissions to the user. The necessary steps that guide the user in giving rights to users are described below:

  • Firstly, you have to right-click on the client data.
  • After that, you have to go to the properties section.
  • Next, you have to open the security tab, which is available under the properties section.
  • And look at whether the user has enough rights to access the file.
  • If not, provide the necessary permissions to access the file.
  • Finally, open the company file and see whether you have the necessary permissions or not. 

Method 2: Update the Window

If the user has all the necessary permissions and is still facing the QuickBooks Error Code 12, 0 issue, then it might be the possibility that your system needs an update. The below-cited steps will help you in updating your system:

  • The first step in the process is to click on the Start tab.
  • In the search box, type the update and click on the enter key.
  • A window update dialogue box will appear on the screen.
  • Further, if you see the update pop-up, then you have to download it.
  • Furthermore, install the update on the system.
  • Finally, your windows get updated, which consequently removes the error.

Method 3: Restore the System Settings

If you have altered the system settings, then, there might be the possibility of QuickBooks Error Code 12, 0 occurrence. You can restore the system settings to rectify the error caused due to the changed system settings. The steps to modify the system settings are as follows:

  • Foremost, click on the Windows start menu.
  • After that, type system restore in the search bar of the window.
  • Click on Enter. This step appears system restore box.
  • Next, tap on the system restore tab to open it.
  • After that, you have to type the admin login email id and the required password to log in to the account.
  • Furthermore, execute the necessary steps to pick the restore point.
  • Finally, you have to restore the system settings.
  • Lastly, open the QuickBooks and start working on it.

Method 4: Make Use of the Scan Now Command

You can also run the system file checker to resolve the error. You have to use the SFC/scannow command in the run box. The necessary steps involved in scanning the system file through the command prompt are explained below:

  • To initiate the process, you have to click on the start tab.
  • The search box will appear below the start tab.
  • In the command box, type the command and press the enter key.
  • After that, you have to press the CTRL + SHIFT Key together and hit the enter key.
  • Click on the “Yes” tab to proceed with the process. The “yes” tab will appear in the permission dialogue box.
  • After giving permission, a black box with a blinking cursor will appear.
  • Next, just write “SFC/Scannow” and hit the enter key to initiate the scanning process.
  • It will scan the error and the other file issues, if there are any.
  • Lastly, just follow the on-screen instructions to end the process.

We hope that this process resolves your error issue. If not, then you can execute the last step. 

Method 5: Enable QB Databaseserviceuser23

If you have tried all the above-mentioned methods to resolve the issue, but nothing works in your favor, then, lastly, you can execute this step to resolve the issue. In addition, to scan the system, it will verify the QuickBooks version. 

The steps involved in the process are:

  • To start the process, verify the QuickBooks version.
  • If the user is accessing QuickBooks, type QBdataservices23. 
  • After that, you have to navigate to services.msc and check whether the services mentioned are active or disabled.
  • Next, you have to click on QBdataservicesusers23.
  • The next step is to go to the properties by right-clicking on QBdataservicesusers23.
  • Check whether the services stop working. If yes, press the “start services” option.
  • Lastly, close the QuickBooks and reopen it to check whether the issue is resolved or not.

Check the Folder Permissions That Contains The Company File

Follow the below-cited steps to check the permissions of the folder that contains the company file.

  • Right-click on the client data and pick the properties tab.
  • After that, you have to navigate to the security tab, which is available in the properties tab.
  • In the security tab, check whether the user has permission or not to access the folder.
  • If not, then provide the necessary permissions and retry to open the company file.

Looking for Expert Advice?

Are you stuck in the run time QuickBooks Error code 12, 0? You have implemented the above-mentioned steps but are still unable to resolve the issue. Then, there is no need to panic. Get the advice from an expert to resolve the issue. There are plenty of third-party service providers which offer pocket-friendly solutions. Our experts are highly qualified and are trained to handle such types of errors. They will be happy to help you round the clock. Moreover, you can get professional advice either through the phone or email. They will provide feasible solutions.

Final Note

QuickBooks is a run time error that can be easily resolved by following some of the simple procedures. Here, in this blog, we have tried to explain the different methods to fix the QuickBooks error code 12, 0. We hope that with the help of these steps, you will be able to resolve the issue. In case you are facing any other QuickBooks issues, do read our other blogs.

QuickBooks Payroll service helps users handle their business payroll processes. You can calculate and initiate payments and file taxes using this excellent service. However, when updating payroll service in the program, a perplexing QuickBooks error 12152 can come into vision. You can get this error when downloading the latest updates for the QuickBooks payroll service.

When QuickBooks fails to do so, some other issues are also experienced in the program. You won’t be able to run payrolls accurately. A weak connection to the server is the most apparent factor behind the evolution of this error. The error 12152 can be resolved with a few simple solutions. However, if you don’t know the right procedure to fix it, the troubleshooting can give you a severe headache. Worry not! We have covered it all for you in this post; just follow it until the end.

Why Does Payroll Update Fail, Giving QuickBooks Error 12152 Desktop?

If you are clueless about the error, let’s discuss the root causes that can provoke the QuickBooks update 12152 error:

  • An outdated version of the QuickBooks desktop application can be the primary reason for payroll error 12152 in QuickBooks.
  • Sudden power failures can shut down the PC, which may lead to an error.
  • QuickBooks installation files need to be downloaded properly on your device.
  • Unstable or poor internet connection preventing QuickBooks from connecting to the server.
  • When your device is affected by the virus, or there is a threat of a malware attack.
  • Windows registry files are damaged or corrupted on your device, required for the update process.
  • Missing QuickBooks files may also cause the QuickBooks error 12152.
  • QuickBooks desktop software is unable to find the licensing information.

These are the possible reasons a user may face QuickBooks payroll update error 12152 on their device.

Signs & Symptoms of QuickBooks Error 12152 Payroll Update Error

If you are facing any of the below-mentioned signs or symptoms, it indicates that your device is affected by QuickBooks update error 12152. Some common symptoms are:

  • QuickBooks desktop application is not working/ opening, which is not a common scenario.
  • Your PC shut down suddenly without showing any prior sign.
  • A pop-up window display message appears on the screen, reflecting error code 12152.
  • PC’s screen is frequently hanging and freezing now and then.
  • The mouse and keyword inputs don’t receive prompt responses from the system.

Solutions To Fix QuickBooks Payroll Update Error 12152

After having detailed information with the list of possible reasons for the error, along with the symptoms, we can now move to the troubleshooting methods. Let’s take a brief look at some of the tried and tested solutions that you can execute to fix QuickBooks error 12152:

Solution 1. Verify Date and Timing Settings

The first solution to fix QuickBooks payroll update error 12152 is to check your device’s date and timing settings. Incorrect settings can lead to the occurrence of the error. So, here are the steps that you can follow to check the date and timing settings on your device:

  • First, ensure that your device’s date and timing settings are correct.
  • In case you find that any detail is incorrect, then put the cursor at the time and then right-click on it.
  • After that, you must click on the “Change Date and Time” option.
  • Then, change the date and timings per your region, and click on the “OK” option.

Once you are done with the above steps, restart the QuickBooks desktop application. Moreover, check whether the error code 12152 has been resolved or not. If not, you will need to move to the next solution.

Solution 2. Restore the Internet Settings Option on Your System

You are here; it means the QuickBooks error 12152 is not resolved. Therefore, let’s take a look at the steps that you can use to configure or restore internet settings on your device:

  • First, press and hold the “Windows + R” keys together on your device to open the Windows run command on your device.
  • Moving ahead, you have to type “Control Panel” in the search box and then click on the “OK” option.
  • As the control panel window appears on your screen, click on the search bar option and type “Internet options.”
  • Now, the Internet properties pop-up box will appear on your screen.
  • Here, switch to the “Advanced” tab settings and click on the “Restore Advanced Settings” option.
  • Once you are done with the above steps, click on the “OK” option and wait a few minutes to revert to the internet settings option.
  • At last, restart your PC and launch the QuickBooks desktop application to check whether the QuickBooks error code 12152 has been eliminated.

Solution 3. Run QuickBooks Clean Install Tool

QuickBooks clean install tool is an in-built tool inside the QuickBooks tool hub, which helps to fix the installation issues with the software. To run the QuickBooks clean install tool on your device, given below are the steps that you need to implement:

  • First, launch the control panel on your device and move to the “Programs and Features” window.
  • Thereon, click on the “Uninstall a Program” option and then select the “Next” option to view a prompt asking to choose between Repair and Remove.
  • Moving ahead, click on the “Remove” option and follow the on-screen instructions.
  • Now, navigate to Intuit’s official website and download the latest version of QuickBooks Tool Hub.
  • After the downloading ends, double-click on the downloaded file and follow the on-screen instructions to install it.
  • Thereon, launch the QuickBooks tool hub application on your device and then click on the “Installation Issues” option available at the left side menu screen.
  • Click the “QuickBooks Clean Install Tool“ option, and the diagnosing process will commence on your device.
  • As the diagnosing process ends, update the QuickBooks desktop application to the latest release, and then check whether the QuickBooks error code 12152 has been resolved.

If this method does not help you eliminate the error, move forward with the procedure below.

Solution 4. Change/Revise Registry Editor Extension

An invalid Windows registry can lead to various technical issues in the system, and error code 12152 QuickBooks is among them. So, here are the steps that you can execute to modify the registry editor extension on your device:

  • Firstly, you must open the Windows run command on your device by pressing the “Windows + R” keys together.
  • Thereon, you have to type “cmd” in the search box. Note: Make sure not to press the enter button.
  • After that, the permission dialogue box will appear on your screen.
  • Here, you have to click on the “Yes” option.
  • Moving ahead, a blank black window with a blinking cursor will open on your screen.
  • You must type “Regedit” and then hit the enter button.
  • Thereon, you must search for a related key with QuickBooks error code 12152 in the registry editor windows such as Google Chrome, Internet Explorer, etc.
  • Afterward, move to the “File” menu and click on the “Export” option.
  • After the previous steps, save the Google Chrome or Internet Explorer backup key in a folder, and then provide a file to the name.
  • Select the required branch, and click on the “Save” option.
  • At last, ensure that the file is stored in the desired path location with the .reg extension.

Solution 5. Restore Your Computer to the Previous Mode

If you have recently updated your PC’s window to the latest release, then there are chances that some bugs may enter your device. The best way to deal with these small bugs is to restore the older version on your PC. Given below are the steps that you can execute to restore your PC to the previous mode:

  • First of all, log in to your computer with administrative rights.
  • Secondly, you have to click on the “Windows” icon and navigate to the “All Programs” option.
  • After that, navigate to the “Accessories” section and move to the “System Tools” option.
  • Now, select the “System Restore” option.
  • In this next step, a prompt window will appear on the screen, and then you have to select the “Restore my computer to an earlier time” option.
  • Then click on the “Next” option and select the location/ point/ folder where you want to restore the version.
  • Confirm the restoration request by clicking on the “Next” option.
  • Again, click on the “Next” option and permit the program to complete the process.
  • Finally, once you are done with the above steps, check whether the QuickBooks error code 12152 has been fixed or not.

Ending Note!

We hope you find this blog useful. This blog has covered five tried and tested solutions you can execute to resolve QuickBooks error 12152: payroll update. If you need a different method than the methods mentioned above, and if you still face the error, you can get in touch with QuickBooks experts. Our QuickBooks specialists are available 24/7 at the help desk to provide the best feasible solution for your query.

FAQ’s

Q1. What is the main cause of QuickBooks Payroll Update Error 12152?

Ans. The possible causes that might give rise to QuickBooks Payroll update error 12152?

  • You might be using an invalid or expired QuickBooks payroll subscription.
  • There might be the possibility that you are using invalid security certificate.
  • You are not connected with a proper internet network connection.
Q2. What are the key points you know before fixing QuickBooks Error Code 12152?

Ans. Below, we have stated the following points that you must know before fixing QuickBooks Error Code 12152.

  • Review that you are accessing the valid subscription of QuickBooks payroll.
  • You are using the supported version of QuickBooks on your device.
  • Check that you are linked with a proper internet connection.
Q3. What do you mean by QuickBooks Error 12152?

Ans. The users might get stuck with QuickBooks Error 12152 when you are not using the active payroll subscription. On the occurrence of the error, users fails to update the payroll and thus interrupt the payroll-related tasks.

Q4. What should you do to resolve Error Code 12152 in QuickBooks?

Ans. Here, we have listed some resolution methods to overcome Error Code 12152 in QuickBooks.

  • Rectify the Internet Settings of your Device.
  • Perform the Clean Installation of QuickBooks Desktop.
  • Try to Restore Your Device to the Previous Mode.
Q5. What would happen on the occurrence of QuickBooks Update Error 12152?

Ans. Whenever the user confronts QuickBooks Update Error 12152 you won’t be able to install the newly launched payroll updates. Thus, it will stops the users from preparing paychecks, which eventually leads to delays in paying employees.

What’s more disturbing than facing an update error while downloading the latest software releases? Well, nothing, right? We understand how disturbing it is for the daily QuickBooks users to face update issues like QuickBooks error 12002 at the time of payroll update. It’s quite essential to get ready with all the latest updates while managing payroll operations using QuickBooks. But, such errors occur and hamper the entire workflow. Are you the victim, too? If yes, find the reliable solutions to fix the issue in this post. 

Hey! Does QuickBooks glitches like error code 12002 hamper your payroll update process? It’s better not to overlook such issues and immediately connect with the QuickBooks support team. Dial 1-855-603-0490. 

QuickBooks Error 12002 – What Message Users Face? 

Whenever you face a glitch or fluctuation while updating your QuickBooks Payroll application due to the QuickBooks error 12002, you will get a triggering warning error message. The following is the same text that appears on the user’s screen: 

“Error 12002: A network timeout that is preventing QuickBooks from accessing the server. Solution: Check your internet connection setup in QuickBooks from the Help>Internet Connection Setup menu selection. Verify that your connection is set to use your computer’s internet connection.”

How Does the Error 12002 QuickBooks Affect User’s Operations? 

Well, whatever QuickBooks error occurs, eventually, users have to face its consequences, affecting the entire workflow of the company’s management. Similarly, the error 12002 QuickBooks occurs and disturbs the entire payroll operations. This also prevents users from accessing the new and advanced payroll features and encountering delays in the workflow due to outdated payroll programs and whatnot. Thus, it’s better not to ignore such stubborn and threatening errors and immediately take action. But let’s first have a look at the factors that mainly trigger such update glitches in QuickBooks. 

Hey! Looking for the Reasons Behind QuickBooks Error Code 12002? 

Below, we have listed all the primary causes of the annoying and disturbing QuickBooks error code 12002. Take a look and notice how this issue has taken place in your application. 

  1. Incorrect configuration of the internet settings is one of the most prominent reasons for facing payroll update errors in QuickBooks. 
  2. Sometimes, the anti-virus or any third-party security software also blocks access to QuickBooks services, including payroll. Eventually, users have to encounter error code 12002 in QuickBooks. 
  3. Do you know a corrupted QuickBooks software installation can also invite payroll update glitches? Well, yes. You may be facing QuickBooks error 12002 if your software installation is damaged or corrupted. 
  4. Facing internet connection issues? If yes, fix them out. The poor internet connection is also a major reason for facing QuickBooks payroll update issues. 
  5. Make sure your default internet browser is Internet Explorer. Why? It’s because any other internet browser, if set as default, may interrupt you from downloading the latest QuickBooks payroll updates. 
  6. Any idea about SSL settings? If these settings are incorrect in your computer system, the download process of the latest payroll updates won’t be successful.
  7. Network timeout is one of the most evident factors responsible for triggering QuickBooks issues like error 12002 QuickBooks. 

Did you get all the factors that may trigger the payroll update glitch in your QuickBooks application? If yes, let’s begin with the troubleshooting guide. But wait! Firstly, have a look at the considerations you better not ignore before fixing the error. 

Consider the Following Things Before Fixing QuickBooks Errors 12002

Before you take any step ahead to fix the payroll update error 12002 in QuickBooks, make sure to consider the enlisted things. It will further help you in seamless troubleshooting of the error.

  • Create a backup file for your company data file. 
  • Ensure your internet network connection is steady and strong. 
  • Run the updated Windows Operating System and avoid compatibility issues. 
  • Access a secure website like a financial institution page outside your QuickBooks Desktop. 

Solution Guide to Eliminate QuickBooks Payroll Update Error 12002

Finally, it’s time to root out the error using the solutions given in this section. Follow each instruction carefully to eliminate the annoying QuickBooks payroll update error 12002 seamlessly. 

Troubleshooting Procedure 1 – Verify the Internet Connection 

As discussed above, the issues with your internet connection can prominently bring QuickBooks payroll update errors. So, verify your internet connection. For this:

  • Firstly, open your QuickBooks Application and hit the Help tab. 
  • Now, navigate to the Internet Connection tab and verify that your internet connection is proper. 
  • If it’s properly fixed, tap the Next button and hit the Done option. 
  • Finally, try to update your QuickBooks payroll and check whether the error 12002 QuickBooks is still interrupting you. If yes, proceed to the next solution. 

Troubleshooting Procedure 2 – Issues with Outdated Chrome Browser? Update Now! 

Yes, an outdated Chrome browser can also lead to interruptions during the payroll update process. So, follow the given procedure and update your Chrome:

  1. Begin this procedure by first opening your Chrome Browser
  2. From the top menu, hit the More option. 
  3. In the next step, hit the Update Google Chrome alternative. 
  4. Here, you’re asked to wait for a while till your Chrome Browser is updating. 
  5. Done? Now, end the process and click the Relaunch button. Move to the next solution if the error still persists. 

Troubleshooting Procedure 3 – Install QuickBooks in the Selective Startup Mode 

The corrupted installation also gives rise to issues like QuickBooks payroll update errors. Thus, follow the given procedure to install QuickBooks in Selective Startup Mode correctly:

  1. Firstly, press the Windows + R buttons on your keyboard and open the Run Window. 
  2. Herein, type “MsConfignd,” and correspondingly, hit the Enter key. Now, click the Selective Startup option and the Load System services from the general tab as well. 
  3. After this, move to the Services tab and select Hide all Microsoft Services. Continue, and select Disable all alternatives. 
  4. In the next option, remove the tick marks from the Hide all Microsoft Services checkbox. 
  5. Choose the Windows Installer checkbox from the number of services given. Hit the OK button and navigate to the system configuration window. 
  6. Done up to this? Now, perform a clean installation of your QuickBooks software and restart your computer system. 
  7. Again, open the Run window and type MsConfig. Click the OK button, and select the Normal Startup option from the particular General Tab. 
  8. Finally, restart your system again and check whether the QuickBooks payroll error 12002 has been resolved or not.
Let’s Wrap Up the Whole Story! 

So, by the end of this well-detailed blog post, we hope you have learned everything related to the QuickBooks error 12002. Did you? It’s OK if you still have any confusion. Our team is there to help you professionally! In case the solutions given above fail to troubleshoot the error or you need further help, connect with us. Our certified QuickBooks technicians, via the available Live Chat Support option, will assist you with effective resolution strategies. 

FAQ’s

Question 1 – What to do before troubleshooting QuickBooks error 12002? 

A1: Before you begin troubleshooting the QuickBooks error code 12002, you must create a backup file of your company data. 

Question 2 – What methods can help me fix the payroll error 12002 in QuickBooks? 

A2: The following methods can help users get rid of the payroll error 12002 in QuickBooks: 

  • Update your Google Chrome Browser
  • Install QuickBooks in the Selective Startup Mode 
  • Set Internet Explorer as Default browser
  • Correct the configuration of Internet Explorer settings. 
Question 3 – How can I reach out to the QuickBooks expert team for further help regarding the QuickBooks payroll update errors? 

A3: You are free to call our professional QuickBooks team at 1-855-603-0490 for further inquiry. Also, you can access the Live Chat Support option and get immediate assistance to resolve the QuickBooks payroll update errors. 

QuickBooks is one of the most advanced and well-favored software. It is loved by millions of people because of its top-notch features. But with all the features, there are a few errors, as well, that QuickBooks User faces; one of them is QuickBooks Unexpected Error 5. This Error arises when the QuickBooks Data Base Service user can’t access their Company File from its location. If you are also among such users, who are stuck with this Error, read this blog to find the Apt Solution.

Are you facing Trouble while rectifying QuickBooks Error 5? If yes, then dial @, and get your Solution immediately.

What is QuickBooks Unexpected Error 5?

Whenever a user encounters this Error, an alert message will come up on your screen that says:

“Got unexpected error 5 is a call to NetShareGetInfo for Path.”

It affects the different versions of QuickBooks software as well, including the QuickBooks POS. You may experience this Error while installing the POS hardware, using the company file in a multi-user mode, or opening the QuickBooks function.

What are the causes that evoke QuickBooks Unexpected Error 5?

In this section of the blog, we have mentioned all the reasons that terrify QuickBooks Error Code 5 in your System. Once you know the reasons, it will be easier for you to troubleshoot the Error effortlessly.

  • Your Company Data file is damaged.
  • You might be using an outdated version of the QuickBooks Software.
  • There must be viruses or malware present in your System.
  • .ND (Network Data) file might be corrupted.
  • There might be an interval between the workstation and your Company File due to network issues.
  • You might not have enough permission to utilize the specific company File in the Multi-user mode.
  • In case the System file or registry entry is deleted.
  • If the System is forced to shut down.

What is the Procedure to Fix QuickBooks Unexpected Error 5?

Now, let’s move ahead and see how you can rectify QuickBooks Error 5 efficiently in just a few steps:

1st Method: Remove and Recreate QuickBooks Company File User

To remove and recreate the users account, follow the instructions given below:

Remove the User

  • Firstly, open the QuickBooks Software and head to the Company section.
  • Next, you have to choose the Users.
  • Moving ahead, select the Setup Users and Roles option.
  • Now, choose the User from the user list, and lastly, hit ok for the Confirmation.

After removing the users, you have to re-create a new user; this will help you in rectifying the Unexpected Error 5 in QuickBooks.

Re-create the User

  • Choose the Users and Roles button.
  • Thereon, create a new Username for the New User.
  • After that, create a New Password and confirm it again.
  • Lastly, establish the Roles for the User, and hit the Ok Button.

2nd Method: Disable the User Account Control on Windows

User Account Control is a feature that helps you by restricting unknown changes to your Windows Operating System. Sometimes, it can also stop you from using the company file. Thus you have to disable it for a few moments to access the Company File.

  • Begin the process by selecting the Start button and choosing the Control Panel.
  • Thereon, look for the User Account from the search bar and click it.
  • Next, you have to tap on the Change User Account Control Settings.
  • Hit on Yes, and move the slider button to the Never notify end.
  • Select Ok and restart your Window.
  • Now, rerun QuickBooks and check if the Error is resolved.

Note: In case error 5 in QuickBooks is fixed now, then ensure to Enable the UAC on your Windows.

3rd Method: Fix the Damaged Company and .ND File with the help of File Doctor

Alternatively, you can also use the QuickBooks File Doctor to resolve the QuickBooks unexpected Error 5.

  • Initially, install the QuickBooks Tool Hub.

Note: The QuickBooks user who has a 2020 or later version of the software can simply go to the Tool Hub download page by hitting the QuickBooks Tool Hub option, present in the Help tab. However, if you can’t find it in the Help box, then look for it online by going to the official website of Intuit. Once you find Tool Hub, download it.

  • After downloading, look for the setup file named QuickBoosToolHub.exe and install it in your System.
  • Now, follow the on-screen information to complete the installation process. After installing, open the QuickBooks Tool Hub.
  • Now, head to the Company File Issues option, and hit on the QuickBooks File Doctor to initiate the file repair process.
  • Now, look for the Company File, and once you find it, select it.
  • Tap on the Check your File tab, and then click on the Continue button.
  • QuickBooks File Doctor will now do your work; it will find the issue in the Company File on its own and repair it as well.

4th Method: Provide the File Share Access

Error 5 in QuickBooks can also appear if the file share for the Company File is disabled. Thus enable it by following the given steps:

  • Firstly, Open File Explorer.
  • Thereafter, right-click on the folder wherever it is saved.
  • Now, choose the Properties button, followed by Sharing tab.
  • Next, you have to select partial or full sharing according to your Business needs.
  • Lastly, select the Apply button and tap on the Ok tab.
5th Method: Download the Reimage Repair Tool

Reimage is an online System repair tool that rectifies all the known errors a Computer faces.

  1. In the beginning, download the reimage repair tool and save it on the desktop.
  2. Thereafter, navigate to the file location, click on the File, and hit Yes on the prompt.
  3. Now, do the Automatic Scan.
  4. Unmark the checkbox, then select the install button; the tool will now get scanned on its own.
  5. Now, you have to start the repair process.
  6. At Last, relaunch QuickBooks and check if the Unexpected Error 5 is resolved.
6th Method: Get the latest version of QuickBooks POS 

Another thing you can do to resolve Error 5 in QuickBooks is to update the QuickBooks Point of Sale to its latest version. 

  1. At First, Sign in to your point of Sale System as an Administrator and head to the Help option.
  2. Now go to Software Update and choose the Updater Preference.
  3. Tap on the General tab, and choose the Auto Download Updates Button.
    Note: You can also opt for the Notify Me button to get all the latest notifications regarding the updates.
  4. End the process by hitting the Ok tab.
7th Method: Delete and Install the QuickBooks Desktop

If none of the above processes works in your favor, then you might have to delete and reinstall the QuickBooks Desktop from your System.

  1. Open the Run dialog box by pressing the Windows+R button.
  2. In the search box of the Run box, enter appwiz.cpl.
  3. Now, once the Window is open, there you have to look for QuickBooks.
  4. Once you are in it, double-click on it, and select the delete button to remove QuickBooks and its features.
  5. Now, go to Inuit’s official website, and download the QuickBooks program again.
  6. Once it is downloaded, go to the File and install it properly by following the on-screen prompt.

Bottom Line!

We hope this blog will help you in rectifying the QuickBooks Unexpected Error. However, if you get stuck in some process while fixing the issue, you can get help from our QuickBooks professionals using the live chat button. Moreover, you also have the option to email us all your Queries and get a proper solution in the shortest time possible.

Frequently Asked Questions!

Question 1: How to Delete a User if you want to fix QuickBooks Unexpected Error 5 Call Netsharegetinfopath?
Answer:
If you want to resolve the Error by deleting a user, check the steps given below:

  1. Open QuickBooks Desktop and head to the Company tab.
  2. Open it, and tap on the Users option.
  3. Next, you have to select the Setup Users and Roles button.
  4. Now, click on the User you want to delete from your List.
  5. Finally, tap on the Ok button and confirm the process.

Question 2: Is it possible to fix an Unexpected error 5 in QuickBooks using File Doctor Tool?
Answer:
QuickBooks File Doctor tool will help you in fixing the Error effortlessly. You just have to follow a few instructions, and you are done.

  1. Begin the process by downloading and installing the File Doctor Tool in your System.
  2. Thereafter, Run the Tool in the System.
  3. Now, Scan all the files and folders to find the Error.
  4. Once the file doctor tool finds the Error, it will repair it.
  5. Lastly, when the process is complete, the Tool will look for the Error again.

No doubt, QuickBooks is one of the most powerful accounting software used by SMEs to track their financial health. However, the robust accounting software is also prone to errors. One such error that users are facing while using the software is the QuickBooks script error. The most perplexing QuickBooks bug happens when a user attempts to access a website from the QuickBooks 2016 application running on Windows 7, 8, or 10. This is the most confusing error as it shows no early symptoms or signs. The users frustrate when they receive QuickBooks script errors, as it is not easy to find the root cause of the error.

If you, too, are getting the annoying QuickBooks script error code and are looking for simple resolving methods, then this blog is meant for you. Before proceeding to the troubleshooting methods, let us first have a look at what this error means, and what are its root causes. This blog focuses on same. Let us read the entire blog and find out the most suitable error solving method.

Got Frustrated By QuickBooks Script Error? Call Our Experts Now @1855-603-0490 and Get It Fixed Immediately.

QuickBooks Script Error Message

What is QuickBooks Script Error

Script error occurs at the time of opening a company’s file. By its default settings, QuickBooks always use the Internet Explorer web browser to connect to the internet. In that meantime, if the JavaScript or VB Script is not installed properly or has installation issues, then the QuickBooks Script Error can occur with a popup display message: QuickBooks Script Error: Unable to Get Property Length of Undefined or Null Reference.”In addition to impairing QuickBooks programme performance, script errors on your computer may also cause problems with your browser and the internet.

Though QuickBooks Script Errors never damage your crucial data or break the file; however, it is important to resolve the error immediately. In order to pick the right solution, you must first know the possible reasons that triggers the error.

Read Also – How To Uninstall QuickBooks

Factors that Trigger QuickBooks Script Error

There are numerous reasons that trigger QuickBooks Script error and interrupt your on going work. Though, some of the most common yet prominent reasons that shoot QuickBooks script errors are listed below:

  • Script processing function is either disabled or blocked.
  • Your PC is attacked by a virus or malware.
  • Unwanted changes in the scripts.
  • Script plugin or software is damaged or corrupted.
  • PC’s window is damaged
  • Online downloaded data is not automatically syncing with the script software.
  • Script debugging feature is disabled.
  • The file which you are trying to open is damaged.
  • The cache browser folder is full or corrupted.
  • The third party or a window firewall is blocking the proper functioning of the script.
  • There is a possibility of damaged QuickBooks data files.

What are the Common signs and Symptoms to Identify QuickBooks Script Errors?

Although we have mentioned that there are no early signs or symptoms, however, some signs are reported by QuickBooks users. Here are some signs or elements that users may experience as a result of a QuickBooks script problem if you want to determine whether your system is affected or not.

  • Internet Explorer is not working properly or is responding slowly to the requests.
  • QuickBooks online activities are prohibited.
  • Facing difficulties in the navigation to the features in QuickBooks.
  • Not able to download or install the latest version of QuickBooks software.
  • Frequent popup messages regarding the error on the screen.
  • Not able to traverse the screens while using the QuickBooks.

Steps To Fix QuickBooks Script Errors

After getting all the information about the script error in QuickBooks, now, let’s discuss the methods to fix the QuickBooks script errors. Just follow the below-mentioned steps and get rid of the problem of facing QuickBooks script errors.

Before starting the QuickBooks script errors solution, please make sure to turn off the notification of every script error in internet explorer 7, 8, 9.

Solution 1: Deleting cache and history of Internet Explorer

Before you start any time-consuming process of solving the error, first, you must try to clear the cache and history of the browser. Sometimes, when the browser is full with unwanted cache, then it might show some errors to its users. So, here are the steps that you can follow to clear the cache on your internet explorer.

  1. Open internet explorer.
  2. Now, click on the tools option.
  3. Then, click on “Internet options” and then “General Tab”.
  4. Now, click on the “Delete Browsing History”. You can also go directly to this page by pressing the “Ctrl + Shift + Del” keys together.
  5. Then, on the history page, select all the options and then click on the “Delete” option. After this, all the history, cookies, and cache will be deleted in Internet explorer.

Solution 2: Turning off the Add-Ons feature in the Internet Explorer

  1. First, open internet explorer
  2. Go to the tools section.
  3. Then, click on the internet options, and there, search for the “Manage Add-Ones” option and click on that.
  4. At last, select the “disable” option from the bottom side of the screen.

Now, you have successfully turned off the Add-one’s feature. This method will definitely help you to solve the problem. If the problem still continues, then don’t bother and follow the last solution.

Solution 3: Uninstall the ActiveX file in Internet Explorer

  • Go to the settings page.
  • After that, check all the installed ActiveX files in your system.
  • After that, you have to search for that name starting with qboax such as qboax11 or qboax11.dll.
  • Then, at Last, close all the running windows or pages in your Windows Explorer, and then finally, delete all the located files available in your system.

Once, you have deleted the ActiveX files from your internet explorer, then again relaunch the QuickBooks software, and perform that task in which you were facing the Script error. At this stage, the QuickBooks Script error will be solved.

Method 4: Run Internet Explorer in Compatible View

Follow the below mentioned steps to run the internet Explorer in the compatible view.

  • Open the internet explorer and click on the three dots available at the top right corner.
  • Pick the tools option and open the compatible view settings.

Compatibility View Settings

  • Put a tick in the box to the left of “Display all settings in compatible view.”
  • Click the “Save” button to make the changes in the Internet Explorer..
Method 5: Clear SSL certificates from Internet Explorer

The steps to remove the SSL certificates from internet explorer are as follows:

  • Click the gear icon in Internet Explorer once it is open.
  • Choose the internet options.
  • In the internet options, choose the tab “Content”.
  • Now, click on clear SSL state option, available under the content tab.

Clear SSL Certificate

  • Click the “OK” button to save the modifications.
Method 6: Set Internet Explorer as Default Browser

You can remove the problem by setting the internet explorer as your default browser. Go through the below-mentioned steps to set internet explorer as your default browser.

Set Default Browser

  • Open internet explorer.
    Click on the gear icon, settings tab, and then open the internet options tab.
  • In the internet options, choose the programs tab.
  • Now, click on the “Make default” option available under the programs option.
Method 7: Add Intuit as a Trusted Site

Adding Intuit as a trusted site will solve your problem. To accomplish the same thing, take the following actions:

  • Open the internet explorer settings and navigate to the tools sections.
  • After that, navigate to the security tab.
  • In the security tab, go to the sites tab and pick the trusted sites.

Add Intuit Trusted Sites

  • In this, add Intuit as a trusted site.
  • Follow the instructions for QuickBooks.
  • Close the trusted site window.
  • In the custom sections, go to the miscellaneous and enable the cross-domain platform.
  • To save changes, click “OK”.
Method 8: Disable the script notification error

You can solve the problem by disabling the script notification error in the browser settings. Follow these simple steps to do the same.

  • Open the IE and click on the gear button to open the settings.
  • Now, choose the tool options, followed by internet options.
  • Click on the advanced settings available under the internet options and uncheck the “Display a notification about every script error”.
  • Press the OK button to save the changes.
Step 9: Repair the QuickBooks Data File

If you are having a problem with QuickBooks, you can repair it with the help of QuickBooks file Doctor. To do the same, you have to go to the official website of QuickBooks and download the QuickBooks doctor from there. Run it after installing it on your computer. It will automatically fix the issue if there is any.

We have tried to accumulate all the possible methods to troubleshoot the QuickBooks Script error.

Read Also : QuickBooks Error PS077

Summary

Facing errors while using the QuickBooks software is very frequent. Whenever you face any error in QuickBooks, there is no need to be panic about it. In this article, we have mentioned all the necessary information about QuickBooks, the Script error, and the methods to get the problem resolved. You can use any of the above methods to get rid of the error. If you are still facing the error, don’t hesitate to get in touch with our assistance team. They are happy to help you.

Frequently Asked Questions (FAQ’s)

Q1. What error messages display on the emergence of QuickBooks Script Error?

Ans. There are different error messages that users might observe on the arrival of QuickBooks script error, which are as follows:

  • “A script on this page is causing your browser to run slowly”. 
  • “The error has occurred in the script of this page”.
  • An error has occurred on the script of this page line: 7 Char: 561 Error: Unable to Get Property Length of Undefined or Null Reference Code: 0”. 

Q2. What should I do if a QuickBooks script error evokes during the import process?

Ans. If the QuickBooks script error appears during the import process, apply the following steps. 

  • Launch the Internet Explorer on your device.
  • After this, look for the Tools button and tap on the Internet Options.
  • If you won’t be able to find the Table option, hit the Alt button. 
  • Consequently, it will show the Hidden option. 
  • Click on Discovered Advanced option and remove the notification related to script error. 
  • At last, hit the OK button to conclude the process. 

Q3. How can you fix the script error while an export process in QuickBooks?

Ans. To fix the script error that occurs while exporting in QuickBooks, use the steps below. 

  • Initially, click the Tools option from the right side of your browser.
  • After this, go to Safety & Security > Delete History.
  • You must choose the checkbox next to “Cookies and Website Data” and hit the Delete option.
  • Wait until it removes all the browsing history and exits from the internet browser. 

Q4. What do you mean by script error in QuickBooks?

Ans. The script error in QuickBooks specifies that the command is not executing properly. In other instances, it mainly triggers when your QuickBooks is exchanging the information with the webpage, and JavaScript creates some issues. 

It is not easy to give your accountant access to your QuickBooks online. Managing the accounts on QuickBooks is a daunting task. It gives a headache to the business owners. Here, at this point, they are really worried about whether they should focus on the growth of their business or manage the QuickBooks accounts at the same time. Undoubtedly QuickBooks is one of the greatest accounting software that caters to the unique needs of modern business.

The robust platform provides the most unique and useful accounting and finance tools, including inventory management, invoice creation, deep insights into business finance, forecasting, and advanced reporting. It helps businesses of all sizes to streamline their financial transactions.

Invite Your Accountant to QuickBooks Online. Talk to Our Experts @1-855-603-0490 and Know More.

Sharing the business accounts information with your accountant may be a difficult task, especially if the accounting software requires the importing and exporting of large files. However, QuickBooks online has eased the process by introducing a new set of features that allows accountants to access their data in a much simpler way. If you are looking for methods for how to add accountants to your QuickBooks, then this blog is for you. So, read the complete blog till the end.

How to Add an Accountant Into QuickBooks Online?

Here are the steps that will explain the complete procedure of inviting an accountant QuickBooks online to your company’s QuickBooks.

The steps are as follows:

  • Open the QuickBooks Online web page on the browser and enter your username and password to login into QuickBooks Online.
  • Now, click on the settings gear icon, then select the Manage users option.
  • After that, choose the Accountant Firm or Accountant tab option and click on the Accountant invitation option.
  • Enter the desired email address of your accountant.
  • An invitation link is sent to your accountant once you click on the invite link.

Note: A QuickBooks login id is required for the accountant. Either they already have it, or you need to create a new login id for your accountant.

  • Once the accountant accepts your invitation, the status will change to active.
  • Click on the “Next” option. You have successfully added the new accountant to your QuickBooks.

The accountant will receive the link to your company’s QBOA, if they already have the QuickBooks accountant account. However, in the case, you add your accountant and they do not have a QBOA subscription, they will have the signup feature as you send them the invitation. You will not have to pay any fees if your accountant signs up for your company QBOA. You can add two accountants.

How Can I change my Accountant in QuickBooks Online?

You have already given an accountant access to your QuickBooks online, but now you want to change your accountant in your company’s QuickBooks. Follow the below-mentioned steps to change the accountant in QuickBooks Online.

  • Please make sure that you are logged in as master or company admin to make the desired changes.
  • Choose the Manage users options available under the settings gearbox.
  • Now, click on the accounting firms option, available under the manage user options.
  • After that, click on the invite button and enter the new accountant’s name and email address.
  • The new accountant will be sent an invitation email with a link to sign in to your company’s QBO.
  • If your accountant is new and is sig in for the first time, they need to create the email id. If they already have the email id, they just need to sign in with their old email id.
  • When the accountant accepts your invitation, the status will change to active.
  • Click on the “Next” option and finish the procedure.

The steps of changing to the new accountant are the same as adding the new accountant to your QuickBooks online.

How Do I Remove My Old Accountant from My QuickBooks Online?

You can easily remove the old accountant from your company’s QuickBooks Online. Just follow the below-mentioned steps to complete the accountant removal procedure.

The steps for the removal of an accountant from QuickBooks online are as follows:

  • Open QuickBooks Online on your system browser and enter your login credentials.
  • Now, tap the cursor on the settings gear icon.
  • After that, choose the Manage user options.
  • Now, locate the accountant you want to remove.
  • Click on the Action drop-down menu and pick the delete option.
  • Confirm the delete option.
  • You have successfully removed the picked accountant from your company’s QuickBooks.

Who is an Accountant User?

An accountant user is a person who can review your QuickBooks, make corrections in transactions, or write off the complete transaction. If you give accountants access to QuickBooks online to a person, they will enjoy additional privileges, including reclassifying transactions or can reconcile a complete transaction. They will measure the results of the company accurately. Moreover, they can use special accounting tools that will ultimately help you in filing the correct tax.

Professional Tools for Accountants in QuickBooks Online?

The accountant toolbox comes with some of the most powerful tools for professional accountants. With the right tool, you can perform the right task and streamline your work.

The tools for accountant professionals in QuickBooks Online are:

  • Reports Tools
  • write Off Invoices
  • Reconcile
  • Reclassify Transactions
  • Charts of Accounts
  • Voided/Delete Transactions
  • Journal Entries
  • Management Reports
  • Accountant Reports
  • Multiple Windows

Benefits of Adding the Accountant

Adding an accountant is always beneficial to your company. The accountants have the opportunity to reclassify the transactions, undo the complete transactions, or write off the invoices. Depending upon the needs and the size of your company, you can hire the subject expert and give the accountant access to your QuickBooks online. Adding an accountant to your company’s QuickBooks has numerous benefits; however, some of the common benefits are listed below:

Tax Compliant
Filing the tax can be the most hectic task. If you hire an expert, they will file the task on your behalf. Or, if you are filing it alone, it is always better to get it checked by an expert before filing. They will also check if you are getting the maximum return.

Well Organized
An accountant manages every account in QuickBooks. If you face problems in managing multiple transactions in numerous accounts, consider hiring an expert. They keep every account in a well-organized way.

Finance Health Check Up
The accountant will take care of every financial transaction and look closely at every transaction. They will inform the business owner if any activity looks fishy. Apart from that, they pinpoint the upcoming opportunities and risks if involved.

Free Your Time
After a certain point, business owners need to focus on sales and customers to achieve exponential growth. If the owner is busy in managing the financial transactions, they can not find enough time to focus on the growth. Hiring an accountant will ease your work. They will craft invoices, chase the payments from the vendors, and take care of other financial activities. It will give ample time to the business owners to focus on the company’s growth.

Audit Your Business
Auditing the business at a certain point is crucial. To assure the shareholders and creditors, time to time audit is very important. It will give them clarity to them that the management is performing right. An internal audit is also important. It builds trust within the company.

VAT Registration
VAT registration is an important milestone in achieving business success. Check with the expert that you are managing your VAT correctly in order to avoid any costly mistakes. QuickBooks Online will help users in filing the correct and accurate VAT returns.

What are the Primary Responsibilities of an Accountant?

A good accountant will make effective strategies that will help in achieving the goals of the company. To be successful, it is always better to have the assistance of a person who has deep, intense, and latest knowledge of the subject. The primary responsibilities of an accountant in business are:

  • Check the accuracy of each and every transaction.
  • Ensure the Tax obligations of the company.
  • Pick the most accurate and budget-friendly accounting system.
  • Create, analyze, and interpret each financial statement.
  • To internally audit the company to check the leaks.

Why Adding Accountant to Your QuickBooks is Important?

Even if you are managing your financial transactions with the help of QuickBooks, it is always great to have an accountant. Investing in an expert accountant will change the way you use QuickBooks. They will help you in growing your business, put a check on the tax obligations, and will identify your savings. The experts of accounts will guide you on how to fragment information in QuickBooks for the best business profitability. This crucial information will help business owners to plan and control things in a much better way. They can make more accurate and effective decisions with respect to finance.

Final Print

QuickBooks is a powerful accounting tool that helps in managing financial transactions. If you want to focus on your business growth, give accountant access to your QuickBooks online. Let them complete your financial tasks like tax preparation, filing return, and chasing the payment, and you focus on growing your business worldwide. Are you looking for more informative blogs? Please read our other QuickBooks blogs. Stay connected, stay updated.

Just like QuickBooks is versatile, so are its errors. One such QuickBooks error that commonly the, daily users encounter is the QuickBooks Read Only error. Are you also searching for solutions to fix the same? Well, your search ends here. This blog post will help you troubleshoot this issue by performing simple steps. Continue reading! 

Are you looking for professionals to help you troubleshoot QuickBooks issues? If yes, give our professionals a call at 1-855-603-0490. We will instantly help you with effective solutions. 

QuickBooks Read Only Error – A Quick Introduction! 

The QuickBooks read-only error occurs at the time when users try to edit their required QuickBooks company file, which is already set to read-only mode. By this, users also receive an error message reading, “Read Only Error: [Company_Name].qbw This file is set to read-only. Try again with a different file name.” 

Misconfiguration of QuickBooks and your system’s settings can also cause such errors in QuickBooks. However, there are many other factors as well that may contribute to the read-only error in QuickBooks. So, continue reading and learn more about them. 

Reasons Responsible for QuickBooks Read Only Access Error 

The following factors can prominently contribute to the occurrence of errors in your company files with QuickBooks read only access. Have a look to fix the issue accordingly: 

  • If any other user has already set the file with read-only mode, you may fail to edit the QuickBooks company files with read-only access. 
  • If the default file attribute status is set as read-only mode while copying the QuickBooks company data files from a CD, you may face the read-only access error. 
  • Another reason for facing the read-only error in QuickBooks is changes done before on the company files with read-only mode. 
  • Users, when trying to replace their QuickBooks company files with a different portable file, may result in the QuickBooks read only access error. 

How Can I Come to Know About the QuickBooks Read Only Error? 

Pay attention to the following signs that may arrive after the QuickBooks read only error attack. These signs will help you recognize the issue: 

  • You will start experiencing access issues with your QuickBooks company files. 
  • The entire QuickBooks Desktop software may also start freezing and lagging. 
  • By the attack of the error, even your Windows Operating System will start crashing or running slow. 
  • You will repeatedly notice the read-only error message on your QuickBooks company file screen. 
  • The active QuickBooks application running on your Windows also starts crashing. 

Troubleshooting Steps to Take and Fix QuickBooks Read Only Error

Panic enough after continuously encountering read-only errors in your QuickBooks application? Don’t worry! We have cited some of the effective and easiest troubleshooting methods to help you with this. Follow the instructions and continue: 

Troubleshooting Method 1 – Log in to your QuickBooks Application with Admin Credentials 

You can resolve the QuickBooks read-only error by logging in to your QuickBooks application using the Admin user account. For this:

  • Firstly, you must close your QuickBooks application and its related windows on your system. 
  • Now, right-click the QuickBooks Desktop Application icon from your computer’s Desktop. 
  • When you right-click, you will get a drop-down list, from where you must click the Properties option. 
  • Now, hit the Compatibility alternative and move to the Privileged Level option, which is located at the bottom of the screen. 
  • Following this, select the Launch, this software in Administrator Mode option. After this, hit the OK button and finally open your QuickBooks company file. 
  • Try to restore and save it. If you still face the read-only error in your QuickBooks, move to the next method. 

Troubleshooting Method 2 – Remove the Read-Only Access from the Company File 

Since the QuickBooks read-only access creates issues and prevents you from editing the company file, removing this feature is better. For this: 

  1. Firstly, save your QuickBooks company file and press the OK button. Ensure to save this company file as Windows
  2. In the next step, right-click your QuickBooks company file, and from the appeared drop-down menu, select the Properties button. 
  3. After this, move to the General tab, and make sure not to check the Read Only option. 
  4. Following this, hit the OK button and choose the Save option. 
  5. Finally, you can fix the read-only access issue of the QuickBooks company file. However, if you still fail to do so, move to the next method. 

Troubleshooting Method 3 – Take Help from QuickBooks Install Diagnostic Tool 

The arrival of QuickBooks company file issues like QuickBooks read only error are quite normal if your QuickBooks application installation is corrupted or partial. Thus, use the QuickBooks Install Diagnostic Tool and fix the problem: 

  • Download and install the QuickBooks Tool Hub from the official Intuit website if you don’t have it yet on your computer system. 
  • Once downloaded, save this downloaded QuickBooksToolHub.exe installer file on your computer’s Desktop. 
  • Double-click the file to open. In this file, you will find some compulsory instructions to start the installation of the Tool Hub. 
  • After ending up with these instructions, you must click the Next button. Now, hit the Install option and begin the QuickBooks Tool Hub installation. 
  • Wait for a while until the Tool Hub installation is over, and once done, hit the Finish alternative. 
  • In the next step, open the Tool Hub and directly head to the Installation Issues tab.
  • Here, you will see the QuickBooks Install Diagnostic Tool; hit the tool, start running the same, and let the tool find and fix the issue. 
  • Once the tool finishes the repairing process, retry to open your QuickBooks company file. 
Taking Everything in Account..!

By the end of this informative blog post, we hope you have learned enough about the QuickBooks read-only error, including its possible causes and required solutions to troubleshoot the issue. If you fail to resolve this problem on your own, don’t panic. Instead, connect with our QuickBooks professionals via the available Live Chat Support option. We will assist you professionally to root out this company file access issue. 

FAQ's

A1: Follow the given instructions to change the read-only attribute in the QuickBooks company file settings: 

  • Firstly, go to Windows Explorer and select the file in which you wish to change the read-only attribute. 
  • Right-click the file, select the Properties option, and uncheck the read-only feature box.

A2: The following factors can be the major causes of facing the QuickBooks read only access error:

  • The QuickBooks company file you wish to edit is already set on Read-only mode.
  • If you’re trying to replace the QuickBooks company file with a portable file. 
  • The saved changes on the company file with read-only access are also a notable cause. 

A3: Yes, you can take help from the QuickBooks Tool Hub to fix the read only access error in QuickBooks. Just navigate to the Installation Issues tab of the Tool Hub and click the QuickBooks Install Diagnostic Tool to fix the issue. 

A4: The following issues can help you recognize the read-only error in QuickBooks: 

  1. Slow and sluggish QuickBooks application performance. 
  2. No response from the keyboard tabs and mouse clicks on the QuickBooks company file that you wish to edit. 
  3. The continuous appearance of QuickBooks read-only error message reading, “Read Only Error: [Company_Name].qbw This file is set to read-only. Try again with a different file name.” 

A5: If you fail to fix the issue on your own, just contact our QuickBooks technicians for further professional help our toll-free number or approach our experts via the available Live Chat Support option. 

At times, QuickBooks users might end up with an Error in reload.sql in QuickBooks for Windows while accessing the Account Transfer File (QBX). It mainly started after the release of the latest version of QuickBooks Desktop. A user can rectify this Error by updating the Software to the newest version. However, if the problem is still not resolved, check out this blog.

Encountering an Error in reload.sql in QuickBooks and need instant assistance? Ring us @1855-603-0490 and reach out to one of our QuickBooks Professionals. 

What are the Root Causes behind the Error in reload.sql in QuickBooks for Windows?

We know how irritating it is when a user comes across a reload.sql Error in QuickBooks while accessing the Accountant’s copy Transfer File. Thus, to fix the issue, it is very important to know the main reasons that evoke the Error.

  • Damage in the QuickBooks Program.
  • You might be using an Outdated QuickBooks Software.
  • Incomplete installation of the QuickBooks Software.
  • There might be some issues with the File location.
  • The Size of the File is more than 3 MB.

What are the Error messages for Error in reload.sql at lines 29886 and 25514?

There are different Sybase Error messages for reload. Sql Error at line 29886 and 25514.

  • Sybase Error message for Error in reload.sql at line 29886: “can not convert hex string to a varbinary”
  • Sybase Error message for Error in reload.sql at line 25514: “Right truncation of string data”

How to Fix the Error in reload.sql in QuickBooks for Windows at line 29886 and 25514?

Now, let’s find out how to rectify the reload.sql Error at line 29886 and 25514.

  • Try to open the Company File from the location where the Account Copy Transfer File was Generated.
  • Moving ahead, you have to delete all the restrictions for the Accountant’s copy.
  • Lastly, Make a new Account copy and transfer it to your Accountant.

Error in reload.sql at line 40454 in Windows

When a user encounter Error in reload.sql at line 40454, they receive a Sybase message on the screen as:

 “The file [file_name] is invalid when the disk sandbox feature is enabled for database’ [database]'”

This Error is easily resolvable; just transfer the Company File to the System in which you access QuickBooks. 

Note: Ensure to update your QuickBooks Desktop as well.

What are the different ways to Fix Errors in reload.sql at line 40454 in Windows?

In this segment, we have discussed all the possible solutions to rectify the reload. Sql Error at line 40454.

1st Method: Save your File Locally

To restore the File locally, there are two steps that you must follow:

Step 1: Transfer the File Locally

  • Initially, open a local folder where you want the File to be saved.
  • Thereafter, Right-click anywhere.
  • Now, click on the New Folder by choosing the Folder button.
  • Provide a name to your Folder.

Note: Avoid using any Special Character (!,@,%,?, #, etc.) while naming the Folder.

  • Next, you have to navigate to the Folder where your Portable Company File or account’s copy is available and look for the File.
  • After finding the File, right-click on it, and choose the Copy Button.
  • Now, go to the Folder you created and transfer the File there using the Paste button.

Step 2: Open or Restore the Accountant File

  • Firstly, you have to press and hold the Ctrl key.
  • Thereafter, launch the QuickBooks Program.
  • Now, you have to Restore the Portable Company File or open the Accountant Copy.

Now, review if the File is restored properly now. If not, then try the next Solution.

2nd Method: Utilize QuickBooks Install Diagnostic Tool

The Install Diagnostic Tool by QuickBooks is used to manage and fix all the Errors you face due to the damaged installation of QuickBooks Software.

  • To begin the process, Exit the QuickBooks program, and navigate to Intuit’s official website.
  • Look for the latest version of QuickBooks Tool Hub, and download and install it in your System.
  • Moving ahead, launch the Tool Hub and select the Installation Issues option.
  • Now, click on the QuickBooks Install Diagnostic Tool button to scan the QuickBooks Program.
  • Let the Tool Scan your QuickBooks software to find if there is any problem with the installation of the Program. 
  • Once the scan is done, if the Diagnostic Tool finds the technical Error, it will resolve it as well.
  • Lastly, restart your device.
3rd Method: Re-Configure the QuickBooks Desktop Program

Here, if you find the problem to be persistent, then you can try to fix it by re-configuring the QuickBooks Program.

  • Initiate the process by clicking on the Start button.
  • Now go to the Control Panel, and select the Program and Features section.
  • Here from the list of Programs, choose QuickBooks and tap on Uninstall/change tab.
  • Now, hit the Repair button, and follow the on-screen instructions to update the accounting program.
  • Once the repair is completed, launch QuickBooks again, and try to restore the Accountants Copy.

However, if the issue is still unresolved, move to the next step.

4th Method: Delete and Reinstall

The last thing you can do to rectify the reload.sql Error at line 40454 in QuickBooks is cleanly install the Program.

  • Click on the Start button, and go to Control Panel.
  • Thereafter, navigate to the Programs and Features option, and look for QuickBooks.
  • Once you find QuickBooks, select it, and click on the Uninstall/Change button. 
  • Moving ahead, Tap on the Uninstall tab.
  • Now, wait for sometimes, for the uninstallation process to get complete. 
  • Restart your System, and install the QuickBooks Software again.

Note: To complete the registration and activate the QuickBooks product, you have to provide an original license and product key.

Bottom Line!

At the end of this blog, we hope that you get your apt Solution to eliminate Errors in reload.sql in QuickBooks. However, if you get stuck at any stage, feel free to get in touch with our QuickBooks experts via the live chat button (Help box), present at the bottom of the page. Moreover, you can even mail us your Query to receive step by step guide.

Posts pagination