Author: admin

Home > Articles by: admin

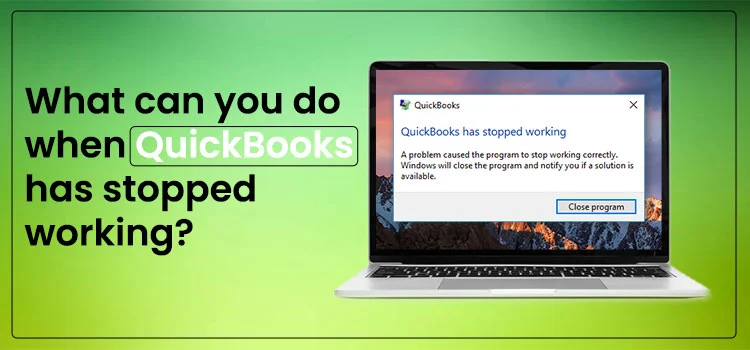
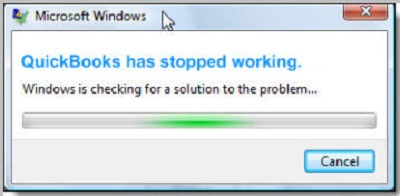
Imagine you are working on a QuickBooks desktop, and in the midst of that, a message pops up on the screen that says, “QuickBooks has stopped Working.” The same error message displays on the screen when you try to open it again after you have quit once. There could be multiple reasons behind this. Some of these could be damaged Windows operating files or missing QBWUSER.INI files. We know that it can be quite frustrating to get such errors in the middle of your work as it can bring your work to a standstill.

QuickBooks has stopped working (Error Message)

What cause QuickBooks has stopped Working

There could be myriad reasons responsible for the “QuickBooks has stopped working” issue. We have mentioned some of these reasons below:

  1. Your company file’s name could be a little too long
  2. It could occur because of a damaged or corrupt QBWUSER.INI file
  3. A corrupt or damaged hard drive could be another reason
  4. A damage in your QuickBooks installation or program files could be the reason
  5. Broken or flawed Windows Operating System can also result in a “QuickBooks not working” issue

Solutions that can troubleshoot the QuickBooks Has Stopped Working issue.

Below, we have provided a list of effective resolution methods which can fix the “QuickBooks not working” error. Here they are:

1.) Solution 1: Using Quick Fix My Program under QuickBooks Tool Hub

To implement this solution, you need to go through two steps. These two steps are as follows:

Step 1: Install & Download the QuickBooks Tool Hub

In order to resolve the “QuickBooks not working” issue, you need to use the QuickBooks Tool Hub. To do that, follow these steps:

  1. First things first, you need to close the QuickBooks application
  2. Thereafter, you need to download the latest version of the QuickBooks Tool Hub. Also, you need to save the file in a suitable location, like in the Downloads folder or the Windows Desktop.
  3. After that, open up the file that you had downloaded and try installing it by following the on-screen instructions that appear. Furthermore, also agree to its terms and conditions.
  4. After the installation, double-click on it to launch the QuickBooks Tool Hub

Also Read – Fix QuickBooks Error 9999

Step 2: Run Quick Fix My Program

The job of Quick Fix My Program is to shut down all the background processes in the QuickBooks application. The steps given below can help you do that:

  1. Firstly, open the QuickBooks Tool Hub and then choose Program Problems.
  2. Thereafter, choose the Quick Fix My Program and then wait while the scan completes.
  3. After you are done, open the QuickBooks application, and after that, the company file

2.) Solution 2: Running the QuickBooks Install Diagnostic Tool from the QuickBooks Tool Hub

The QuickBooks Diagnostic Tool is responsible for detecting and fixing the “QuickBooks not working” issue. This particular error occurs when you try accessing the company file. The following steps shall guide you in doing that:

  1. First things first, Open up the QuickBooks Tool Hub
  2. After that, choose the “Program Problems” option from the Tool Hub
  3. Thereafter, click on the QuickBooks Program Diagnostic Tool.
  4. After the tool has finished working, you need to restart the system and open the QuickBooks application again

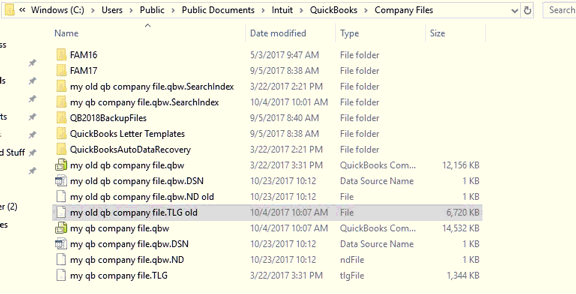
3.) Solution 3: Renaming the QBWUSER.INI file

If you encounter the QuickBooks has stopped Working, you need to rename the QBWUSER.INI file. You should follow the steps below to rename this particular file.

  1. First of all, pick the Windows icon
  2. Thereafter, press the Windows+E key together to open the Windows File Manager
  3. After that, you need to go to the QuickBooks folder located in the C drive.
  4. Consequently, look for and then right-click on the QBWUSER.INI file and then click on the Rename option.
  5. Furthermore, type .OLD at the end of name of file, and then click on the Save button to save the changes
  6. Also, try opening the QuickBooks application one more time

Also Read – Fix QuickBooks Error 1328

4.) Solution 4: Reinstalling QuickBooks using the Clean Install Tool

A lot of the times, you might get the QuickBooks has Stopped Working issue due to the damaged or corrupt program files. You should, in this case, run a basic install if it affects more than one of the company files. You might also want to do a clean install using the QuickBooks Clean Install Tool. It resolves such issues that would restrict you from opening the company file, display, and template problems.

Conclusion

Although we have listed down all the possible troubleshooting methods that can fix this QuickBooks not working  issue, there might be a situation when even none of these solutions might work. In such a case, you should contact our QuickBooks support team, who is skilled at resolving such QuickBooks issues. We are available 24*7 to help our QuickBooks users who might require a quick solution.

Frequently Asked Questions (FAQs)

Q1. What can you do when Ctrl Alt Del does not work to fix the QuickBooks not working issue?

  1. You need to first Edit the System Registry Editor
  2. After that, update your Operating System(OS)
  3. You need to examine for malicious or erroneous programs
  4. You need to check also if your keyboard is working or not

Q2. Is there a quick method to resolve the QuickBooks has stopped working error?

  1. First of all, go to the QuickBooks Tool Hub
  2. After that, use the Quick Fix My Program
  3. Also, you can alternatively use the QuickBooks Install Diagnostic Tool
  4. Lastly, you need to disable the anti-virus program in your system and then restart it

Q3. What can I do if QuickBooks freezes up?

Ans. You need to first download and install the QuickBooks Install Diagnostic Tool and then run it for quite some time until it is done. Thereafter, restart your system to let the effects take change.

Q4. How can I fix the common installation issues?

Ans. You need to run the QuickBooks Install Diagnostic Tool to fix common installation issues. You should follow the below-mentioned steps:

  1. At the outset, go to QuickBooks Tool Hub and then choose the installation issues
  2. You need to choose the QuickBooks Install Diagnostic Tool
  3. After the tool has finished its job, you need to restart the system and then start the QuickBooks Desktop.
  4. Lastly, open the data file

At times, the users might come across QuickBooks POS failed to open company file error while accessing the application. Wondering why it happened? It may happen due to damage or corruption in the QuickBooks company file. Every time the error occurs, any one of the following error messages comes into view:

“Failed to Open company Error: Unable to connect to your company data file”

Go through this whole post attentively, and you will come to know the root causes of the error and how to overcome it.

Are you facing difficulty while accomplishing your task due to QuickBooks POS failed to open company file error? Don’t worry, and connect with our professionals at @+1855-603-0490 to get immediate assistance.

Top Reasons Why QuickBooks POS Failed to Open Company File Error Occur

At times, the users might confront QuickBooks POS failed to open a company file error because of accessing an obsolete version of the QBDT application. The complete list of reasons that may evoke this error is as follows:

  • Sometimes, it may occur when the users install the Point of Sale application on the client workstation instead of a server.
  • It may also occur due to the damage in the company file.
  • You might have experienced that the connection with your QuickBooks data file has failed.
  • Also, it may trigger when the POS Database service manager isn’t running, and you cannot access your data file.
  • In other instances, it may occur when you see that by accessing Windows XP SP2 operating system, you have converted the data file into a higher version of POS.

Also Read – Fix QuickBooks Desktop Error 15107

Key Points You Know Before Fixing “QuickBooks POS Failed To Open Company File” Error

Here are the tips that the users must know before diving towards the troubleshooting part. This will help you eliminate the error seamlessly.

Relaunch Your System:-

Relaunching your computer device refreshes your operating system and will remove all the changes saved. Doing so will help if you encounter an issue due to recent changes.

Use the Windows Admin Credentials To Sign In to your Account:-

Whenever you sign in to your device with admin credentials, it will grab you some extra permissions. Also, it allows you to make changes within the system configuration and control it. 

What should be done when QuickBooks Point of Sale Won’t Open Company File?

You can easily configure QuickBooks POS failed to open company file error using the below-listed resolution methods. 

Process # 1. Relaunch Your QuickBooks POS Services 

Relaunching the QuickBooks Point of Sale will delete all the saved information from the application by refreshing it. Therefore, to refresh the application, apply the steps listed below. 

  1. To begin the process, exit from the QuickBooks Point Of Sale application if it’s already open.
  2. Press the Windows key and input “service.msc” within the search area. 
  3. Locate and then configure the Intuit Entitlement Service and QBPOS Database Manager.
    • In the first step, double-click on the Intuit Entitlement Service vX. 
    • Next, move to the General tab and select the Startup Type field as Automatic. Also, ensure that the service status represents Started. 
    • Following this, opt for the Log On tab and then choose the Local System Account > Allow service to interact with Desktop.
  4. For instance, if you wish to configure the IntuitEntitlement Service, only then move to the Recovery menu. Later on, opt for the highlighted Restart the Service from the First, Second, and Subsequent fields.
  5. Now, choose the Apply options and then hit OK.
  6. In the end, try running the company file and see whether the issue is resolved. 

Also Read – How to change Payroll schedule in QuickBooks desktop

Process # 2. Establish a Test Company File:-

Generating a test company file will help you identify whether the issue is with your application or your system itself. For instance, you need to reinstall the software if there is any issue with the entire application. Follow the step-by-step instructions to prepare a test company file:

  • Begin the process by opening the QuickBooks Point Of Sale application on your device.
  • Afterwards, pick Create New Company from the Start Company screen and then hit the Next option. 
  • Thereafter, input “Test” within the Company Name field and hit the Create option.
  • Next, you must run the test file, move to the File menu, and opt for Company operations. 
  • Furthermore, head towards the Open Existing company and look for your file. 

Process # 3: Recover a Backup Of the Company File 

If you come across the QuickBooks POS failing to open the company file issue, you must run the last backup generated for your data file. For that, you must implement the following steps in the same way as written below. 

  • The first and foremost step is to move to the QuickBooks File menu and then opt for Company Operations.
  • Next, choose Restore from backup > Next > Browse to alternate backup file > Browse. 
  • Now, from the left window, follow the path: “C: > Users > Public > Public Documents > Intuit > QuickBooks POS 18.0 > Data > Your Company Name > Backup”.
  • After this, you have to opt for the latest backup and then hit the Next option. Doing so, will recover your data file till the date and time when that backup was generated.

Also Read – Fix Trouble in Opening QuickBooks Payroll 2020

Winding Up!!

We hope you find this post relevant and helpful in figuring out the QuickBooks POS Failed to Open Company file error. If you still face problems while accessing your company file, drop an email to our experts, and they will provide the most effective solutions to rectify the issue immediately.

When you face QuickBooks error code 401 and can’t find any method to remove it, we are definitely here to assist you. This issue is generally an unauthorized request on the QuickBooks desktop and can be easily solved. You might be facing such an error when you try to:

  • Log in company file or accountant toolbox
  • Registering during the QB installation
  • Sending an invoice with QuickBooks payment
 QuickBooks error 401 (Error Message)

The error code is handled by several methods, which are discussed later in this blog. If you can’t get the proper resolution, you can call the QuickBooks helpline number to troubleshoot it instantly.

Quick Steps to Fix QuickBooks Error 401

You will not find many solutions to fix QuickBooks error code 401. Once the issue appears on the screen with the error text, follow some simple methods that are given below.

  • Firstly, opt for No and shut down the error message window
  • Then, upgrade the QuickBooks software with the latest version

Troubleshooting Methods to Upgrade the QuickBooks Software to the Latest Version

Few handful options are mentioned to update the QuickBooks Software.

Method – 1 Setting up Automatic Updates

To upgrade to QuickBooks latest version, go for setting up automatic updates. The automatic updates option saves a lot of time and ensures timely Updates. The methods involved in this process are

  • It can be moving to the Help menu and choosing update QuickBooks Desktop
  • Go to the Update Now tab. Choose the reset update checkbox and delete all the previous update download
  • Select get updates to begin the download
  • After the end of the downloads, ensure to restart the software
  • Finally, accept the option to install the new release.

Method – 2 Scheduling for Automatic Future Updates

Another option can be opted to schedule updates. It means that you can prepare QuickBooks Updates according to their comfort, and the software will get upgraded automatically. The methods followed are mentioned below.

  • Go to the Help menu and update QuickBooks Desktop
  • Search the Options tab
  • Now, choose Yes to switch on automatic updates. Share automatic downloads to the other systems on the network, choose yes for each design.
  • Then, press on Close.

Method – 3 Manually Upgrade Procedure

If you don’t feel comfortable with automatic updates and wish to update the software manually, follow the steps below.

  • Close the company file and QuickBooks
  • Then, access the Windows start menu
  • Once completed, look for QuickBooks desktop. Do a right-click on the icon and select run as Admin
  • Move to the Help menu while on the no company access screen and then press on updates QuickBooks desktop
  • Move to the options tab and then select mark all and choose to save
  • Now, search the Update Now account and select the Reset Update Checkbox
  • Finally, choose to get updates.

It has been trusted that updating QuickBooks software will definitely remove QuickBooks error code 401. You can implement any of the above methods to fix this error. If you can eliminate it, you must dial the QuickBooks support number to remove it quickly.

Payroll schedule in QuickBooks desktop are a way of ascertaining the duration after which employees need to be paid by the company. Grouping together employees according to their pay schedules becomes most crucial and can be done quite easily with QuickBooks. With such classification, processing your payrolls becomes much more efficient. In this blog, we are going to do an in-depth coverage of how payroll schedules can be created, changed and managed in QuickBooks online & desktop version.

Types of pay schedules that can be assigned in QuickBooks

  • Weekly: Doling out payouts every week, 52 times a year can be obtained on QuickBooks on any recurring day of the week, usually a Friday or a Saturday.
  • Bi-Weekly: This is giving out payouts every 2 weeks meaning 26 payouts in a year.
  • Semi-Monthly: Paying employees twice a month with one payment at the middle of the month and the other at the end. This would mean a total of 24 payouts in a year.
  • Monthly: This is the most common form of payment schedule in which the pay is given once a month, on any recurring day making it a total of 12 payouts in a year.

Setting up and updating pay schedules in QuickBooks Online Payroll

  • Go to Payroll and then choose Employees
  • Fill in the employee’s name
  • Choose the Edit employee option
  • From the drop-down menu, choose “How often do you pay[employee]?”.
  • Then choose the employee’s pay schedule
  • “Add new” for creating a new pay schedule.
  • Jot down the details in the appropriate fields
  • Click OK
  • Now choose Done

Read Also : QuickBooks payroll Update Error

Assigning and updating pay schedules in QuickBooks Desktop Payroll

Creating a schedule of payroll

  • Go to Employees menu
  • Now choose employee centre
  • Double-click on the employee’s name
  • Move on to Payroll Info tab
  • From the drop-down menu, choose the Payroll Schedule option.
  • Choose the type of payroll schedule that you want to assign
  • Click on OK to save

Updating a Pay Schedule

  • Choose Payroll Centre from the Employees menu
  • Pick the schedule you want to update from the Create Paychecks menu.
  • Go to Edit payroll Schedule and make the desired amends.
  • Click on Yes for updating schedules of all employees assigned to it.
  • Click on OK

Also Read – Fix QuickBooks Error Code 1646

Deactivating & Deleting a Pay Schedule

Getting a payroll schedule inactive instead of deleting it is a much better option because this allows you to activate it in the future without the hassle of setting up a new payroll schedule. In order to deactivate a payroll schedule stick to following steps-:

  • Visit employee centre by clicking on the Employees menu
  • From “Create Paychecks” table, pick the desired pay schedule
  • From the drop-down menu of payroll schedules, choose Edit Schedule
  • “Schedule is inactive” is to be marked
  • Click OK

Should you decide to completely delete a payroll, here are a couple of steps that can help you do just that-:

Step 1: Delete the name of employees who are on the to be deleted payroll schedule

  • Choose Payroll center from the Employees menu
  • Open the employee tab by double-clicking on the employee’s name
  • Now, move on to Payroll Info tab
  • Ensure that schedule in Payroll schedule is not the one that needs to be deleted. If that is the case, then choose another payroll schedule for the employee or leave the field blank.

Step 2: Delete the payroll schedule

  • From the employees menu, choose the Payroll Centre option
  • Click on Pay Employees tab
  • From the Create Paychecks tab, choose the payroll schedule that is to be deleted.
  • From the drop-down menu of Payroll Schedules, pick Delete Schedule.
  • If you get an error message saying that you can’t delete or make payroll schedule inactive, then it means that there are some names of employees that still exist. In that case, you need to follow step 1 and then Click OK.

Read More : QuickBooks payroll service

Conclusion-:

Although, we’ve tried to walk you through the troubleshooting process of QuickBooks and have given you an in-depth solution regarding Payroll schedule in QuickBooks desktop, a situation might arise when it still couldn’t fix the problem. In that case, feel free to get in touch with our expert professionals who are ready to solve all your queries regarding these issues. Chat with us or shoot us a mail at info@quickbooksupportnet.com, We’d be happy to help!

QuickBooks software was developed to make finance and accounting easy for its users. This is a one-stop-shop for all your needs. However, the software has been prepared in the best possible way, but like any software, QuickBooks faces errors and glitches, such as QuickBooks error 6147,0. This is when it shows alerts, and you need to fix these errors to resume your work.

Know About QuickBooks Error 6147,0

QuickBooks error 6147 ,0 occurs when there is an issue in opening a company file. An error window pop-ups on your screen in such a situation. This issue might even make your QuickBooks stop working. Additionally, there is a slight possibility that your Windows might stop responding, and the hardware devices might start to lag.

QuickBooks error 6147

What Causes QuickBooks Error 6147,0

There can be a few reasons why QuickBooks has failed to open your company file. They are:

  • The error can occur if your QuickBooks file is corrupted
  • QuickBooks error 6147, 0 can also happen if the file is damaged
  • In addition to that, you might face the issue if you are using a network drive to restore your data
  • in case you haven’t moved your company file to the QuickBooks installation file.
  • If the name of your QuickBooks company file has extended the character limit.
  • The Windows version you are using is outdated.

Also Read – Resolve QuickBooks Sync Manager Error

How To Resolve 6147,0 in QuickBooks?

If you are also encountering QuickBooks Error 6147,0, you might have to go through the five solutions mentioned below. You can get the error fixed within no time if you follow the steps explained later perfectly.

Solution 1: Rework On Damaged .ND and .TLG Files

Damaged QuickBooks .ND and .TLG files can be one of the major issues behind the error. Renaming and recreating these files might fix the error.

  • Open the QuickBooks Installation folder and look for the .ND and .TLG files.
  • These files must have the same name as your company files.
  • Once you see the files in the folder, right-click on them one by one and edit the file name.
  • You need to add .OLD at the end of each file’s name
  • After you are done with it, save the file and head to QuickBooks again.

Solution 2: Edit QuickBooks Company File Name

After you are done editing the installed files, and in case you fail to fix the error, you must now check the company files name and make the required edits.

  • Navigate the folder with the company file.
  • Look for the document you are working with and right-click on the same.
  • Now, from the list of available options, hit Rename.
  • Next, you need to make sure that the entire name of the file is within the maximum character limits, i.e., 64.
  • In case the name is more than the required character limit, then cut it short and make it meet the requirements.
  • Once done, open QuickBooks and try to open the file again.

Solution 3: Relocate the QuickBooks Company File

After editing the names of both the company as well as the installed file, if you are still not able to get to the company, check if the QuickBooks company file is in the wrong folder.

  • Head to QuickBooks and hit the F2 key on your keyboard.
  • The system will take you to the Product Information Window.
  • Now, you will see the file location under the File Information section. Write it down somewhere.
  • You now need to check if the file is still in the QuickBooks folder.
  • In case you do not find the file there, then look for it in the search box of Search Programs and Files.
  • You need to look for all the .qbw files and then right-click on the QuickBooks company file.
  • From the options, select File Location and move it to the QuickBooks folder.
  • Once done, you can now try to open the file in QuickBooks again.

Solution 4: Make Use Of The Rebuild Utility Tool

To fix QuickBooks Error 6147,0, you can also rebuild the data utility and verify it. You can do it with the following steps:

  • Open QuickBooks and head to the Menu.
  • There, look for the Utilities option and select that.
  • Now, click on the rebuild utility, and a window will pop up alarming you about the backup of the company file. Hit OK.
  • Finally, select OK again when the screen shows the message “QuickBooks is not responding.”
Solution 5: Install QuickBooks Tool Hub

QuickBooks Tool Hub is not just to fix Edit QuickBooks error 6147,0. This can come in handy many times. But for this error, download the tool hub to run the QuickBooks file doctor tool.

  • The very first step here is to install the QuickBooks Tool Hub.
  • Once you save it, open the file and install it. You will find the instructions on your screen.
  • Make sure that you agree to the terms and conditions to start the software.
  • Now, head to the Tools Hub and click on Company File Issues.
  • At last, run the QuickBooks File Doctor, and it will start looking for the damaged file and will repair it too.

Read more : QuickBooks Error 80070057

Closing Statement

There is a possibility that you might need to go through all the above-mentioned solutions to resolve QuickBooks error 6147,0. For some, it might just be the file name or its location. But the bright side is that none of these solutions take much time and, therefore, will fix the problem within no time.

If you are, however, still stuck and unable to open your QuickBooks Company File, you can always get in touch with our team of professionals at info@quickbooksupportnet.com and ask for help. Our team holds lots of experience in the field and has adequate knowledge. We will assist you in the best way possible and will help you until we resolve your QuickBooks error 6147,0. You can also ask our executive to help you with any other QuickBooks related issue.

FAQs on QuickBooks error 6147,0

1. What is the need to rename QuickBooks .ND and .TLG files?

.ND and .TLG files in QuickBooks that helps QB to look for a company file, even in a multi-user environment. Renaming and recreating these files can help you fix errors like QuickBooks error 6147,0.

2. What does an unrecoverable error means?

An unrecoverable errors are the one that are not pre-registered and can not be fixed in any way. These usually occur when you are executing a program or a code.

3. Why does unrecoverable error occur?

An unrecoverable error might occur due to missing QuickBooks update or an updated version of Windows.

4. How can you fix QuickBooks error 6147,0?

You can perform 5 solutions to resolve QuickBooks error 6147,0:

  • Reworking On Damaged .ND and .TLG Files
  • Editing QuickBooks Company File Name
  • Relocating the QuickBooks Company File
  • Making Use Of The Rebuild Utility Tool
  • Installing QuickBooks Tool Hub

QuickBooks error 1406 is a technical issue in the program that occurs when performing a crucial task in the QuickBooks application. A conflicting application running in the background is one of the most apparent reasons behind this error.

When the error code crops up on your screen, you may not be able to accomplish an ongoing task in the program. There are several issues that can trigger this error in the QuickBooks application. To get rid of the QuickBooks error 1406, you need to fix all these reasons carefully. Let’s start!

Dealing with QuickBooks Desktop error 1406? Avail of the relevant assistance by dialing our helpline number +1855-603-0490.

What Is QuickBooks Error Message 1406?

QuickBooks error 1406 can take place due to multi-faceted reasons. When the error occurs, you will see an error message on your screen that states – 

Error 1406: Could not write value to key. 

In addition to this, the error message also tells you to verify if you have sufficient access to the key. When the error occurs, it can hamper your work progress. Therefore, you need to perform the right troubleshooting at the right time. 

Also Read – Troubleshoot QuickBooks Error C-224

Why do I see Error Code 1406 in QuickBooks? 

QuickBooks error code 1406 can take place due to several reasons. Some of the main reasons are explained in the below-given list: 

  • Corruption in the Windows registry is one of the main reasons behind this error. 
  • Other applications interfering with the QuickBooks program can also evoke the error.
  • When you are not logged in as an admin in Windows. 
  • If the download location of QuickBooks is not accessible. 
  • When multiple users try to download QuickBooks at the same time. 
  • A corrupt Windows installer is also one of the apparent reasons behind the error. 

What Are The Symptoms of QuickBooks Error 1406? 

When the QuickBooks error code 1406 occurs, you can determine it by the below-given symptoms:  

  • An error message, including the error code 1406, will appear on your screen. 
  • The system crashes now and then when performing a task. 
  • Sluggish performance of the system on mouse or keyboard inputs. 
  • The system shuts down all of a sudden while working in QuickBooks.

Also Read – Fix QuickBooks Error Code -6177, 0

How To Fix QuickBooks Error 1406? 

After discussing the causes and symptoms of the error, we can finally move to the troubleshooting solutions to eliminate the error code 1406 in QuickBooks. Follow the below-given steps: 

Solution 1: Disable Your Antivirus or Security Program Temporarily

The antivirus or security application running in the background can interfere with running QuickBooks processes, and therefore, you need to disable them temporarily. You can enable it once the task giving the error is fixed. The error can take place when you update your antivirus application. If this method doesn’t fix the QuickBooks error 1406, try the next method. 

Solution 2: Utilize QuickBooks Install Diagnostic Tool 

QuickBooks install diagnostic tool is devised by Intuit to diagnose the issues related to the program installation and troubleshoot them. 

  • Download and QuickBooks Tool Hub from Intuit and save the file on your Desktop.
  • Next, perform the on-screen instructions carefully to complete the installation.
  • Agree to the terms and conditions, and you are not ready to put the tool to use. 
  • When in QuickBooks Tool Hub, navigate through the list of options and select Installation Issues.
  • Here, you will get the option to run the QuickBooks Install Diagnostic Tool.
  • Run it and wait for it to scan and repair the common installation issues related to the program. 
  • Once done, check if the QuickBooks error code 1406 is fixed or not.

If the error persists, try the third troubleshooting solution of this post.

Also Read – Fix QuickBooks Error Code 1646

Solution 3: Repair The Damaged Registry To Fix Error Code 1406

A damaged Windows registry is one of the main reasons behind this error. To repair it:

  • Go to the Process tab and then press on the windows + R tabs together and open the Run window. 
  • After that, type in “Regedit” in the Run window.
  • Next, hit the enter tab, and it will open the registry editor window.
  • Now move to the path: HKEY_LOCAL_MACHINE\SYSTEM\CurrentControlSet\services\iaSTOR registry key.
  • Now conclude this process by repairing the registry.

Following these steps carefully, you can troubleshoot QuickBooks error 1406.

Solution 4: Update Windows To The Latest Release

If none of the above-described solutions fix the error, update your Windows to the latest release by following the steps described underneath:

  • First, go to the Windows Update screen and enter the Update tab.
  • Thereafter, click on the Windows Update icon to proceed further.
  • Next, click the “Check for Updates” option to see if an update is available.
  • If available, double-click the Windows update icon, and it will launch the Windows update window.
  • Here, you can go for the required update and download them with a single click.
  • After that, restart your computer and install the downloaded update on your computer.
  • When the startup screen appears, launch QuickBooks and check the status of QuickBooks error 1406.

Also see – Resolve The QuickBooks Error Code 2107

Ending Words!

The solutions discussed in this post can help you troubleshoot the QuickBooks error 1406. If you are having trouble performing these solutions or need professional assistance in error resolution, our experts can help. You can reach us by sending us an email or chatting with us. With the help of one-on-one assistance, you can get rid of QuickBooks error code 1406 with ease.

Encountering the installation errors in QuickBooks is very common and frustrating also. Amongst one of them is QuickBooks Error 1646 that might pop up on the screen when you try to install QuickBooks if another version of it is already installed on the system. Whenever the error occurs, the following error message bumps on your computer screen stating:

“Error 1646 installing quickbooks.msi uninstallation of the update package is not supported”. 

QuickBooks Error 1646 (Message)

However, there are plenty of other factors that might generate this error. So, it is essential to figure out the problem asap. Have a quick overview of this post and go through all the relevant causes triggering the error and solutions to fix it. 

Finding it difficult to install QuickBooks due to Error 1646 and need quick help? Dial @1-855-603-0490 without wasting your time and talk to our specialists to have a one-to-one consultation.

Causes that might trigger QuickBooks Error 1646

Finding the root causes behind the occurrence of QuickBooks Error 1646 will help you resolve the issue. Have a glimpse at the below-listed points attentively, and check them out. 

  • You are using the QuickBooks version that is not in use any more.
  • There may be damage in the Microsoft Components.
  • Sometimes, it may trigger due to a corrupt QuickBooks installer.
  • You have already installed another version of QuickBooks Desktop on your device.

Also Read – Resolve The QuickBooks Error Code 2107

Few Indications To Identify QuickBooks Error 1646

Here, we have mentioned some of the symptoms so that users can easily witness the arrival of QuickBooks Error 1646.

  • You might experience that the company file might get locked.
  • Damage in the Microsoft C++ and MSXML components may be another symptom of the error.
  • The user is accessing the unsupported version of the operating system.
  • It might be possible that you won’t have enough permissions to install QuickBooks.
  • There is no space within the Windows temporary folder. 

Easy Guidelines to Eliminate QuickBooks Error Code 1646

After letting you know about the causes and symptoms of QuickBooks Error 1646, move further with the troubleshooting part. 

Procedure 1: Verify the QuickBooks Desktop Product Information

  • Start the QuickBooks Desktop software and press F2 key on your keyboard to view the product Information window.
  • As a result, you will see all the details associated with your QuickBooks product.
  • Here, you have to assure that you have written down all the essential details including License Number and the Product Key.
  • Moreover, also verify that you have copied the Product Year as well as the Product key.

Also Read – Troubleshoot the QuickBooks Unexpected Error C=184

Procedure 2: Uninstallation of QuickBooks Desktop Software

Uninstalling the QuickBooks isn’t a complicated task so follow the steps below to do the same.

  • Press the Windows key, look for the Control Panel and tap on it to open it on your device.
  • From the window of the Control Panel, hit the highlighted Programs and Features option. Otherwise, tap on the Uninstall program option.
  • Now, pick the QuickBooks Desktop version you currently use from the available options lists;.
  • Once found, select the Uninstall/Change option to proceed further.
  • Afterwards, opt for the Remove option and then select Next.

Procedure 3: Allot a New Name to the folder of QuickBooks Desktop

  • Once you have completed the uninstallation process, right-click on the QuickBooks folder. 
  • After that, you have to allot a new name to the QuickBooks folder say “.old” at the end of the file name.
  • Doing so, will help you identify the file from that one that is already created. 

Also Read – Fix QuickBooks error 3371 status code 11118

Procedure 4: Reinstallation of QuickBooks Desktop Software

  • Access the Control Panel and then move to Programs and Features.
  • You have to pick QuickBooks from the available list of options available.
  • Next, tap on Uninstall/Change and then click the Uninstall option.
  • After this, you have to wait patiently until the process is over.
  • Now, reinstall QuickBooks and enter the product key and license number correctly.
  • Move further with the installation procedure and complete the instructions coming on the screen. 
  • Finally, launch QuickBooks software and verify if the error recurs. 

Ending Words!!

So, here we wind up this post and give you the surety that this post will guide you in eliminating QuickBooks Error 1646. However, contact our experts if you have any trouble while installing the software. You can communicate with our highly-certified professional by sending an email. Otherwise, have a conversation with them through the live chat experts to acquire the simple solutions to the query.

QuickBooks error 2107 is related to the salaries or direct deposit payment mode in the program. The error often occurs when processing the employee’s salaries directly to their accounts. QuickBooks Desktop Payroll is definitely one of the most efficient accounting applications for keeping track of the employee’s payroll and making their payments. 

However, when the QuickBooks error code 2107 takes place, you may not be able to transfer employees’ salaries using the Direct Deposit method. Moreover, the error can also occur when downloading payroll in the system. To resolve this error, you need to explore its possible reasons. Let’s follow this post to gain insight into the error code 2107 in QuickBooks.

What is QuickBooks Error 2107?

QuickBooks error message 2107 can take place when making employee payments. When the error occurs, you will see a warning message with the below-given text:

Error 2107: QuickBooks has encountered a problem and needs to close. We are sorry for the inconvenience. 

QuickBooks Error 2107 (Message)

Improper installation of the QuickBooks Desktop application is one of the main reasons behind this error. In addition, there are some other possible reasons as well. Once the error is identified, you need to suppress the possible factors that can promote the error code 2107 by implementing the trial and error methods discussed in this post.

Also Read – Fix QuickBooks error 3371 status code 11118

What Are The Possible Reasons That Can Cause QuickBooks 2107?

The below-given list describes some of the main reasons behind the error code 2107 in QuickBooks:

  • When the installation of the QuickBooks application gets hindered or corrupted.
  • A virus attack on the system can also promote the error code 2107.
  • Accidental deletion of important QuickBooks-related files.
  • Corruption in the Windows registry due to erroneous changes within the products.
  • Make sure that you are not installing a corrupted version of QuickBooks.

Symptoms of QuickBooks Desktop Error 2107

After discussing the possible reasons behind the QuickBooks ERROR 2107, let’s discuss the symptoms of the QuickBooks error code 2107:

  • A warning message with the error code 2107 will show up on your screen. 
  • The system’s Window will respond sluggishly when provided with the mouse or keyboard inputs.
  • System freezes for a few seconds on the arrival of the error code 2107 in QuickBooks.
  • The system crashes every time you try to run QuickBooks on it.
  • Inappropriate settings of your personal Firewall or Internet security settings.

Also Read – Solve QuickBooks Error 80029c4a

How To Troubleshoot QuickBooks Error Message Code 2107?

The above-explained sections give crucial insight into the QuickBooks error 2107 and can also play a vital role in the error resolution. Now, we can move ahead and discuss some effective solutions to override the error code 2107:

Solution 1: Put System File Checker To Use Via Command Prompt

To utilize the system file, check using Command Prompt:

  • Click the Start button in the first place, and when the search box opens, type Command into this box.
  • Thereafter, click and hold the CTRL + Shift keys simultaneously.
  • When a permission box opens up on your screen, click the Enter button.
  • Next, you will see a black screen with a blinking cursor.
  • Type Sfc/scannow using the cursor and click the Enter button.
  • After completing this step, the System File Checker will start scanning for the QuickBooks error code 2107.
  • Now perform the on-screen instructions to accomplish the procedure.

Solution 2: Check If A New Windows Update Is Available

An outdated Windows OS is one of the strong reasons behind the arrival of the QuickBooks solution error 2107. Therefore, look for the latest Windows updates and download them if available. Below are the steps:

  • In the first place, hit the Start button to initiate the procedure.
  • Now type Update in the search area and click Enter key.
  • When in the Windows Update dialogue box, check if an update is available or not.
  • If available, choose the Install updates option and follow the on-screen prompts to finish the procedure.

Also Read – Fix QuickBooks Error Code -6177, 0

Solution 3: Repair Windows Registry Manually

A damaged Windows Registry is also one of the various reasons behind the QuickBooks fix error 2107. To repair it:

  • Tap the Start button, and in the search area, type Command.
  • Also, press the CTRL + Shift keys at the same time.
  • It will open a permission dialogue box wherein you need to hit the Enter key.
  • Next, you will see a black box with a blinking cursor wherein you need to type “Regedit” and click Enter button.
  • To move back to the registry editor, choose the error 2107 related key.
  • After that, click the Export button from within the File menu.
  • Now in the “Save in” list, choose a suitable folder to save the QuickBooks backup key. While saving, name your backup file in the file name box.
  • Make sure that the “Selected Branch” option is chosen in the Export Range box.
  • After confirming it, save the files.
  • In the end, you need to save the file with a .reg file domain and create a backup of the QuickBooks-related register entry.

Ending Words! 

After executing the steps discussed in this post, you can get rid of the QuickBooks error 2107 with the utmost ease. However, if you are stuck with a complex step or procedure and need help, get in touch with us. You may dial our helpline number or send us an email with the error description to get a callback.

QuickBooks is a powerful accounting tool that helps businesses and entrepreneurs to handle their business accounting processes efficiently. In addition, it also facilitates you to manage your employee’s payroll and tax filing smoothly. QuickBooks Desktop payroll is a subscription-based service that lets you harvest its incredible advantages in your payroll management. However, when updating QuickBooks payroll, you can get multiple instances of errors due to a myriad of possible reasons. Here, in this post, you can get to know some common issues related to the QuickBooks payroll Update Error service along with their troubleshooting solutions. Let’s start!

What Are the Possible Reasons Behind QuickBooks Desktop Payroll Error?

When using the QuickBooks payroll service, you can experience several issues. Below are some of the apparent reasons that can bring forth payroll errors in the QuickBooks application:

  • Incorrect or wrong billing information often leads to the update error in QuickBooks Payroll.
  • A possible corruption or damage in the QuickBooks company file can also bring forth the update error.
  • Make sure that your QuickBooks software is registered, otherwise, you are prone to receive an error when updating the QuickBooks payroll service.
  • When the tax table file is damaged in the payroll folder.

Common Error Codes Related to the QuickBooks Payroll Update Error

When updating QuickBooks payroll, you can get an error message on your screen abruptly. The error message also contains an error code that tells many things about the error, such as nature and possible reasons. Below are some of the main errors related to the QuickBooks payroll update:

1: 12000 Error Code Series

This error code series incorporates several error codes that depict the almost similar nature of the QuickBooks payroll update error. These errors mainly occur when QuickBooks fail to connect to the Internet. The list includes QuickBooks update errors 12007, 12009, 12029, 12002, 12031 and several others.

2: QuickBooks Error 15241

QuickBooks payroll update error 15241 takes place due to misconfigured Firewall settings, system date and time settings, or the Internet Explorer security settings.

3: QuickBooks Error 12152

An erroneous Internet setting is one of the main reasons behind the QuickBooks error 12152. When QuickBooks takes too long to connect to the Internet, it fails to download a new update.

4: QuickBooks Error PS034

QuickBooks Error PS034 can crop up when downloading the latest updates for QuickBooks payroll service. Invalid tax table, wrong billing information or a payroll file are some of the primary reasons behind this error.

5: QuickBooks Error PS038

When QuickBooks payroll error PS038 occurs, it gives an error message on your screen that reads – “update the payroll because it was last updated in an older version with which some of the files can’t be opened.” There can be several possible reasons that can evoke the error when performing a QuickBooks payroll service update.

How To Resolve the Common QuickBooks Payroll Update Errors?

Now that you are aware of the common updates error codes related to the QuickBooks Payroll service, performing the below-given solutions can resolve these issues:

Solution 1: Repair Your QuickBooks Software

  • First of all, open the task manager and terminate all the processes related to the QuickBooks application.
  • Thereafter, take a backup of your crucial data that can help you restore the files in case of any damage during the data repair.
  • Moving ahead, click on all the applications with .Qb extension.
  • Here, you must select the End Task option and it will close all the apps.
  • Now start the repair by following the below-given steps:
  • Press the Windows + E button simultaneously on your keyboard. Windows 8 users can click on the Computer Tab.
  • Next, click on Uninstall or change program option.
  • Once done, select the QuickBooks option and hit on either Uninstall/Change option.
  • After that, open the QuickBooks installation window and click on Next.
  • Proceeding further, click on the Repair radio button.
  • In the end, click on the Finish option and restart your system.

Solution 2: Modify Your Internet Explorer Settings

Internet Explorer is the best-supported Internet browser by QuickBooks software. When updating the QuickBooks program, you need to make sure that the Internet Options are configured correctly to support the process:

  • First thing first, start your computer.
  • Next, open your Internet Explorer and click on the gear icon.
  • Now select Internet options.
  • Click on the Security tab and then select Trusted sites from within the same menu.
  • Proceeding further, click the Site option and add the following websites in the specified area.
  • For the US version, add *quickbooks.com and *intuit.com.
  • If you are using the Canadian version of the program, then add *quickbooks.ca and *intuit.ca.
  • Once entering your QB version, select Close >> Apply >> OK.

Solution 3: Download QuickBooks Updates Manually

Below are the steps for users who are running their QuickBooks Desktop application on Windows 10:

  • Go to the Taskbar and then right-click on the “This PC” option and select the Manage tab.
  • When the new screen opens, click on Services & Applications option.
  • Now locate and double-click on the service windows, which are located on the right side of the Services & Applications window.
  • Moving ahead, highlight the QuickBooks FCS option and then double click on it.
  • Thereafter, go to the General tab and then click on the start-up Type option’s drop-down arrow and choose the Manual tab option.
  • Once done, select Apply.
  • Next, click on the Start button and then hot OK.
  • Open the QuickBooks application and check if the new updates are available.
  • If yes, download it and try to update Payroll Tax Table as well.

Read Also : QuickBooks error PS107

Other Considerations to Keep in Mind When Updating QuickBooks Payroll Service

The above-given solutions can resolve multi-faceted issues related to the QuickBooks program. However, you also need to stick a a few crucial points to prevent update errors in the QuickBooks payroll service:

  • Make sure that your device is connected to a strong Internet connection.
  • Configure your Internet security application or Firewall settings so that it does not interfere with an ongoing update process.
  • Check if your network time-out is not preventing the download of a QuickBooks update.
  • Internet Explorer is the supported browser from the QuickBooks program; therefore, it must be your default browser.
  • Also, verify if your SSL settings are configured correctly.

In A Nutshell

This post elaborates on some of the most common issues related to the QuickBooks Desktop Payroll update procedure. Besides, it also describes some of the most efficient techniques to get rid of the update error in the QuickBooks Desktop payroll service. If the error continues, even after performing these solutions, get in touch with the adept QB professionals.

QuickBooks is a man-made accounting software, and it is very common for it to encounter some technical glitches every now and then. One such problem is QuickBooks Error 1722. Although a user encounters this pop-up because of incorrect coding of the software, you can still fix it. These problems are usually in Microsoft.Net Framework. You might face a hindrance if the framework is corrupted, missing, or outdated.

This post is for all the QuickBooks users who have been facing this error code. Here, we will discuss the symptoms, the main reasons behind this, and the troubleshooting solutions for the same. Let us get into it.

Symptoms Of QuickBooks Error 1722

Hereafter are a few symptoms that you must look for.

  • If your active windows program crashes frequently.
  • Your PC crashes a lot while you are working on it.
  • The speed of your Windows gets slow.
  • You receive a QuickBooks error 1722 pop-up.
  • Hardware devices respond late.
  • Your PC starts to lag for a couple of seconds every now and then.
  • The error pops up on your screen when opening or closing the computer.
  • Error 1722 appears when you install Windows operating system.
  • The issue displays when performing a program installation.

What Causes QuickBooks Error 1722?

Before we get into the solutions, it is important to understand their source. Here is a complete list of reasons that can be behind this error code.

  • Incomplete or damaged installation of QuickBooks
  • Downloading a damaged or corrupted file
  • Working on corrupted Windows
  • Infected system from malware or virus
  • Missing QuickBooks files
  • Due to a run-time error

Troubleshooting Solutions For QuickBooks Error 1722

Now that you know why you are facing QuickBooks Error 1722 let us understand how anyone can fix it.

Troubleshoot 1: Restore Your System

By performing a system restore, you can get back all the files that have been deleted or are missing.

  • Open your desktop and head to the Start menu option.
  • Here, in the search bar, type System Restore and hit the Enter button on your keyboard.
  • A new window will pop up on your screen.
  • Thereafter, from the options available on the menu bar, go to System Protection.
  • Under this tab, you need to locate the System Restore option. Click on that.
  • Next, you need to put in your login credentials to continue the process.
  • Eventually, you will need to choose your Restore Point.
  • Finally, complete the restoration process and reboot your system.

Troubleshoot 2: Run QuickBooks Install Diagnostic Tool

To run QuickBooks Install Diagnostic Tool, you first need to download and install QuickBooks Tool Hub. Hereafter, you will find the steps you need to resolve QuickBooks error 1722.

  • Firstly, open the QuickBooks Tool Hub from the Downloads folder on your computer.
  • Remember to open the .exe file from the folder.
  • Now, follow the steps on your screen to install the software.
  • Finally, agree to the terms and conditions, and your software will be ready to use.
  • Here, on the homepage, you will find various options on the left side.
  • Click on the Installation Issue window and thereafter locate the QuickBooks Install Diagnostic Tool.
  • Lastly, let the software scan issues for you, and if any are found, click n repair to put it to rights.

You can find the Tools Hub download file on our web browser.

Troubleshoot 3: Use A Repair Tool

If neither of the aforementioned solutions works for you, you need to run a repair tool.

  • Initially, locate the folder where you have all your QuickBooks files.
  • Once you find it, click on the same to open it.
  • Thereafter, go to the Search option and select the file.
  • Here, you will see the Scan button; hit that.
  • After that, go to the Company tab and head to Customers.
  • In the following window, you will find the details of all your clients.
  • Furthermore, go to the Vendors option and choose Employee from the available items.
  • Finally, hit the Repair button and then on Start.
  • Give it a few minutes and once the repair is over, restart your PC.

You can now check if you have overcome QuickBooks error 1722. 

Read more : Quickbooks error 1712

Troubleshoot 4: Run Windows File Check

Running a Windows File Check can help in overcoming any problems with Windows.

  • To initiate the process, run the Command Prompt tab on your desktop.
  • Ensure that you go ahead with this process as the admin.
  • Thereafter, in the given space, cmd, type SFC/Scan now, and hit the Enter key.
  • This eventually will start the scan, and you will have the problem resolved.

Troubleshoot 5: Fix Microsoft.Net Framework

This is one of the major causes of this QuickBooks error code, and here is how you can fix it.

  • Go to the Start menu and locate the Control Panel.
  • Click on that and let the tab open up on your screen.
  • Now, from the available options, go to Programs and look for Turn Windows Feature On or Off.
  • Thereafter, mark tick in front of .Net Framework 3.5 and hit OK.
  • Finally, reboot your desktop and try running QuickBooks again.

Read Also – Fix QuickBooks Error Code H202

Troubleshoot 6: Update QuickBooks Desktop

There is a chance that you are using an outdated QuickBooks version, and this is what is causing the problem. Go along these steps to download the latest version:

  • Head to the QuickBooks Desktop from the Start menu.
  • Remember you need to perform this step as admin.
  • Once the application is open, go to the Help tab.
  • Thereafter, a drop-down list will appear before you. Click on Update QuickBooks.
  • Eventually, from the next window, hit the Update Now option and then select Get Updates.
  • Wait for a few minutes while the update is downloading.
  • Furthermore, you need to follow the instructions and agree to the terms and conditions to install the application.
  • Finally, click on Start, and this will do the work for you.

Final Statement

This blog included a step-by-step guide to fix QuickBooks error code 1722. Here, you must have found its symptoms, causes, and solutions. However, if you have more QuickBooks-related queries, get in touch with our experts via email at info@quickbooksupportnet.com. Our experts will assist you with the same.

Posts pagination