You might get certain error codes and technical glitches while working on the QuickBooks Desktop Software. While you are installing, updating, or downloading the payroll update, you might get the QuickBooks error 15240. When this error occurs, the update you are trying to download for the program gets obstructed. It is imperative to keep QuickBooks Desktop payroll and its services up to date.
One of the most common factors behind error 15240 is a privacy configuration or a malfunction in the Firewall settings. Improper data and several modifications in the computer are other factors adding to this particular error. Here, we shall cover all the possible aspects of the error, including the reasons, outcomes, and feasible ways of fixing the error.
Causes Behind the QuickBooks Error 15240
QuickBooks error 15240 can come into the picture due to various reasons. Some of the possible reasons are apparent, whereas some are minor reasons that can give rise to a bigger havoc. However, addressing the primary reasons behind the error is crucial as it can guide in taking the right course of action for the error resolution. A few of these reasons are:
- A change in the QuickBooks programming
- Malware or Virus on the QuickBooks documentation file
- Erroneous erasing of QuickBooks records
- Wrong or improper Internet Explorer Setting
- Incorrect date and time settings
- Misconfigured Firewall settings
Troubleshooting methods for QuickBooks error 15240
After knowing the possible reasons behind the error, you can think straight and implement the solutions to fix those causes. Here, we have explained some of the best solutions that can help in resolving the QuickBooks update error 15240 with the utmost ease:
Solution 1: Run QuickBooks with admin rights
If you want to make a crucial change on your device, such as updating an application, it is crucial that you have logged into that application with admin rights. Having full admin privileges lets you complete a task without getting an error due to insufficient permissions. The steps are stated below:
- Firstly, close the QuickBooks Desktop.
- In the next step, you need to make a right-click on the QuickBooks Desktop icon.
- Followed by that, select Run as an administrator.
- Lastly, click Yes to allow administrator permissions.
Solution 2: Verify Date and Time Settings
As we have discussed, some minor factors can also evoke the QuickBooks error code 15240, such as the incorrect date and time settings of your device. It can also hamper your Internet connection, so you can fix it by applying the following steps:
- Firstly, open up the run window by pressing the Windows+R keys from the keyboard.
- Thereafter, advance to the Control Panel as the next step of the procedure.
- Next, you need to click on Clock and Region and then go to Date and Time.
- Consequently, change the date and time.
- Finally, save the changes and click on OK.
Solution 3: Authorize Windows Permissions to QuickBooks Folders
If the QuickBooks error 15240 is getting adamant, then you need to authorize Windows permissions to QuickBooks folders to accomplish the task. You need to perform a few simple steps here, as listed below:
- Firstly, close the QuickBooks Desktop.
- Furthermore, go to C:\Program Files(x86).
- Now, access the Intuit folder, right-click on it, and then choose Properties.
- After that, after selecting the Security tab, choose the Advanced option.
- Consequently, ensure that the user group is the owner of the folder.
- Thereafter, you need to shut down the QuickBooks application and then find a link to the program files.
- Subsequently, after locating the QuickBooks file folder, you need to right-click on the Properties option.
- Furthermore, check the Security and the Advanced option.
- Finally, you need to verify the owner’s current file folder, complete the task, and then check if the problem has been taken care of or not.
Solution 4: Verify the Settings of the Internet Explorer
Internet Explorer is the favored Internet Browser by Intuit, so you can make it your default browser while downloading the updated. Besides, make sure that the settings are in favor of the update process and are not interfering with it:
- First, go to the Toll tab, click on the Internet option, and then choose Advanced.
- Thereafter, verify, and then under the security option, mark the USE SSL 3.0 and USE SSL 2.0.
- Finally, choose Apply and finally hit the OK button to end this task.
Solution 5: Check The Third-Party Firewall
Your third-party Firewall can also interfere with an ongoing update process, giving an error message abruptly on your screen. Therefore, you need to make sure that the Firewall is not preventing the download process. You can keep the QuickBooks error 15240 at bay by following these steps:
- First things first, you need to check with the developer of your third-party Firewall for directions on how you can adjust the settings and permit QuickBooks to download and install the updates.
- Also, check and verify that the following files are allowed access to your Firewall:
- qbw32.exe.
- qbupdate.exe.
- Lastly, you need to also verify that ports 80 and port 443 are not disabled.
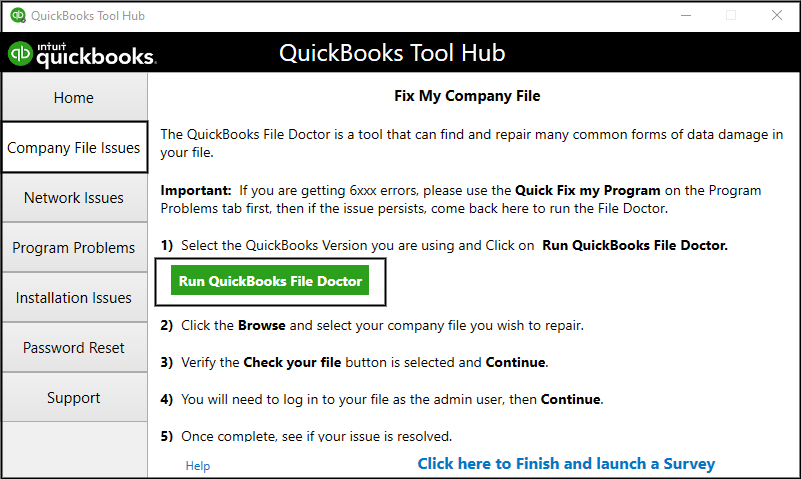
Solution 6: Reinstall QuickBooks using the Clean Install Tool
If the error is too stubborn to get fixed by the previous solutions, you need to re-install the QuickBooks application. When you do it with the Clean Install Tool, it installs a fresh copy of the QuickBooks application on your device. Below are the steps to run this tool for the error resolution:
- In the first place, open a Run window by pressing the Windows and R keys together.
- After that, fill in the appwizz.cpl and then click on OK.
- Subsequently, go to the Programs and Features section and select QuickBooks and Uninstall.
- Thereafter, pick the Yes Tab, and after that, click Next and then select Remove.
- Subsequently, QuickBooks may take some time to uninstall from the QuickBooks Desktop.
Wrapping Up!
Although we have cited all the possible solutions for troubleshooting QuickBooks Error 15240, you might sometimes encounter a situation where you might need professional help. In such a situation, our trained QuickBooks professionals can help you with the relevant solutions. When you connect with us using our call or chat support channels, they look into the matter, identify the possible reasons, and implement the best solutions to eliminate the QuickBooks error code 15240.
FAQ's
Q1. How can I fix the QuickBooks server not running issue?
Ans. In order to resolve the QuickBooks server not running issue, you should follow the steps below:
- Firstly, ensure that you are using the most recent version of QuickBooks. If your QuickBooks is not updated to the latest version, then you need to update the QuickBooks and try again after some time
- Consequently, If that is not fruitful, you should try resetting the QuickBooks Database Server Manager
- Finally, when nothing works, you might want to repair the Windows Registry. Subsequently, You should be able to resolve this error by fixing the “QuickBooks server not running” issue
Q2. How can I condense the QuickBooks files?
Ans. You should follow the below-given steps to condense the QuickBooks files:
- Firstly, Go to the file menu and then choose Utilities and then tap on the Condense data option
- Accordingly, follow the instructions on the screen and you may select the options that you require.
- Nonetheless, Should you need assistance, you may click on the Help option
- Thereafter, select the Begin Condense option. Subsequently, when the Condense option starts,
- QuickBooks will automatically make a backup and will archive the file.
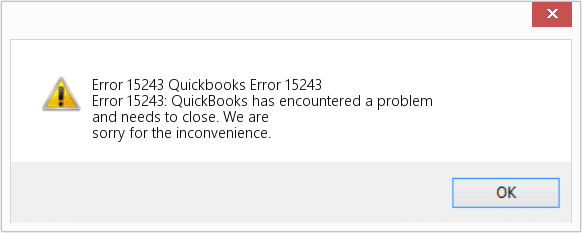
Q3. What is the error message that you get for the QuickBooks Error 15240?
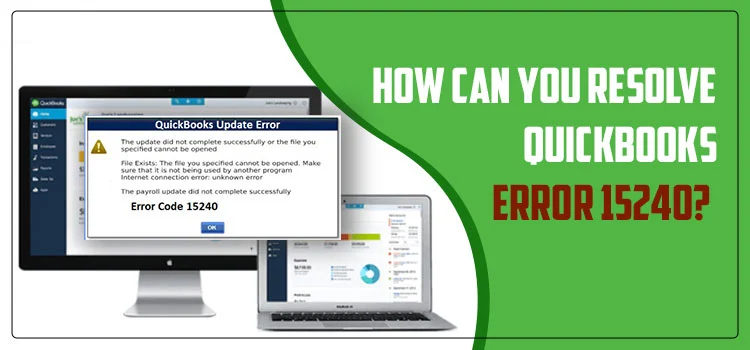
Ans. The following two error messages are displayed on the screen when the QuickBooks Payroll Error 15240 occurs:
- QuickBooks Error 15240: HRESULT XXXXX the payroll update failed to complete successfully
QuickBooks Error - 15240: HRESULT XXXXX the QuickBooks updates failed to complete successfully
Q4. Which are the Microsoft Windows Operating systems that can experience the QuickBooks Error 15240?
Ans. The QuickBooks Payroll Update Error 15240 can occur in specific Windows operating systems such as:
- Windows ME
- Windows 8
- Windows XP
- Windows 7
- Windows 2000
- Windows Vista