No matter whether you are running a small or a large scale business, reconciliation is an important part of the organization. QuickBooks Online also allows its users to reconcile their bank accounts to tally the books of accounts accurately. As a result, it will help you give a clear picture of the company’s overall status and help identify if there are any discrepancies while preparing the account. But, sometimes, users add the transaction accidentally, so users need to undo a reconciliation in QuickBooks Online.
If you are also struggling to undo a bank reconciliation in QBO, then this detailed post is key. In this post, we have elaborated on the proper process to undo the transactions to manage the accounts properly.
Are you facing issues while trying to undo a reconciliation in QuickBooks Online and need an expert’s help? Call us at 1-855-603-0490 and talk to our highly-certified QB professionals to find a way to figure out the issue quickly.
What Do You Understand By Undo a Reconciliation in QuickBooks Online?
The users must mainly undo a reconciliation in QuickBooks Online to delete or unreconcile a transaction from the entire reconciliation. Moreover, undoing a reconciliation is also done when you have accidentally added the transaction. Apart from this, there are multiple reasons to undo, listed below.
- In case you have added the payment for a wrong date in the books of accounts in QuickBooks Online.
- You also need to undo the transaction when it isn’t checked off accurately and cleared off.
- Also, it helps to identify different banking errors.
- Additionally, it also helps to avoid fraud committed by vendors, customers, and employees.
Detailed Steps to Undo a client’s reconciliation in QuickBooks Online Accountant
Before you further undo a client’s reconciliation in QuickBooks Online Accountant, you first need to download any attachment linked to the reconciliation. However, if you undo the reconciliation, it will remove all the current attachments. Furthermore, go through the points below to remember to accomplish the process.
- Whenever you try to undo the older reconciliation, it will automatically undo all the transactions under it. For instance, if May is presently going and you undo the transactions of January, you also have to undo the transactions of Feb, March, and April along with it, which may generate certain issues. So, in that scenario, you need to begin with the latest reconciliation and work accordingly.
- Another thing you must know is that undo reconciliation won’t support manually reconciled transactions. Apart from this, the transactions that stay in the register for the dates will be changed eventually. To tally those transactions, you must review the transaction audit history.
Steps to Perform while you’re in the Data File:
- In the beginning, browse to the Accounting menu and choose the Reconcile tab.
- Afterwards, opt for the History by Account and pick the account you wish to reconcile with. Along with this, you must also choose the date range by clicking on the drop-down menu.
- Thereon, you must look for the reconciliation from the list of options available.
- Next, tap the View Report to launch the Reconciliation Report on your device.
- You are supposed to search whether there are any discrepancies and modifications that your client wishes to make.
- Once you are all set, hit the drop-down menu from the Action Column and opt for the Undo button.
- Finally, click the Yes button followed by Undo for the confirmation.
What should I do to Undo Bank Reconciliation In QuickBooks Online?
Go through the following stepwise instructions to undo bank reconciliation in QuickBooks Online.
First Scenario: Undo Reconciliation By Sending an Invitation To Your Accountant
- Initially, tap on the Gear icon from the screen’s upper-right corner and choose the highlighted Manage Users option.
- Afterwards, navigate to the Accounting Firms tab and hit the Invite button to proceed further.
- Thereon, you must accurately include the accountant’s details in the respective text fields.
- You should hit the Save button and allow the accountant to undo the reconciliation.
Second Scenario: Undo the Reconciled Transactions One at a Time
You can also manually undo the reconciled transactions one at a time in QuickBooks Online. For that, you must apply the steps illustrated below to get the desired result.
- The first and foremost step is clicking the Accounting menu, followed by Charts of Accounts.
- You are supposed to search for the account and then opt for the View Register option.
- After this, to focus on the task, you must apply a filter to the register to add the transactions of the last 60 days.
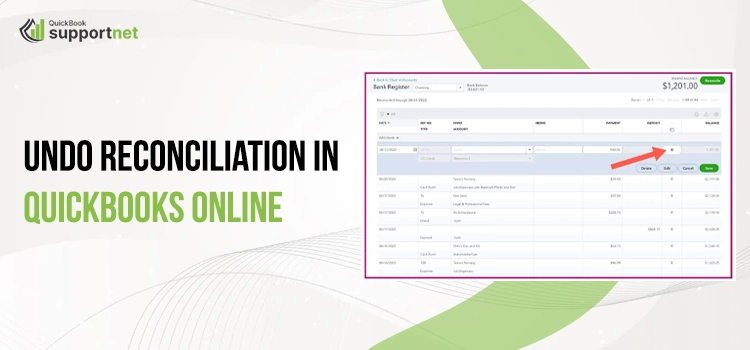
- Thereon, you must go through the Check column, and if you notice that the transactions are reconciled, it will be reflected as the letter “R.”
- Furthermore, choose the box, and you must keep making the changes until that box is blank. You will notice that doing so will delete all the transactions from the reconciliation.
- At last, hit the Save button and then exit from the register.
Third Scenario: Process to Unreconcile in QuickBooks Online Version
- First of all, choose the highlighted Registers option from the Banking menu.
- Afterwards, opt for the account by hitting the Register Name menu list.
- You are supposed to choose the transaction that you want to unreconciled. Later on, delete the “R” letter from the top of the transaction to modify the status as Unreconciled.
- Note:- For instance, if you wish to reconcile every transaction for a specific period, you must print a list of transactions through the reconcile alternative from the Banking menu.
What Should be Done to Undo Reconciliation in QuickBooks Online Accountant Version?
This blog’s section describes the complete procedure to undo reconciliation in the QuickBooks Online Accountant version.
- The users must move to the Gear icon from the bottom right corner of the screen.
- You must choose the highlighted Reconcile option located below the Tools option.
- Now, you are supposed to opt for the bank account, and then you will get the Undo button beside the Auto Adjustment column.
- Following this, go with the Undo button, and you will receive the message on the screen by clicking the OK button.
- In the end, you will see the success screen and hit the OK button again to finish the procedure.
How Can I Undo or Delete a Reconciliation in QuickBooks Online?
Before you undo or delete a reconciliation in QuickBooks Online, you must know that you can only reconcile one transaction at a time. However, visit your accountant to undo the entire reconciliation if you wish to start from scratch.
Stage 1: Thoroughly Review the Account
Before you try to make any changes, confirm that you are making the right changes as required. If you are unaware of the changes, consult your accountant first. Thereon, you must review the opening, beginning, and ending balances for the account holding that particular transaction.
Stage 2: Unreconciliation of the Transaction:-
- In the first place, move to the Transactions menu > Charts of Accounts.
- You are supposed to look for the account that is carrying the transaction and hit the Account History.
- Thereon, go with the transaction you wish to unreconcile to expand the view.
- Afterwards, thoroughly review the check column. If you observe that the transaction is reconciled, it will be displayed with the letter “R”.
- Later on, select the checkbox, and it will eventually change the letter. You have to keep clicking the box until it becomes empty. However, it will erase the transaction from the reconciliation.
- Furthermore, hit the save button and exit from the account history.
Stage 3: Verify the account is accurate:-
Now that you have performed all the above steps, your accounts will be balanced and accurate. However, if you have made adjustments to the previous reconciliation or are having issues with the reconciliation, you must accept the accountant’s help.
Summarizing the Above!!
You can now easily undo a reconciliation in QuickBooks Online and remove the transactions that are mistakenly added to books of accounts. If you are having any trouble while implementing the steps, you can consult with our QB professionals for better results.
Frequently Asked Questions (FAQ’s)
Question 1: What steps are included to resolve issues with previous reconciliation in QBO?
Ans. To fix the issues with the previous reconciliation in QBO, you must use the steps below.
1. Initially, switch to Transactions > Bank transactions and pick what you wish to reconcile again.
2. After this, pick the Go option next to the Bank Register and then hit the Reconcile option.
3. You must insert the details from your statement within the Ending Balance field and Ending Date Field.
4. Go through the transactions and then hit the Finish Now button.
Question 2: How Can I Unreconcile an entire month in QBO?
Ans. To unreconcile an entire month, launch the reconciliation report for the month you wish to undo the transaction. After this, move to the Actions drop-down menu and opt for the Unreconcile All Transactions from This Report option.
Question 3: What’s the process to clean up unreconciled transactions in QBO?
Ans. To start the process, switch to the QuickBooks File menu and then hit Switch to Single User Mode > Accountant menu > Batch Delete/Void Transaction. After this, pick the transactions that you wish to remove from the Available Transactions List. End the process by hitting the Review & Delete option.
Question 4: What does the letter C and R signify in QuickBooks Online?
Ans. The letter C mainly reflects cleared and is used while accepting a green match in the Review screen. Whereas, the letter R indicates Reconciled which means that you are done with the reconciliation part that consists of the cleared item.
Question 5: Who can undo the reconciliation within the QB application?
Ans. You can only unreconcile the transaction one at a time. However, if you wish to remove the entire transaction, you must connect with the accountant.