Although QuickBooks is known for its functionalities for seamless accounting, it also offers advanced payroll features with direct deposit to ensure your employees are paid on time. You can track time, allowing you to create payroll reports and plans such as pensions. Keeping payroll services up to date is essential to ensure accurate calculation of recent tax tables and tax rates. However, you may fail to update the features and encounter QuickBooks error code 15276 while updating the QB program.

This error is one of the 15XXX series, which varies from a larger number discussed below in this article. This blog discusses its possible causes and steps to fix the problem immediately. Let’s get started and make sure QB and payroll updates are seamless.
Table of Contents
QuickBooks Error Code 15276: An Overview
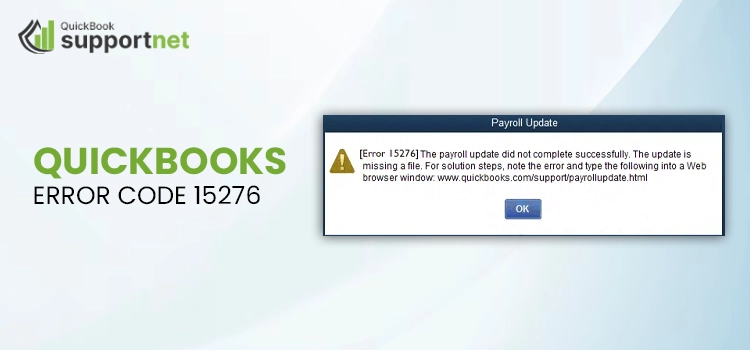
QuickBooks error 15276 is one of the 15XXX series that appears on your screen due to failure to update payroll services. The error suddenly comes on your screen with a warning message,
“[Error: 15XXX] The payroll update did not complete successfully. The update is missing a file.”
When updating payroll services, the error varies across multiple codes belonging to the same series, such as 15XXX. Let’s review the possible error codes you may get
| QuickBooks error 15102 | QuickBooks error 15103 | QuickBooks error 15104 |
| QuickBooks error 15105 | QuickBooks error 15106 | QuickBooks error 15107 |
| QuickBooks error 15212 | QuickBooks error 15215 | QuickBooks error 15222 |
| QuickBooks error 15223 | QuickBooks error 15240 | QuickBooks error 15241 |
| QuickBooks error 15270 | QuickBooks error 15271 | QuickBooks error 15276 |
What Triggers QB Error 15276 When Updating Payroll?
Failure to update payroll services in QuickBooks Desktop can occur due to several reasons, such as the error code 15276 on your screen. This section discusses the possible reasons behind the interruption. Let’s look at them one by one:
- General internet connection or computer performance issues
- Permissions not properly set for updating payroll services
- General internet connection or poor computer performance.
- Shared download drives may not be mapped correctly
- Missing a file or component for payroll updates may also cause problems
- There may be some damage to Windows files
- Incorrect firewall settings often block QuickBooks or related processes
- QuickBooks File Copy Service (FCS) may be disabled
- Your QuickBooks is unable to verify digital signatures
- Possible damage or corruption to your QB program files
Instant Ways to Troubleshoot Payroll Update Error 15276 in QuickBooks
QuickBooks error code 15276 when updating payroll services often fails due to insufficient permissions, disabled QB FCS, and other reasons we have discussed above. To resolve the issue and get back to updating payroll, consider following the step-by-step instructions below:
1. Download the Updates as an administrator
Not having sufficient permissions often hinders payroll updates and can also trigger unknown errors like QuickBooks error code 15276. Let’s run the update with all admin rights:
- Close the company file and QuickBooks Desktop.
- Find the QB Desktop icon and right-click on it. Then, select Run as Administrator.
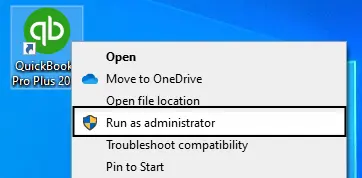
- Click OK when you see a prompt on your screen saying, “Do you want to allow this program to make changes to your computer?“
- Once done, try again to update your payroll services.
2. Map a Shared Download Drive in Windows
Shared download drive lets you share your data over the network and work in a convenient way. Meanwhile, if the network drive is not mapped, administrators or power users will not be able to share or access the data.
Follow the steps below to map the shared download drive in Windows and try again to update payroll services:
- Press the Windows logo key to launch the Windows Start menu.
- Type This PC and hit the Enter key.
- Click on More (…) and select Map network drive.
| Note: If you don’t see the Map network drive, right-click on This PC, then choose Map network drive. |
- Select any drive letter in Drive.
- You can either:
- enter the full path of the folder that you are mapping or
- Just enter the path of the computer on which the file is hosted and select Browse to find the folder
- Choose Reconnect at sign-in to keep your drive mapped every time you sing in to your system.
- Click Finish.
3. Enable the QuickBooks File Copy Service
Intuit File Copy Services (FCS) is one of the crucial components in QuickBooks that helps start and carry out QB Desktop updates. Proceed with the below steps to enable the QuickBooks File Copy Service:
- Launch the Run window by pressing the Windows+R keys together.
- In the Run command, type COMPMGMT.MSC and hit on OK.
- The Computer Management window will open on your screen.
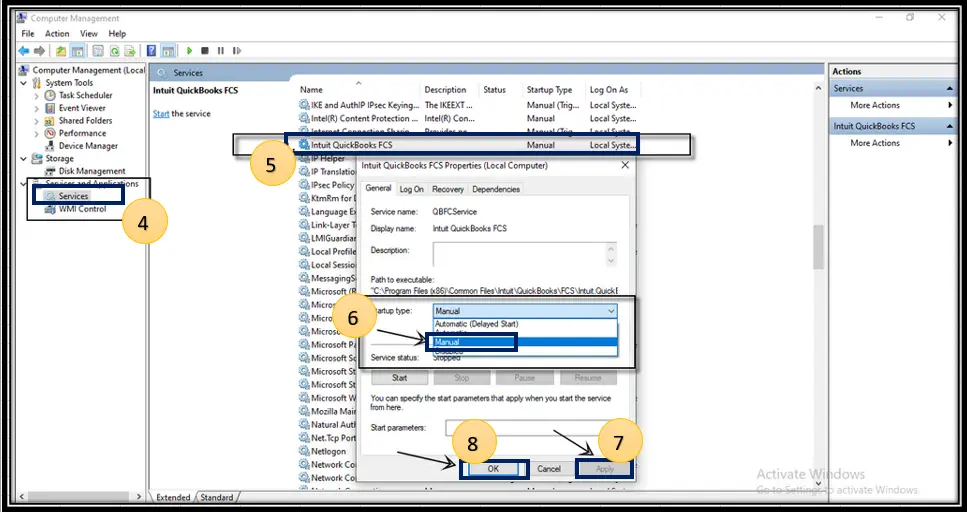
- Click on Services and Applications, then select Services.
- Scroll down until you see Intuit QuickBooks FCS and double-click on it.
- Choose Startup type and tap on Manual.
- Finally, click Apply.
Once done, you will need to re-validate the payroll’s service key to refresh the connection.
Let’s learn how:
- In QuickBooks, select Employees at the top menu bar.
- Click on My Payroll Service.
- Select Activate Service Key.
- In the Service Keys window, highlight the current payroll and click Edit.
- Choose Next until finish displays on your screen.

4. Add QuickBooks Desktop Security Certificate manually
The QuickBooks Desktop security certificate is crucial as it holds all the information that protects or establishes secure network connections. If QuickBooks fails to verify the certificate when downloading the payroll updates, it may trigger QuickBooks error code 15276. Below are the steps to add a Security Certificate in QuickBooks Desktop:
a. Locate the file
- Right-click on QuickBooks Desktop icon and select Properties.
- Go to the Shortcut tab, choose Open File Location and then click OK.
| Note: You can also access this location manually in the QuickBooks program file folder. You just need to eeplace the Xs with the year of your QuickBooks software as shown below. |
- Pro, Premier, or Premier Accountant: C:\Program Files (x86)\Intuit\QuickBooks 20XX
- Enterprise or Enterprise Accountant: C:\Program Files (x86)\Intuit\QuickBooks Enterprise Solutions XX.0
b. Install the certificate
- In the prompted File Location window, find the Application file (.exe file), then right-click and choose Properties. This will open the Application file Properties window.
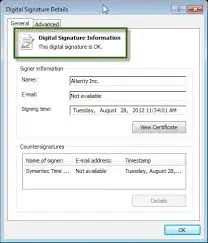
- Go to the Digital Signature tab and select one of the entries in the Signature list field. Now, click on Details.
- Choose View Certificate in the Digital Signature Details window. This will open the Certificate window.
- Navigate to the General tab and select Install Certificate.
- On the Certificate Import Wizard welcome screen, you need to make sure the Store Location is on Current User. Then, click on Next.
- In the prompted Certificate Store window, Windows already selected the certificate store based on the type of certificate.
- Choose Next and then Finish.
- It will prompt you to say the import was successful; select OK.
| Note: Consider following the steps to get the rest of the security certificates on the digital signature list. |
5. Repair the Windows Files
The Windows System File Checker (SFC) is a tool built into all modern versions of Windows. This tool allows you to fix corrupted system files in Windows. It can be run with administrator privileges both from within Windows and by using Windows recovery media.
- Press the Windows+X keys on your computer.
- From the drop-down menu, choose Command Prompt (Admin).
| Note: You can also run the System File Checker (SFC) from Windows PowerShell (Admin). |
- Click Yes on the User Account Control (UAC) prompt.
- Type SFC /scannow in the command prompt window and hit Enter.
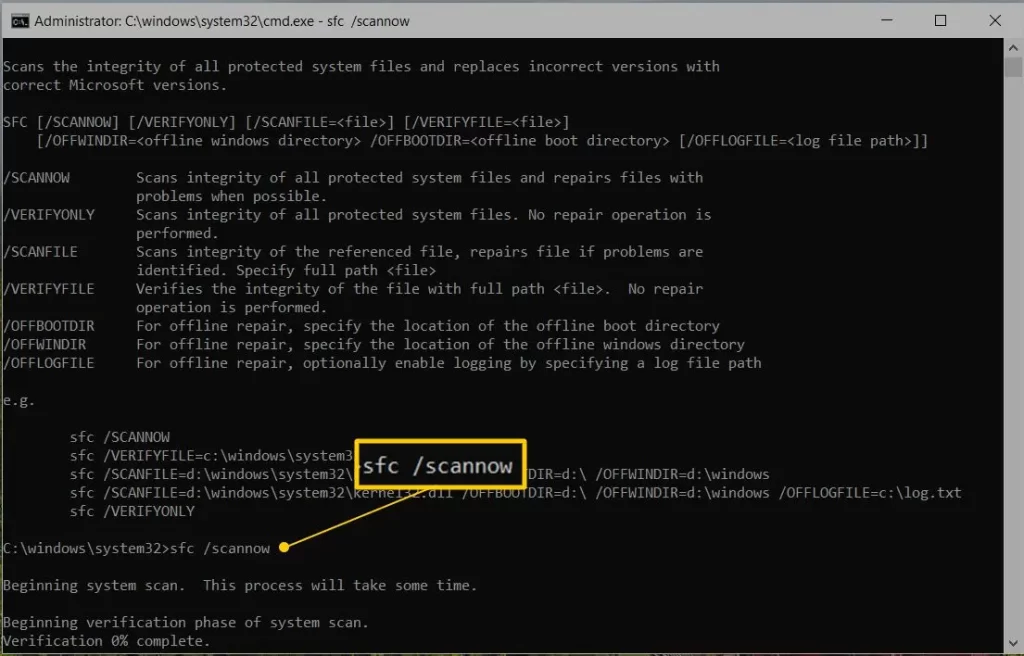
- Now, the System File Checker utility will check the integrity of Windows system files and run a quick repair.
- Once the process is complete, reboot your computer.
6. Configure the Windows Firewall Settings
As a system security application, the Windows Firewall may block your QuickBooks program and trigger QuickBooks error code 15276 when attempting to update the payroll services or QuickBooks Desktop. Thus, you must configure the Windows Firewall for QuickBooks Desktop and ensure you can run the updates seamlessly.
7. Run Quick Fix my Program
The Quick Fix my Program will shut down any of the background processes hamoering the update and also run a quick repair on your QB program. To access the tool, ensure to download and install QuickBooks Tool Hub to its latest release.
- Select Program Problems in QuickBooks Tool Hub.
- Hit on Quick Fix my Program.

- Once done, launch QB Desktop and then your company file.
- Now, try again to download the payroll updates again.
If you still see the error, try these:
- Exit the QB application.
- Navigate to C:\ProgramData\Intuit\QuickBooks XX\Components.
| Note: XX represents the QuickBooks Desktop version you use. Fox example, QuickBooks Desktop 2023 is DownloadQB23. |
- Right-click on Components, then select Delete.
- Launch QuickBooks Desktop and navigate to the Help menu.
- Choose Update QuickBooks Desktop and go to the Update Now tab.
- Mark the checkbox for Reset Update checkbox.
- When the download is complete, close and open your QuickBooks again.
- Move again to the Help menu and select Update QuickBooks Desktop.
- Select the Overview tab and click on Update Now.
8. Repair QuickBooks
You may experience issues when attempting to utilize QuickBooks if there was an issue with the installation process. To resolve typical install problems, use the QuickBooks Install Diagnostic Tool.
- Click on Installation Issues in QuickBooks Tool Hub.
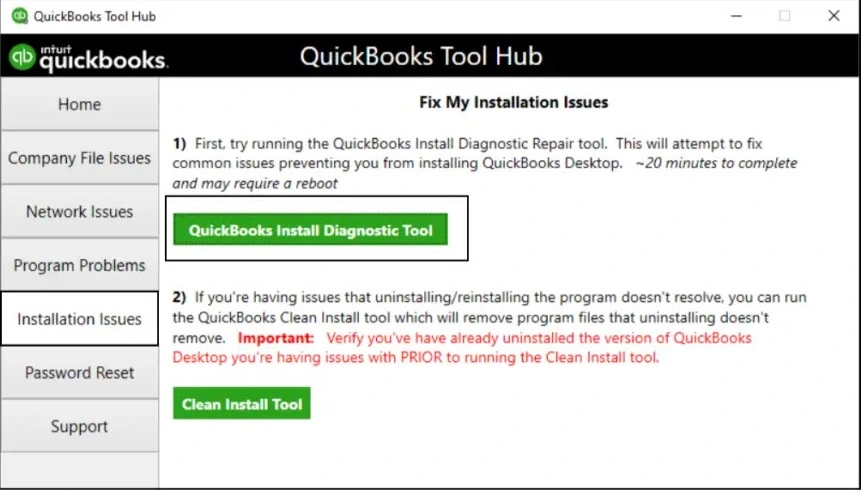
- Select QuickBooks Install Diagnostic tool. Let the tool run until it completes. It usually takes up to 20 minutes.
- When the tool finishes, restart your computer and launch QB Desktop and open your company file.
- Once done, update QuickBooks Desktop to ensure you have the latest fixes security patches.
9. Re-install QuickBooks Desktop
When you re-install QuickBooks Desktop, it will automatically rename the existing folders and replace them with new ones to fix QuickBooks error code 15276. Also, this will not affect your data at all.
Let’s proceed to the below steps to re-install QuickBooks:
Before you start
- Get the installer of the same version as your QuickBooks.
- Keep the QuickBooks license number handy. You will find it on the original package or visit the confirmation email if you bought it online.
| Note: You can also collect the same information form your account management portal. |
a. Remove QuickBooks
- Launch the Windows Start menu and search for Control Panel.
- Hit the Enter key.
- Click on Programs and Features or Uninstall a Program.
- Now, choose your version of QuickBooks Desktop you want to remove from the list of programs.
- Hit on Uninstall/Change, Remove and click Next.
- If you can’t find the option, sign out and sign in again to Windows as an admin (or a user with admin rights).
b. Install QuickBooks Desktop again
When you’re done, install QuickBooks Desktop. When you install again, QuickBooks will automatically install new folders and rename your old ones.
| Note: If you need to install or move QuickBooks Desktop to another computer, we’ll show you how you can do it with the migrator tool. |
- Keep your computer connected to a strong internet connection.
- Locate the QuickBooks program file QuickBooks.exe.
- Now, select
- Express install – This will install QuickBooks over your old version and save all of your preferences. To access your prior version, you will need to reinstall it using custom install.
- Custom and Network Options – This enables you to maintain older versions installed while installing the current version in a different location. The new version does not incorporate your choices from the previous version.
- Hit on Next and select Install.
- Once done, select Open QuickBooks.
Summary
The outdated payroll services mean not having current tax tables or up-to-date tax rates and hampering the payroll management of a business. This detailed guide discusses the possible factors triggering QuickBooks error code 15276 and the best ways to address it. We hope this has helped you get back to your business.
Meanwhile, connecting with an expert is recommended if you get stuck somewhere or are seeking professional assistance. Dial +1-866-500-0076 and talk to a QB advisor now!
Frequently Asked Questions
Consider running the payroll update with all admin rights and perform a quick repair in your QuickBooks program. If this doesn’t help, configure Windows firewall settings, repair Windows files or try reinstalling QuickBooks Desktop if nothing works to fix error 15276.
QuickBooks error 15107 usually occurs when trying to update the payroll services in the program. This problem often results from disruption of the update process due to system configuration issues, corrupted files, or interference from third-party applications.
Let’s manually update the payroll services in QuickBooks:
• Go to the Employees menu and click on Get Payroll Updates.
• Choose Payroll Update Info to check the latest version.
Any of these reasons causes payroll update issues: The shared download drive was not mapped correctly. A file or component is missing for the payroll update. Incorrect configuration of IE settings. Firewall settings that may block payroll updates in QuickBooks Desktop.
• In QB Desktop, select the Help menu.
• Choose Update QuickBooks Desktop from the drop-down.
• Go to Update Now in the prompted update window.
• To reset the updates, select the checkbox for Reset Updates.
• Finally, click Get Updates and restart your computer.
• Reopen QuickBooks and click Yes to install the updates.