QuickBooks installation gets damaged when incompatible settings or components are used to carry out the process. Intuit has a special tool for to repair the damaged program installation – QuickBooks Install Diagnostic Tool. This tool fixes the damaged components, such as .NET Framework, MSXML, and C++. Thus, you can install QuickBooks without experiencing any error or technical hurdle. However, many users don’t understand how does this install diagnostic tool for QuickBooks work. These users can find this post useful after navigating until the end.
Table of Contents
Let’s Understand The Install Diagnostic Tool QuickBooks First
If you are experiencing any issues with the program installation, the QuickBooks Install Diagnostic Tool can effectively address the issue. The installation issue mainly arises when your Windows is not compatible or has damaged components. In such a scenario, the install diagnostic tool repairs the damaged components to facilitate the installation process. You need to download and install this tool on your device to make it work. Thereafter, the tool will diagnose the installation issues and repair them without needing you to put in additional effort.
How Does Install Diagnostics Tool For QuickBooks Work?
Using the QuickBooks Install Diagnostic Tool is a straightforward task. However, you need to be mindful about a few things when using it to fix the installation issues.
- First of all, you need to close all the applications running in the background to prevent any undesired interruptions.
- Thereafter, choose the file to access your tool, and it will automatically resolve the issues related to the program installation.
- If it says – No problem is identified, it is possible that an issue related to the installation is not resolved yet.
Download and Installation Procedures For QuickBooks Diagnostic Tool
You can bring the QuickBooks install diagnostic tool into work after installing it on your device. Below is how you can proceed with the process:
Steps To Download The Tool:
- When on Intuit’s product page, download the latest version of QuickBooks Tool Hub.
- QuickBooks Install Diagnostic Tool can be accessed from within the tool hub.
- After clicking on the download link, wait for a while until it downloads completely.
- When choosing a location to save the downloaded file, make sure that the location is easily accessible.
Installation Steps For Install Diagnostic Tool QuickBooks
- Now that you have downloaded QuickBooks Tool Hub go to the download location to initiate the procedure.
- Locate the executable file from within this folder.
- You can find this file as QuickBooksToolHub.exe.
- Open this file and follow the on-screen instructions to install it.
- Next, agree to the given terms and conditions, which is a mandatory step to move ahead.
- After the successful installation, double-click the icon on your Windows Desktop to open it.
Incredible Benefits Of QuickBooks Install Diagnostic Tool
After installing the QuickBooks Tool Hub on your system, you can reap its incredible benefits as explained in the following pointers:
- Users stuck with the installation issues with the program can find this tool useful.
- It addresses the persisting issues automatically, saving you time and effort.
- You don’t need to assist the tool with the error resolution, so you can focus on other tasks.
- The tool can address a wide range of error codes, such as errors 1722, 1903, 12031, 1334, and several others.
How To Bring QuickBooks Install Diagnostic Tool In Use?
After installing the Intuit Tool Hub, you can run the QuickBooks Install Diagnostic Tool by implementing these steps:
1: Access The Install Diagnostic Tool
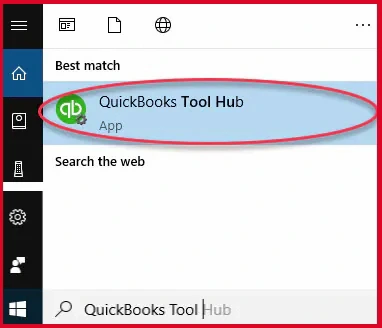
- Double-click on the QuickBooks Tool Hub icon on your Desktop to open it.
- After launching the tool hub, navigate through the list of the issues listed in it.
- Select Installation Issues from this list, and it will open a window that is attached to the option.
- In this window, you can select the QuickBooks Install Diagnostic Tool.
2: Use The Connection Tab To Examine Compatibility
The Connection tab can be used to check the system in order to ensure its compatibility with the QuickBooks software. It can also configure a new QuickBooks company file.
3: Authenticate The Firewall Status
QuickBooks needs the appropriate ports to communicate to the web-based applications. If these ports are not properly configured during the installation or Firewall is blocking them for the security reasons, the tool can fix the ports for normal operations.
4: Diagnose The Network Connectivity
The system storing the QuickBooks company file is networked with the other computers in multi-user mode. This mode enables the simultaneous access to the QuickBooks company file on different systems. If a network related issue is observed right after the installation, QuickBooks install diagnostic tool can resolve it.
Things To Keep In Mind Before Running Install Diagnostic Tool in QuickBooks
If you want to achieve the optimal results from the diagnostics tool when resolving the installation issue, adhere to the following pointers:
- Make sure that no applications are running in the background to prevent any interference.
- Reboot your system after you install the QuickBooks Tool Hub.
- Check your current QuickBooks version and make sure that it is updated to the latest release.
- Disable your firewall or antivirus applications so that QuickBooks can access the necessary resources without being blocked.
- Prevent the loss of your crucial financial information by creating a secure backup.
What To Do After The Tool Scans For The Error?
After the tool scans for the installation issues, you will be prompted to log in again. Check if the issue is resolved after the scan. In certain instances wherein the changes are made on the Windows operating system, you need to follow these steps:
- Update your Windows to the latest release if an update is pending.
- After updating the system, check if an issue related to the installation still persists.
- If it reflects an error code, open your QuickBooks company file.
- Now, complete the QuickBooks installation that was giving the error before running the QuickBooks install diagnostic tool.
Repair Damaged Windows Components
When installing a program on your Windows computer, you need to ensure that the components are updated and in their optimal health. However, if the error persists, you will have to repair it manually to install QuickBooks.
Repair/Reinstall Microsoft .NET Framework (Windows 10, 8.1, and 7)
Execute the below-stated steps with the utmost care:
- Close the background application to ensure a smooth procedure.
- Now that no background applications are running choose the Windows Start menu.
- Next, in the search area, type Control Panel.
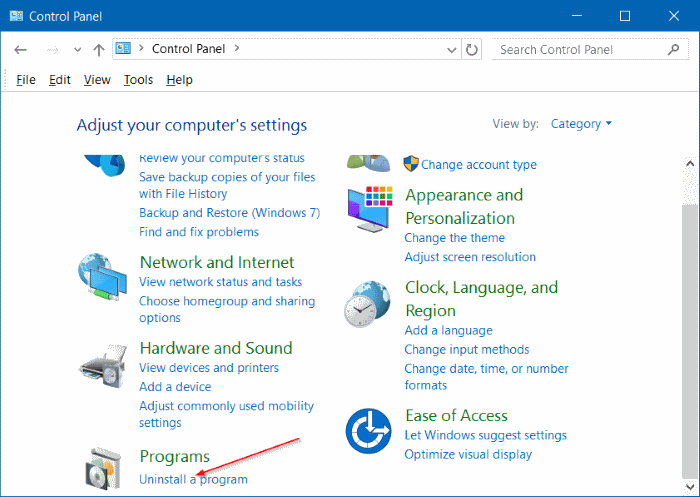
- Moving ahead, you have to click on the Programs and Features option.
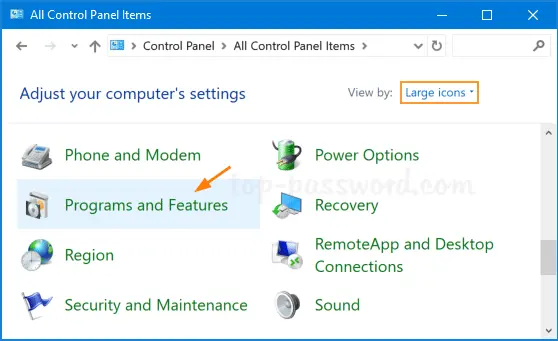
- Thereafter, select Uninstall a Program, and it will take you to the next step.
- Here, you are supposed to choose the Turn Windows Features option on or off.
- In the end, enable .NET Framework 3.5.
Repair Microsoft MSXML After Registering the MSXML DLL Files
Follow the below-stated steps for your Windows 64-bit OS:
- Start the procedure after opening the Windows Start menu.
- Thereafter, you are supposed to type CMD in the given area to open it.
- When the CMD option appears, right-click on it and select Run as Administrator.
- Moving ahead, enter cd\Windows\syswow64 at the C: prompt.
- Once done, type regsvr32 MSXML6.dll and hit the Enter key to jump to the next step.
- Now, install the QuickBooks desktop and confirm that the error is resolved.
Try Reinstalling The QuickBooks In Selective Start-Up Mode
Selective startup mode lets you run your system with the programs and services you want to load on the system restart. Thus, you can stop the programs from loading, which can interfere with the QuickBooks installation.
- First of all, press the Ctrl + R keys simultaneously to reinstall QB in selective startup mode.
- After that, type MSConfig in the specified area and choose the OK tab.
- Moving ahead, choose the Selective Startup option from within the General tab.
- Here, you are supposed to select the System Services in addition to the startup items.
- Proceeding further, click on the Hide All MS option and then choose the Disable All option.
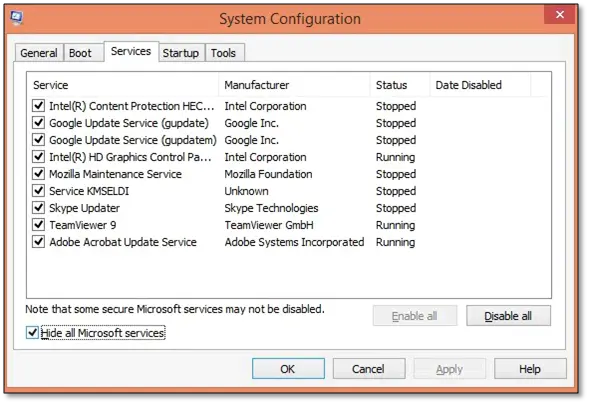
- After that, you can choose the services listed.
- Make sure to mark the installer option.
- After accomplishing these steps, restart your system.
- Now, try reinstalling the QuickBooks using the clean installation procedure.
Error Codes You Can Fix With Install Diagnostic Tool QuickBooks
QuickBooks install diagnostic tool can address a wide range of installation issues in your accounting application. Some of the main error codes are:
Error 1402: This error message comes with a warning text – ‘Couldn’t Open Key.’ This error occurs when installing QuickBooks software due to a failure to access the registry key. Insufficient permissions or damaged registry entries are some of the other possible reasons that can promote this error in QuickBooks.
Error 1603: If you are receiving this error code when installing your accounting application, it depicts an issue with your .Net Framework, C++ & MSXML components. The install diagnostic tool can repair these components to facilitate the program installation.
Error 1722: A partial or incomplete installation of the program can give rise to the error code 1722 in QuickBooks. Besides, it can also occur due to the removal of the files. When this error occurs, you can try resolving it with the help of the QuickBooks install diagnostic tool.
Error 1903: QuickBooks error 1903 is another perplexing error code that can show up when installing the program. It mainly occurs due to erroneous .NET Framework and blocking issues. Bringing the tool into use can help you override this problem.
Error 1935: This error also occurs due to the problematic .NET Framework. Also, it can take place if the .NET Framework is not installed. You can run the intended tool from within the Intuit Tool Hub and bring it into use for the error resolution.
QuickBooks Has Stopped Working: A partial or damaged QuickBooks software installation can give technical hiccups when using the program. You may experience that QuickBooks has stopped working when carrying out an important task. Damaged components, such as MSXML, C++, or .NET Framework promotes this issue, which can be resolved with the install diagnostic tool QuickBooks.
Final Words!
This post explains everything about the QuickBooks Install Diagnostic Tool and also educates users on how to use it. By mastering this tool, you can fix multi-faceted problems related to the QuickBooks Desktop software installation. The best thing about this tool is that it can detect the issues automatically and alleviate the need for human intervention. If you have any other query related to this tool or are having difficulty comprehending this post, you may refer to other resources, such as the QuickBooks community or Knowledge-base.