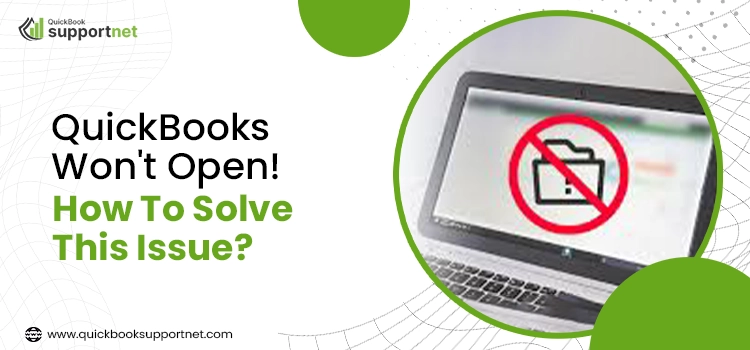
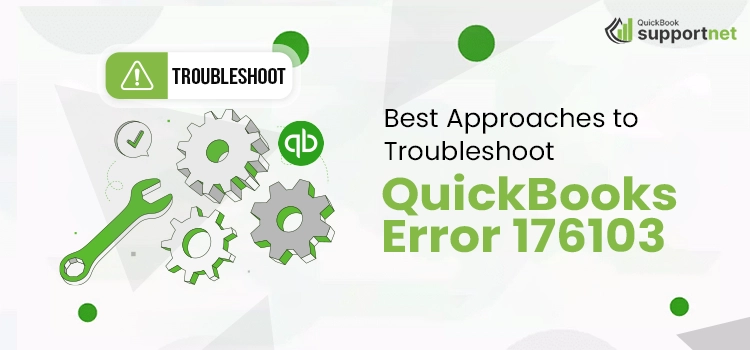
Author: admin

Home > Articles by: admin

There is not a single doubt about the fact that QuickBooks is the most used software for financial management. People use it for personal use, while companies run this software to manage salaries, budgets, and other accounting functions. But as we all know that with great things come some drawbacks. QuickBooks to have some issues that can interfere with your operations. One such problem is QuickBooks error 6175.

This blog revolves around the same error code. Users of QuickBooks Desktop can consider this post to find all possible solutions to resolve this issue. Here, we will talk about what the error is, what triggers it, and how a user can fix it without any assistance.

Get a quick assistance in eliminating the error code 6175 by speaking live with our QuickBooks experts through call at +1-855-603-0490“.

What is QuickBooks Error 6175?

QuickBooks error 6175,0 occurs when you try to access the company file in a local server. When the software faces a hindrance in communicating with the company file, a user might get the error code 6175, otherwise known as 6175,0. QuickBooks shows a pop-up that mentions the error as ‘QuickBooks is trying to access the company file, but the database server is not responding. Error codes (-6175,0).

QuickBooks Error 6175 (Error Message)

Why QuickBooks Error 6175 Arises?

There are ‘n’ number of reasons that can trigger QuickBooks error 6175. We have jotted down some for you:

  • If QuickBooks is unable to run the local server manager.
  • In case of any cyber sitter software (content blocker).
  • Also, your antivirus or firewall settings do not provide access to QuickBooks.
  • When the server fails to successful share the company file due to a busy status.

Along with these, there can be other technical issues too that can cause the error 6175.

Solutions to Fix Error Code 6175 In QuickBooks Desktop

Users usually come to the internet looking for solutions to fix error 6175 in QuickBooks Desktop. To answer the same, here are a few troubleshooting solutions that you can get your hands on.

Troubleshoot 1: Get and Use QuickBooks File Doctor

To run QuickBooks File Doctor, you need to download QuickBooks Tool Hub. Follow these steps to do so:

  • Initially, you need to download QuickBooks Tool Hub. Although earlier you could download the file doctor separately, now it is a part of the tool hub.
  • Once the file is downloaded, go to the folder where it is and install it by following the steps available on your computer screen.
  • Thereafter, open the application and click on the Browse option.
  • Here, you need to look for your QuickBooks company file and open that.
  • Now, hit the Both File Damage and Network Connectivity tab.
  • You might need to put in the password here.
  • Furthermore, to run the troubleshoot, click on HOST/Server; otherwise, and choose Workstation from the available options.
  • QuickBooks File Doctor will not start looking for issues and will fix them automatically.

After the process is done, see if you have resolved QuickBooks error 6175.

Troubleshoot 2: Switch to Multi-User Mode

Changing your hosting settings to multi-user mode to resolve the problem. Hereinafter are the steps that do the changes.

  • Head to QuickBooks Desktop Application to initiate the process.
  • When you are on the homepage, click on the File menu from the upper left corner.
  • Now, from the list of options, click Utilities and then on Switch Host to Multi-User Access.
  • Thereafter, hit the Yes button to save the changes.
  • Here, make sure to go through the terms and conditions and then, on the multi-user setup information, choose OK.

Now, you can use your account on two or more desktops simultaneously.

Multi-User Mode

Recently Added : QuickBooks Error H303

Troubleshoot 3: Switch QuickBooks Desktop Service to Local Account

If you are still receiving the error message and need to fix error 6175 in QuickBooks Desktop, change QuickBooksDBXX (XX being the version) services.

  • Open your PC and go to the Start menu.
  • Here, in the search bar, put in MISC and hit the keyboard’s Enter key.
  • Now, look for QuickBooksDBXX and make right-click on the same.
  • Thereafter, go to Properties and select Log On option.
  • Next, you will see a radio icon beside the Local System Account; click on the same.
  • Finally, confirm the changes by hitting Apply and then OK.

Go to QuickBooks and see if the issue is resolved.

 QuickBooks Desktop Service to Local Account

Troubleshoot 4: Change Admin Rights

When QBDataServiceUser lacks admin rights, it can generate QuickBooks Error 6175.

  • The first step in changing the administrative rights is closing the QuickBooks Desktop application.
  • Now, on the Run command box. You can either locate it from the Start menu or simply press Ctrl+R on your keyboard.
  • Here, on the pop-up, you will see an empty space. Type in Control Panel and press Enter.
  • From the available options, click on User Accounts and move to the next window.
  • Next, choose the Manage Another Account option.
  • Thereafter, locate the QBDataServiceUser and double-tap on the same.
  • This is where you need to select Change Account Type to Administrative.

You can now exit the window and try to access the company file again.

Quickbooks Admin Rights

Troubleshoot 5: Reinstall the QuickBooks Desktop Application

Does none of the above solutions work for you? Well, then it is time to uninstall the current QuickBooks and reinstall it.

  • To start the uninstalling process, open the Control Panel from the Start menu or with the help of the Run window.
  • From the Control Panel, double-tap on the QuickBooks Desktop option from Programs and Features.
  • Now, you will see the instructions on your window. Follow the same to uninstall the application.
  • Once you have installed the app, go ahead and download the latest version in your system.
  • Thereafter, go to Downloads and run the QuickBooks file.
  • Furthermore, go along the steps and install the same.
  • Log in and try to access the company file.

Check if you have finally resolved QuickBooks error 6157.

QuickBooks Desktop Application

Closing Statement

This blog is the right place for you if you are irked with QuickBooks error 6175Here, we have mentioned five simple as well as advanced solutions for you to try. By following the steps carefully, you will be able to fix the error code easily.

However, if you still have questions or need help with another QuickBooks error, you can get in contact with us anytime you want. Our team of experts is available over a call as well as via email. Share your query with us, and we will find the best solution for you. To send an email, send us your information and problem at info@quickbooksupportnet.com.

QuickBooks Error 1723 is one of the most frustrating issues faced by users. It hampers and delays all your accounting-related work by creating problems. There can be different reasons that can evoke Error 1723 in QuickBooks. The error mainly flashes due to the issue in the Window Installer package. Moreover, the users might have to invest a lot of time to fix this error. Read the full post to get the easiest way to deal with it. 

“Dealing with QuickBooks Error 1723? Call at 1855-603-0490, to get quick help.” 

What is QuickBooks Error 1723?

At the time of installing and uninstalling QuickBooks Desktop Software, you may encounter an error message that says, 

QuickBooks Error 1723 (Message)

This error is primarily due to problems in your Windows operating system, which need to be fixed quickly and carefully. Another cause of QuickBooks Error Code 1723 can be the absence of the required DLL file in your System. To get rid of this error, you can simply download all the required files and take care of the prerequisites. However, you may have to perform a few other methods to get rid of this error.

What causes QuickBooks Error 1723?

You may receive Error 1723 in QuickBooks because of a few reasons that are explained in the below-given list:

  • If your QuickBooks setup file is damaged.
  • In case your installer package is damaged.
  • QuickBooks is not installed properly.
  • Your System is full of viruses.
  • You are using an outdated version of Windows.
  • The temp folder permission is not configured in a proper manner.
  • The configuration between the computer and QuickBooks is not done, as the requirements don’t match properly.

Also look – Resolve QuickBooks Error 1321

Symptoms of Error Code 1723 in QuickBooks

If you are still wondering how to determine the error code 1723 in QuickBooks, you have to check its common symptoms, which are explained below: 

  • You may face problems in installing other programs in your System.
  • Installation of the program might stop unexpectedly on its own.
  • Before you uninstall QuickBooks Desktop, it might stop responding to your command.
  • An error message for QuickBooks Error 1723 will appear on your screen at the time you try to uninstall or install some other program.
  • The window may start responding sluggishly.

Things to take care of Before going further with the solutions

The steps you must follow before proceeding with the troubleshoots of error 1723 are:

  • You must have QuickBooks Registration number
  • QuickBooks desktop should be updated.
  • You must have the latest version of windows in your System.

How to Troubleshoot QuickBooks Error 1723?

Now that you are fully aware of all the important aspects of the error, let’s learn and follow a few tried and tested methods to troubleshoot it.

Also Read – Fix QuickBooks Error 15101

Method 1: Permit Administrative Rights to the User Account

  • Select the Windows icon, and then go to the Control Panel.
  • Then you have to double-click on the User Account tab and choose the user account that wants the administrative rights.
  • Now select the Change Account Type and click on Computer Administrative.
  • After that, click on the Change Account Type again.
  • Now, reboot your System.
  • At last, log in to your account, and try to update QuickBooks Desktop.

Note: All the other program running needs to be closed at the time of the process.

Method 2 : Modify the permissions of the Windows Temp Folder

  • To initiate the process, select the Windows key.
  • Then a start menu will appear on your screen; enter %temp% in the search box of that start menu.
  • Hit Enter to proceed.
  • A new Window Temp Folder will open; choose Properties.
  • Then click on the Security option, followed by the Edit option.
  • Now, Verify your Windows Username, and highlight it.
  • Select the box in the Allow column of Full Control.
  • Now, click on OK twice, and restart your System.

Solution 3: Run QuickBooks install Diagnostic tool

  • Initially, you have to download QuickBooks Tool Hub and install it. 
  • Then after installing, launch the Tool hub by hitting on the desktop icon.
  • After that, you have to go to the Installation issues tab.
  • Now, there will be a green-colored option named Install QuickBooks Diagnostic Tool; hit on it.
  • Then the tool will initiate performing its work. 
  • Wait till the overall scan is done, and restart your System.

Method 4: Utilize the System File Checker tool

  • Go to the start menu and in the search box, enter Command Prompt.
  • Now, the results will appear on your screen; right-click on it to use it as administrator.
  • Then provide the password if asked.
  • Then a command prompt window will appear on your screen; enter SFC/Scannow in that.
  • Press Enter and let this tool diagnose and fix the problem that is affecting the computer.

Method 5: Fix QuickBooks Desktop

  • Go to the Control Panel.
  • Now, click on the Programs and Features option.
  • Then from the given list of installed programs, Select the QuickBooks Desktop application.
  • After that, follow the given prompt present on your screen to repair.
  • Repair, then Next, and at last, Finish.
  • Now, wait for the repair process to be finished completely.
  • After that, check the status of the QuickBooks error 1723 again.

Final Words!

After trying all the described solutions, if you are still struggling with the QuickBooks Error code 1723, then it might be possible that your system is having some kind of technical glitch that is stopping you from fixing the error. In this case, you need to get in touch with the QuickBooks professionals Team and save your time in the error resolution process. Get in touch via email or live chat and sort out your Queries.

The QuickBooks unable to sync license issue is getting quite popular among QuickBooks users. Are you also among these users encountering license synchronization issues? If yes, take this comprehensive blog as your guide and rectify this problem easily. Users face this error after updating their QuickBooks desktop to its latest version with the recent updates. The error is making users face issues with their computer systems. QuickBooks users complain about the error as it prevents their systems from communicating with the remote license server. Continue reading and learn how to notice and troubleshoot this error efficiently. 

If you receive this error, you might have seen an error message reading, “There was a problem while synchronizing QuickBooks license data with Intuit.” Well, many factors contribute to this error and send you this error message. We will discuss all those reasons further in this blog to eliminate this error from its roots. But first, let’s continue reading and know what this blog is all about and the other aspects that it actually entails. 

Need professional advice while fixing your QuickBooks license issue? Reach out to our certified QuickBooks professionals @+1855-603-0490 and get your issue solved professionally! 

Signs To Witness With QuickBooks Sync License Issue

In this section of the blog, we have discussed all the symptoms that can help you in identifying QuickBooks Unable to Sync License.

  • Sudden or frequent computer system freezing is one of the commonest signs you can see with the sync license error. 
  • QuickBooks crashes immediately upon being launched.
  • Failure to access or retrieve crucial financial data due to sync license issues
  • Error messages or warnings when attempting to sync data, such as “Sync License Error” or “License Expired.”
  • Data inconsistencies between QuickBooks and third-party applications can result in inaccurate financial reports and analyses.
  • If you fail to set up a proper connection with the server, this can be considered a sign of the QuickBooks sync license error.

Why are your QuickBooks Unable to Sync License?

Numerous factors make you face QuickBooks unable to sync license issues. We have jotted down some of them below. Take a look and continue rectifying the error with a better understanding. 

  • Ensure the recent QuickBooks updates are compatible enough with your operating system; otherwise, this would create issues with your QuickBooks license syncing.
  • The corruption and damage of your crucial QuickBooks files due to an improper QuickBooks update process is another reason for facing license syncing issues.
  • The firewall may restrict the connectivity of your QuickBooks software with the server, and because of this, you may lead to a Sync License issue.
  • Specific network-related issues can also provoke the QuickBooks Sync license issue.

Essential Troubleshooting Methods to Fix QuickBooks Sync License Error 

We got some quick and easy troubleshooting methods for you to rectify this QuickBooks sync license error. Carefully follow all the instructions and get yourself out of this QuickBooks license error.

Troubleshooting Strategy 1 – Rename the File Name of the Intuit Entitlement Client Folder

If you’re experiencing errors syncing your QuickBooks license, the following steps to rename the Intuit Entitlement Client folder file’s name can help you:

  • It’s obvious to know that the Intuit Entitlement Client folder is generally hidden. So, you need to display the hidden files and folders. 
  • Once you access the folder, now press the Windows + R keys to get the Run box Window. 
  • In the Run window, type the path: C:\ProgramData\Intuit\Entitlement Client, and after this, click the Enter key. 
  • In this step, right-click the folder v8 and continue to select the Rename option. Now, change the name of the client folder to v8(old).

Troubleshooting Strategy 2 – Fix the Issue with QuickBooks Database Server Manager

The QuickBooks Database Server Manager develops connections with the server and, as an effective tool, can help you with QuickBooks license syncing. Follow these steps to fix the issue with this tool.

  • First, you need to download and install the QuickBooks Database Server Manager tool on your system. 
  • In the second step, configure the QBDSM. For this, you are required to click the Start button and then navigate to the Search bar. 
  • Type Services in the Search bar and look for QuickBooksDBXX. Here, XX stands for the QuickBooks version you are using.
  • After this, go to the General tab and look for Services status. If you see that the service is running, click on the Stop button to pause it. 
  • Click the Startup type and choose the Automatic option. Next, go to the Logon option and select the Local System account option. 
  • Once you have selected the Local System account, go to the Recovery option and click the Restart the Service option for the First, Second, and Subsequent failures. 
  • After this, you need to navigate to the General tab and click the Start button. By this, the QuickBooks Database Server Manager will restart. 

Troubleshooting Strategy 3 – Use File Doctor Tool to Fix the Network Issues 

The QuickBooks unable to sync license issues can also result from network issues. So, use the free File Doctor Tool and fix the network problems to avoid syncing issues.

  • First, you have to install the QuickBooks Tool Hub to use the free File Doctor Tool from QuickBooks. 
  • Once you have installed the Tool Hub, run the File Doctor tool to check the network issues. 
  • To check the issues, navigate to the Company File issues, and after this, select the option of Run QuickBooks File Doctor
  • After this, use the tool and scan your system for any network-related problems. The tool will detect the existing issues and automatically rectify them to help you with the QuickBooks sync license issue. 
  • If the error is still not fixed, implement the next troubleshooting method to solve the one. 

Troubleshooting Strategy 4 – Recheck the QuickBooks License and Product Keys

Verifying the correctness of your QuickBooks license and the product keys can help you resolve the syncing issue to a great extent. Follow the steps penned down for the same. 

  • QuickBooks accounting software and then press the F2 key to open the Product Information Window. 
  • In this Product Information Window, you can check whether the license and product keys are correct or not. 
  • If you see any sort of incorrectness, figure it out, and then check if QuickBooks can sync licenses. 

Troubleshooting Strategy 5 – Check the Firewall Configuration Settings 

Sometimes, the Firewall program blocks the QuickBooks software, and this may lead users to face license syncing issues. So, check your Firewall configuration and eliminate the error. 

  • Go to the Desktop’s Start menu and navigate to the Advanced Settings. Click the Port option and right-click the Inbound rules. 
  • After this, visit the TCP option to include the following ports in your QuickBooks Database Server Manager:
    • For 2018 QuickBooks users: 8019, 56728, 55378- 55382
    • For 2017 QuickBooks users: 8019, 56727, 55373- 55377
    • For 2019 QuickBooks users: 8019, XXXXX (XXXXX is the QuickBooks Database Server Manager Port)
  • Now, enter the correct port and continue to click the Next button. After this, name the rule and click the Finish button to end the process. 
  • Once you have finished this process, repeat the same steps for Outbound rules. 
  • If you are still not getting the desired error-resolving errors, check the next troubleshooting strategy. 

Troubleshooting Strategy 6 – Uninstall and Carry Out a Clean Reinstallation of your QuickBooks Software 

If the above solutions are not enough to rectify the syncing QuickBooks license issue, try to uninstall and then reinstall your QuickBooks software. 

  • First, open your Control Panel and click the Programs and Features option. Now click the QuickBooks software icon and the uninstall/change button.
  • Follow the instructions on your Desktop screen and continue to reinstall your QuickBooks software. After the installation, set up your QuickBooks software and register the program. 
  • For registration, download and use the QuickBooks product and license keys. 
  • Once you finish this, rename the old QuickBooks folder by navigating to the drive where you kept your older QuickBooks application folder. Subsequently, right-click the QuickBooks folder to choose the Rename option. 
  • Give the folder a new name by adding the “.old” extension to the end of the filename. 

Let’s Wrap Up Everything..! 

That’s it! Hopefully, these troubleshooting strategies will help you rule over QuickBooks’s unable-to-sync license problems effectively. If the scenario is getting worse and you are not figuring out this issue after putting in these solutions, reach out to our QuickBooks Support professionals! Our professional team of certified QuickBooks experts is there to get you out of this problem.

Frequently Asked Questions (FAQs)

Why is my Sync Manager not working?

There could be multiple reasons why your QuickBooks Sync Manager is not working, like an Outdated QuickBooks version, network connectivity issues, damage or corruption in QuickBooks company files, firewall blocking Sync Manager, QuickBooks compatibility problems, user account issues, Sync Manager service not running, and many more. 

When can I face the QuickBooks syncing license data the most?

There are several chances when you can get the QuickBooks syncing license error the most: 

  • Poor internet connection
  • Damaged or corrupted license data file
  • User account issues
  • Outdated version of the QuickBooks software

Why does QuickBooks fail to connect to my company data file?

Facing connection issues with QuickBooks and company data files is due to the following reasons:

  • If your QuickBooks is not updated with the latest updates
  • A poor connection can also trigger this issue
  • If the QuickBooks file is already open somewhere
  • The incorrect company data file location is another reason 

How Do I Sync License Data in My QuickBooks Software?

Select the Manage my license option and click the OK button. After this, sync license data online by navigating the Help menu. 

Why am I facing the QuickBooks Payment Integration Issue when QuickBooks is unable to sync licenses?

This QB payment issue can occur due to a number of reasons. Have a look at the following causes of QuickBooks payment integration problems:

  • If a customer’s name is not there in the reports, this issue can arrive. 
  • Improper transactions are also a reason for your payment integration issues. 
  • A corrupted customer list can also bring QuickBooks payment integration issues.

Importing the transactions and lists in QuickBooks can be quite frustrating and complex. Though with the help of the IIF import tool kit, you can easily and conveniently import the documents in Quickbooks. However, if the user did not use the correct format of the document, then they will receive the IIF Import Error in QuickBooks.

Facing IIF Import Error in QuickBooks? Connect with our Experts @1-855-603-0490, & Get Instant Solutions.

Are you facing the IIF import error in QuickBooks and are looking for instant yet feasible solutions? If yes, then this blog will surely answer all your queries. Read the complete blog to find the most feasible solution to fix IIF Import Error in QuickBooks.

What is IIF Import Kit?

Intuit’s interchangeable format or commonly known as IIF, is used by QuickBooks to import or export the lists of transactions between the two different platforms. It is the easiest way to import or export the file in QuickBooks. Normally the. IIF files are in ASCII text.

The user can download the IIF import kit from the Inuit official website. The kit contains the following:

  • IIF Import manual: It contains some of the common issues and rectification procedures.
  • IIF header help: It contains the column headings that are used for importing the list’s data.
  • IIF Example Files: The folder contains examples of IIF transactions that are depicted across the various versions.

Steps to Download and Install the IIF Import Kit

You can download the various types of lists which are mentioned in the table.

Items Sales Tax Codes Price Level Customer Message
QuickBooks Import Inventory Shipping Methods Employees Classes
Vendor Types Budgets Customers and Customer Jobs
Impor Invoices into QuickBooks Import Charts of Accounts Payments terms
Customer and Job Types Import Sales Receipt  

The below-mentioned steps help the users download and install the IIF kit in QuickBooks:

  • Open the official website of Intuit and search for the IIF import kit.
  • Download the kit.
  • Unzip the folder by using the Winzip extractor.
  • Once unzipped, open the import kit folder to view the content, including IIF Example files, IIF header help, and IIF import manual.

Though downloading and installing the IIF Import folder can be easy; however, users may sometimes encounter some errors. Though there are various IIF import errors in QuickBooks troubleshooting methods; however, the users must know what exactly IIF Import errors are.

Overview of IIF Import Errors

The user will receive the IIF Import Error in QuickBooks when they are trying to import the IIF files to QuickBooks, and the format is incorrect. Also, when you are trying to import IIF files that contain the lists or the transactions through the QuickBooks file menu > import >utilities, then there is a high possibility that you will not be able to import the file successfully. Here, we have listed some of the common IIF errors in QuickBooks along with the reason to occur.

Error Message Cause
The Transactions are not in balance The sum of the individual split lines is not equal to the total amount of the transactions.
Can not add a duplicate name or change the type of a name or If the name that you are trying to import already exists in another list.
Have no items, or your account is not associated with an item. In the import file, there are one or more split lines that do not have an item or an account. You can not enter a transaction that does not associate with an item.
The tax field is left blank. The import file does not mention the sales tax code on the SPL lines.
It does not have enough disk space, so it is unable to import. The number of list items exceeded the maximum limit permitted in Your QuickBooks.
The number is larger than the maximum The IIF import files exceed the maximum length
Unable to record an invalid transaction, Error on line XX. There is an error in the file that must be corrected before Quickbooks accept the file to be imported.
Unable to import QuickBooks Pro Timer data The timer activities files are not associated with the QuickBooks company file that you have opened and are trying to import.

Important Points to Consider While Troubleshooting the IIF Import Error in QuickBooks

Before we jump to the IIF Import Error in QuickBooks troubleshooting methods, let us have a look at the important tips that must be considered before you try to implement the resolution methods.

1. Ensure that your QuickBooks version is compatible with the IIF files.
As the IIF files are only compatible with certain versions of QuickBooks desktop, make sure that you are using the QuickBooks version, which is compatible with the IIF files. For knowing detailed information on the QuickBooks support version, do visit the QuickBooks support site.

2. Verify that you have formatted the IIF files correctly.
Before importing the file into QuickBooks, make sure that you have formatted the file correctly. Open the file in the text editor and check whether it matches the IIF file format.

3. Divide the file into smaller sections.
If you are trying to import a larger file, there is a high chance that you will receive the IIF Import Error in QuickBooks. To import the larger files, it is advisable to split the files into smaller sections and then import the sections individually.

4. Look out for the special characters.
The IIF file format does not allow you to have special characters like “&” or “+” signs. If your file contains special characters, then you will encounter an IIF Import Error in QuickBooks. Make sure to delete the special characters from the file before importing it.

How to Fix the IIF Import Error in QuickBooks Desktop Issues?

There is a cascade of IIF Import Errors in QuickBooks resolution methods. You can opt for any of the methods that best fit your requirements. All of the troubleshooting methods for IIF import errors in QuickBooks are efficient and easy to implement.

Method 1: Review and Resolve the “File Not imported Error.”

In order to fix the IIF file import error, follow the below-mentioned steps:

  1. Step: When the error window appears, tap on the “Review Now”
  2. Step: After that, you have to review the lists and find out the line where the Error is. If the Error is located by you, resolve it and save the file.
  3. Step: Click on the “File not imported” window and import the correct QuickBooks IIF files.

Method 2: Change the extensions of Journal Entries

If you are trying to import the journal entries from the previous application and fix the import error, the procedure explained below will help you.

The below-mentioned steps will help the users in changing the extensions of journal entries:

  • Open the QuickBooks and go to the File menu option.
  • In the file menu option, select the utilities and click on the general journal entries.
  • Next, you have to click on the import option.
  • Pick the journal entries file (.QBJ) and click on the Add GJE. You can also add it to your previous accounting application.
  • As the GJE summary opens up, tap on the “OK” button.

Method 3 Using the Alternate Import Process

The below-mentioned steps will help you in fixing the IIF Import Error in QuickBooks.

  • Open the QuickBooks and switch to the single-user mode.
  • Now, you have to go through the file menu.
  • To move ahead, pick the utility option and click on the import options.
  • In the import options, tap on the import IIF files.
  • Once you click on the import IIF files, browse and select the file that you want to import.
  • To move ahead tap on the “import it for me. I will Fix it later” option and finally press the “OK” button.

Method 4: Change the IIF file extensions to Resolve the IIF File Line Error

If the Error occurs in the specific file, then you can go through the below-mentioned steps to resolve the Error. The steps are as follows:

  • Create a copy of the file and double-click on it to open it.
  • Rename it to change the extension to. XLSX.
  • Open the file in Excel.
  • Look out for the line where the Error occurs.

The Right Way To Import the IIF Files To Avoid IIF Import Errors in QuickBooks

If the IIF file is imported in the correct manner, then you will not face the IIF Import Error in QuickBooks, as the incorrect import format leads to the Error.

The steps to import the IIF files are as follows:

  • Open the QuickBooks and sign in as an administrator to your company file.
  • After that, navigate to the file menu and switch to the single mode user.
  • Now, you have to go to the files and then utilities.
  • In the utility option, click on the import file and pick the file you want to import.
  • Browse the required file from the location.
  • Finally, tap on the open button followed by the “OK” button. It will import the IIF file.

Final Words

The IIF import kit plays a vital role in QuickBooks while importing files. However, the users may encounter an error during the import of the file. We hope that the above-mentioned steps have helped you in resolving the IIF Import Error in QuickBooks. In case you are facing any other QuickBooks issue, let us discuss it over a cup of coffee.

Frequently Asked Questions

Ques 1 – Can I import an IIF File into QuickBooks Online?

Ans- Yes, you can import the IIF files into QuickBooks online. The importing process of IIF files into QuickBooks online is a little bit different from the QuickBooks desktop version. However, the end result is the same. To import the file into QuickBooks online, click on the gear icon, then go to the import data and click on the transactions. Select the IIF file and click on the “OK” button to import the file.

Ques 2 – Can transactions be imported into QuickBooks?

Ans – Yes, you can import anything into QuickBooks, including bank transactions, batch transactions, general journal entries, and much more.

Ques 3 – How can I import the bank transactions in QuickBooks Desktop?

Ans – To import the transactions, go to the banking menu and click on the download transactions available at the top. In the downloaded transaction window, pick the account you wish to import. Once you click on the download, you will be redirected to the financial institution. You can import the file transaction.

There you go! All set to operate QuickBooks data files and suddenly encounter the unexpected data file error in QuickBooks. What will be your situation after this? Distressing, right? Do not worry; this comprehensive blog post will help you address this QuickBooks Data Corruption issue with the latest methods.

Fear of losing your essential business data due to potential QuickBooks fix data damage on your QuickBooks desktop company file errors is genuine enough. We have a team of QuickBooks expert technicians to assist and help you immediately. Just call us anytime anywhere. 

Users may come across data damage in QuickBooks company file while formatting one or more pages. With this, they further face issues, including performance failures, power surges, damaged pages, disk failures, and data file damage. If you’re also facing the same issues, let’s quickly go through the reasons for such data damage and then troubleshoot the same. 

Signs Indicating Data Damage in QuickBooks Company File

Determining data damage in QuickBooks company file becomes easier once you learn about the prominent signs of the same as given below:

  1. The foremost sign of noticing data damage errors is the issue with your Verify Data Utility or Verify Target. If the values in minor are unmatched by the major ones on your screen, it’s because of the damaged company data. 
  2. If your paid bills and invoices are shown as unpaid in your QuickBooks software, it’s again a sign of the data file error. 
  3. Consider there is a data error in your QuickBooks software if it starts running sluggishly.
  4. Internal glitches in your transactions balance sheet also indicate the data file error in your QuickBooks software. 
  5. If your QuickBooks account’s name is preceded by an asterisk (*), the software has created accounts without the original accounts, which indicates the error in your QuickBooks data file. 

Why Am I Facing Company File Data Damage in QuickBooks Desktop?

Below, we have listed some of the major reasons for facing company file data damage in QuickBooks Desktop. Carefully read them out to reach the roots of the issue. 

  • An unexpected shutdown or crash of your computer system is one of the major reasons for facing data damage issues in QuickBooks. 
  • Another reason for such data damage errors in the QuickBooks Desktop is the power surge or dropout. 
  • You may expect such an issue in your QuickBooks Desktop if the QuickBooks company data file size is larger than the standard size limit. 
  • Malware attacks and malicious virus infections can effectively provoke the data file error in QuickBooks desktop. 
  • In case your system lacks the basic requirements, such as Virtual memory, RAM, network interface cards, network cables, routers, etc., then you can surely face company data damage in QuickBooks. 
  • Damaged databases of your QuickBooks software are another reason for coming across the company data file issues. 
  • One of the prominent reasons for data damage in QuickBooks company files is the corrupted QuickBooks log file. 
  • An outdated version of your QuickBooks Desktop application is itself a big reason for coming across the data file error in QuickBooks Desktop. 

Essential Points to Remember Before Troubleshooting Data File Error

Before you begin with the troubleshooting methods, it would be more than helpful to take a look at the following points and consider them. It will help you further avoid any potential technical errors: 

  • Do not use any wireless network, but choose a hard drive and then proceed. 
  • Make sure you have a backup of your QuickBooks company data files to avoid failures and data losses. 
  • It’s better to update patches and then move to troubleshoot the data damage in the QuickBooks company file. 
  • Enable the Rebuild and Verify Data tools on your computer system with the QuickBooks software and the related company data files. 
  • Do monitor your list size and track your QuickBooks database monthly. 
  • It’s better to delete all the transactions that you no longer need in your daily QuickBooks operations. 

Troubleshooting Solutions to Address Data Damage in QuickBooks Desktop 

Understood all the factors giving rise to the data damage in QuickBooks desktop? Now, let’s perform the troubleshooting methods given below and rectify this QuickBooks rebuild data utility some problems with your data file. Follow the instructions carefully as given: 

Solution Method 1 – Run the Rebuild and Verify Data Tools

Using the Rebuild and Verify data tools to fix the issues in your company file leading to data damage can be an effective approach. For this, you must continue performing the following steps: 

  • Firstly, navigate to the File menu and select the Utilities alternative. 
  • After this, from the drop-down menu, choose and click the Verify Data alternative. 
  • Once chosen, hit the OK button, and if you encounter a text reading, “QuickBooks detected no problem with your data,” it means the company file has no issues. 
  • If you find any issue with the company data, you will automatically receive the Rebuild Now or View Errors prompt. 
  • Hit the OK button, and you will get some mandatory instructions to follow on your screen. Follow them and select the OK button to begin the rebuilding process. 
  • This process may take a while; wait for the same, and once the process is over, check for the data file error in the QuickBooks company file. If still the issue persists, try another method to resolve the same. 

Solution Method 2 – Run QuickBooks File Doctor Tool

You can win over numerous company file errors by running the QuickBooks File Doctor Tool from the Tool Hub. However, if you don’t have the QuickBooks Tool Hub installed on your computer, get it by following the given directions: 

  • Firstly, visit the official Intuit website and directly download the QuickBooks Tool Hub. 
  • Once you have downloaded the QuickBooksToolHub.exe file, open your browser’s download and double-click the downloaded installer file. 
  • Now, save this installer file on your Desktop and open the same to initiate the installation of QuickBooks Tool Hub. 
  • When you open, you will see some on-screen instructions to follow, continue following them, and hit the Next button. 
  • Begin the installation by clicking the Install button, and wait till you successfully complete this installation process. 
  • Now, click the Finish button and end the QuickBooks Tool Hub installation process. After this, open the Tool Hub and navigate to the Company File Issues tab. 
  • Here, you will get the QuickBooks File Doctor Tool. Click the tool and start searching for the company file having issues by hitting the browse button. 
  • Once you get the file, click the Continue button and enter the required admin account credentials
  • Hit the Next button, and complete this procedure. If you still notice the data damage in the QuickBooks company file, follow the next solution method. 

Solution Method 3 – Get the Latest QuickBooks Software Updates

When nothing works, a simple update can do wonders. Similarly, downloading the latest QuickBooks Data File Errors can be helpful to get rid of the annoying data file error in QuickBooks company files. So, follow the jotted-down instructions: 

  1. Firstly, open your QuickBooks software and navigate to the help menu. 
  2. From here, hit the Update QuickBooks button, and check whether any updates are available for your QuickBooks current version from the QuickBooks Update Window. 
  3. If any update is available, hit the Yes option on the Update QuickBooks window. It will automatically update your QuickBooks Desktop software to the latest. 
  4. Finally, click the Save button, end the update procedure successfully, and continue accessing your QuickBooks company files
The Bottom Line..!

So, that’s all about this blog post! We hope you have got enough insights about the data file error in QuickBooks & QuickBooks won’t open company data file Now, do not let this issue hamper your smooth and efficient QuickBooks workflow. Just follow the solutions given above and troubleshoot the error. Contact our QuickBooks Support experts via the Live Chat Support facility if you face any issues or need help while removing this QuickBooks data file issue.

FAQ's

A1: Absolutely! If you change the location of your company file, it may result in data file errors with different codes in QuickBooks. 

A2:  You can use the following tools to fix the data damage errors in QuickBooks:

QuickBooks Verify and Rebuild Data Tool
QuickBooks File Doctor Tool 

A3: Yes! That’s why it’s recommended to always update your QuickBooks Desktop application to the latest and avoid data errors in company files. 

A4:  

  • Sudden shutdown of your computer system
  • Slow and sluggish running of your QuickBooks application
  • Negative transaction history

A5: You can dial our toll-free number and contact our QuickBooks team or consult our technicians via the Live Chat Support facility. 

Are you facing issues with QuickBooks error PS033 while updating your QuickBooks payroll processes? If yes, don’t worry! You’re not alone in this. Thousands of daily QuickBooks users encounter this error, leading to damaged CPS folders and security patch issues. Eventually, users also fail to access the improved payroll features. If you’re also struggling with such problems, continue finding the proven solutions in this blog to fix the error. 

QuickBooks payroll errors are disturbing enough for daily users. If you need professional help to get rid of such problems, just ring us anytime anywhere. 

This blog post will discuss everything related to the error, including why it occurs, what signs it shows to the users, and the necessary ways to troubleshoot the same. Let’s begin! 

QuickBooks Errors PS033 – What’s the Issue All About?

Due to the damaged CPS folder, users may face QuickBooks errors PS033, a payroll update error preventing users from downloading the latest payroll updates. QuickBooks users, at the time of the error attack, notice a message stating, “QuickBooks can’t read your payroll setup files. [Error PS033].” In this message, you can see the Help option that will take you to the support page for finding the required troubleshooting solutions. 

To permanently eliminate this error, it’s better to first understand its major causes. So, continue reading.

What Reasons Can Be Responsible For QuickBooks Error Code PS033?

Apart from the damaged file in your “C:\Program Files\Intuit\QuickBooks 20nn\Components\Payroll\CPS” folder, the following factors can also give rise to the how to fix QuickBooks payroll update error ps033 Take a look and proceed with troubleshooting accordingly: 

  • If your QuickBooks payroll subscription is inactive, you may fail to update your QuickBooks payroll services. 
  • Another reason for facing this payroll error is the enabled UAC (User Account Control) settings. 
  • An outdated QuickBooks application is the major cause of many QuickBooks errors, and so is the QuickBooks errors PS033. 
  • You may receive the QuickBooks payroll error message PS033 if your internet connection settings are poorly configured. 
  • The incorrect EIN (Employee Identification Number) is a notable factor in inviting the QuickBooks payroll update error PS033. 
  • If your Windows operating system and QuickBooks payroll application are incompatible with each other, you may face issues while updating payroll services. 
  • The background running Windows programs can also hamper the download process of your QuickBooks payroll’s latest updates. 
  • The incorrect or invalid payroll service key is also one of the main reasons for encountering the QuickBooks error code PS033 message.

How Can Users Notice the QuickBooks Payroll Error PS033? 

The following signs can help you notice the payroll error PS033 in QuickBooks and be prepared accordingly. Take a look to catch the error in your system:

  1. Slow, sluggish, or no response from Windows commands is one of the prominent signs of the error. 
  2. Fluctuations and crashing of the QuickBooks payroll update process are also signs of the payroll error. 
  3. If you notice issues while accessing your company’s employee information, it’s due to the payroll error PS033 attack in your QuickBooks application. 
  4. Continuous flashing of QuickBooks payroll error PS033 message on your screen while updating payroll services is also a notable sign of the issue. 
  5. Another sign for noticing this payroll error is your QuickBooks programs’ freezing, lagging, or slow performance.

Quick Solutions to Fix QuickBooks Payroll Error PS033

So, as we have learned about all the possible reasons and signs of the payroll error, now it’s time to take the following actions and rectify the error permanently. Carefully follow all the instructions given with each method to eliminate the annoying QuickBooks payroll error PS033 successfully: 

Troubleshooting Solution 1 – Modify your CPS Folder Name 

As you already know, the damaged CPS folder can be a key reason for facing issues while updating QuickBooks payroll processes. So, follow the instructions and try to rename the folder: 

  • Firstly, shut down your QuickBooks and other background-running Windows programs. 
  • Now, navigate to the C:\ Program Files\ Intuit\ QuickBooks 20XX\ Components\ Payroll\ CPS folder location. 
  • Here, right-click the CPS folder and select the Rename alternative from the appeared drop-down list. 
  • Rename the old folder name by CPSGHJ, and hit the Enter button to save this new CPS folder name. 
  • Once done with this, reopen your QuickBooks application, try to update payroll services, and if the QuickBooks error ps033 and keeps shutting down message still appears, check the next method.

Troubleshooting Solution 2 – Get the Latest QuickBooks Payroll Application 

An outdated application is the reason for many technical errors, and so is the case with the QuickBooks application. Thus, perform the given method and try to update your QuickBooks payroll application to avoid payroll errors. 

  1. Firstly, you must close your QuickBooks program and its related company files to begin the process.
  2. In the next step, move to your Desktop and right-click the QuickBooks program icon.
  3. Now, hit the Run as administrator option and then go to the Help menu.
  4. Here, you must select the Update QuickBooks Desktop option, go to the Options tab, select the Mark All option, and then click the Save button to save your changes.
  5. Once done, hit the Update Now tab and tick-mark Reset Updates box. After this, select the Get Updates button and wait until the Update process ends.
  6. Is it over? Now, close your QuickBooks application, open it again, and hit the Yes button to begin the installation of the QuickBooks latest updates.
  7. Once the installation is successful, restart your computer system and try to download the QuickBooks payroll updates again. Perform the next method if the QuickBooks payroll error PS033 still hampers the update process.

Troubleshooting Solution 3 – Try to Download the Payroll Updates in Windows Safe Mode 

Running update processes in Windows Safe Mode is highly recommended. It’s because Windows Safe Mode allows users to complete their download and update processes with no interruption or error interference. Thus, you can try this for updating your QuickBooks payroll services as well. For this: 

  • Close the running QuickBooks application and its related opened windows. After this, press and hold the Shift key simultaneously by pressing the Power button.
  • Now, hit the Restart button and go to the Choose an Option screen tab, where you must click the Troubleshoot option.
  • Furthermore, hit the Advanced alternative and choose the Startup Settings alternative.
  • Here, click the Restart button and open your computer system in Windows Safe Mode.
  • Finally, try to download the latest payroll updates, and if it helps, restart your computer system back to the Windows normal mode and download the payroll updates again.
What’s the Crux?

So, here, by the end of this blog post, we hope you have learned enough about the QuickBooks error PS033 or ps033 error in QuickBooks desktop. Now, there is no need to dig into the payroll update issues anymore. Just perform the given methods above in the post and avoid all the potential payroll errors. If you face any issues while troubleshooting the error, you can connect with us via the available Live Chat Support facility. 

FAQ's

A1: The QuickBooks error PS033 is a payroll update error that hampers the download process of the latest QuickBooks payroll services. 

A2: By taking the following actions, users can troubleshoot the QuickBooks payroll error PS033: 

  • By updating the QuickBooks application
  • By renaming the CPS folder
  • Also, by fixing data damage issues using the QuickBooks Rebuild and Verify data utilities.

A3: You can notice the following signs to learn about the attack of error PS033 in your QuickBooks application:

  • Slow and sluggish Windows program performance
  • The repeated flashing of the “QuickBooks can’t read payroll setup files” error message
  • Freezing or crashing of the QuickBooks payroll update screen. 

A4: Make sure your QuickBooks payroll application is updated to the latest releases and the product subscription is active. 

A5: Don’t worry! You can either directly contact us anytime or connect with our QuickBooks technicians via Live Chat Support for further help.

QuickBooks Error 1612 is an error that occurs in your System due to an interruption in the installation of the QuickBooks Software. However, the steps to rectify this Error are not so difficult if you know the set of steps. Thus, if you are also facing this Error, and don’t know how to resolve it, simply read this blog and find your Solution.

But what if you get stuck in some steps while following the process? Call on @+1-855-603-0490 and grab immediate help from a QuickBooks expert. 

What Causes the QuickBooks Error 1612?

Before rushing towards the troubleshooting of QuickBooks Error 1612, you first have to understand why it occurs in your System. Thus check the below paragraph to learn about all the root causes that can provoke such Errors in your QuickBooks Software.

  • The Corrupt Installation of QuickBooks Software.
  • Windows Registries are invalid or unauthorized.
  • The presence of Malware or Viruses in your System can also evoke such Errors in your System.
  • In case the Company File is damaged or corrupted.
  • If there is some power fluctuation, that ends up with the shutting down of the System.
  • You might have deleted an important file by mistake.
  • Installing QuickBooks using deactivate CD can also lead to error 1612 in QuickBooks.

How to Identify QuickBooks Error Code 1612?

Below we have mentioned a few Signs and Symptoms that can use to recognize the occurrence of QuickBooks Error 1612 in QuickBooks:

  • An error message stating
    • “Error 1612: The update installer is not accessible”.
  • In case the System stops responding frequently.
  • The update of QuickBooks may freeze in between.
  • Windows Operating System might crash.
  • QuickBooks software starts hanging.
  • QuickBooks stops responding to your command.

What are the Steps to Fix QuickBooks Error Code 1612?

Finally, let’s understand the steps that can help you in fixing Error 1612 in QuickBooks:

Method 1: Reset the Patch

In case a user struggle with QuickBooks Error Code 1612, the first thing we advise them to do is patch reset. To do so, you can follow the given information:

  • Check if the patch is working properly or not; if not, then re-download it.
  • Thereafter, navigate to the Share Download Folder button, and turn it on and off.
  • After that, follow the given instructions: Off, then Save. Next On again Save.
  • Now, try to repeat step 1 again to check if the problem is fixed.

Method 2: Run a Scan in QuickBooks through System File Checker

System File Checker Tool in QuickBooks is used for repairing damaged QuickBooks Files in Windows. To utilize the Tool, follow the given steps:

  • Initially, open the Run dialogue box by pressing the Windows+R keys simultaneously.
  • After that, enter cmd in the Box, and launch the Command Prompt window.
  • Now, in the Window display, write SEC/Scannow and hit the Enter button.
  • Now, the scanning process will begin.

Note: Scanning might consume some time.

  • Lastly, reboot your System, and verify if the issue is resolved.

Method 3: Repair the QuickBooks Installation

Alternatively, you can also repair the QuickBooks software to eliminate the Error. For that, check the given steps:

  • Launch the Control Panel, and head to Add/Remove Program tab.
  • Thereon, from the list of programs, select QuickBooks.
  • Hit on the Uninstall/change button.
  • Tap on the Repair tab from QuickBooks Installation Window.
  • Moving ahead, you have to follow the on-screen instructions to complete the process.
  • Lastly, Restart your System.

Method 4: Delete the Damaged Application

A corrupted or damaged msi.file can also be a reason behind this Error. Thus fix the Error by uninstalling them.

Note: The uninstallation process might vary according to the Operating System you are using.

Steps for Windows 7 and windows vista
  • At the beginning of the process, click on the Start tab.
  • After that, hit the Programs and Features button.
  • Tap on the Control panel, and click on Programs.
  • Thereon, Hit on the Programs and Features tab and look for the Windows installer error code linked with the program present in the name column.
  • Moving ahead, hit the Windows installer, followed by taping the enter key.
  • Now, hit the Uninstall button, and follow the on-screen prompt to complete the process.
Instructions for Windows 8
  • Click on the Start Button and right-click on the Start Context menu.
  • Hit on the Programs and Features tab, and then look for the Windows installer error code related to your issue.
  • Once you find it, click on Windows Installer-related Entry, and hit on Uninstall and Change button.
  • Lastly, follow the on-screen instruction to complete the overall process.
Instructions for Windows XP
  • The Windows XP user has to hit on the Start Button and launch the Programs and Features section.
  • Thereafter they have to click on the Control Panel and select Add or Remove Program tab.
  • Now, look for the Windows “installer error code 1612″ related problem in the list of installed programs.
  • Next, tap on the Windows Installer Entry.
  • Select the Remove tab, and perform the on-screen instruction to complete the process.

Method 5: Check the Anti-Virus Settings

At times, you might face QuickBooks Error Code 1612 due to the presence of a Firewall or Anti-virus in your System, as it can interrupt the Software. Thus, fix the Error by modifying the Anti-virus settings:

  • Start the process by verifying the Firewall Ports. Check if the QuickBooks or some related files are disabled.
  • Now, configure the Anti-virus settings; if QuickBooks is in the list of Blocked apps, remove it.

Note: You can also uninstall the Anti-virus for some moment if you still face problems. To do so, check the given steps:

  • Open Control Panel and look for Programs and Features.
  • Thereafter click on the Uninstall a program tab and head to the Anti-virus software.
  • Tap on Uninstall. Click OK, and finally, restart your device.

Method 6: Make Changes in the QuickBooks Software Settings

If none of the above methods works in your favor, then fix your Software settings.
Note: Take a backup of your Company Files to save them from any damage or loss.

  • Click on the Start button, and in the list of programs, look for QuickBooks.
  • Thereafter right, click on the QuickBooks icon and hit the Uninstall button.
  • Now, let the uninstall procedure complete.
  • Moving ahead, navigate to the Inuit’s official website and look for the QuickBooks program.
  • Download the newest version of QuickBooks and Save it at an easily accessible location.
  • Next, set up QuickBooks by providing the apt login details.
  • Once the installation is done, go to Control Panel and head to the Programs and features button.
  • Under the Name option tab on the Associated entry.
  • Select the associated files and hit the Uninstall button.
  • Now, again in the Box, tap on the Programs and Features section and look for QuickBooks.
  • Choose it and click on the Repair button.
  • Now, let the repair process complete.
  • Lastly, restart your System and check if the Error is resolved now.

In a Nutshell!

Here we are wrapping up our blog. In case you need any additional help while fixing the QuickBooks Error Code 1612, then use the live chat option, and get help from our QuickBooks Experts. These experts are available around the clock to help the QuickBooks user in finding the answer to their Queries.

Frequently Asked Questions!

Question 1: How does QuickBooks Error Code 1612 appear?

Answer: When a user face QuickBooks Error Code 1612, they receive an error message on their screen stating, “Error 1612: The update installer is not accessible”. 

Question 2: How to recognize Error 1612 in QuickBooks?

Answer: To identify the occurrence of Error 1612, match the given Signs and Symptoms:

  • Your System stops suddenly.
  • The update process stops.
  • If the software freezes frequently.
  • You will receive an error message.
  • QuickBooks stops responding to your command.

Question 3: Why Did I Receive The QuickBooks Error 1612?

Answer: In case there is an incomplete installation of QuickBooks update, it can lead to QuickBooks error 1612. Apart from that, it can also appear due to the presence of Malware or viruses in your System.

Question 4:  Can I use QuickBooks Online instead of QuickBooks Desktop to eliminate QuickBooks Error 1612?

Answer: Yes, in case you are facing error 1612 using QuickBooks Desktop, you can switch to QuickBooks Online. It is a Cloud-based version of QuickBooks that can be used from any device that has an Internet connection.

Question 5: Is it safe to clean my computer to fix QuickBooks Error 1612?

Answer: The easiest way to remove unwanted files and programs is by cleaning your System. However, make sure to delete files and programs that are safe to delete, i.e., files that conflict with QuickBooks.

Being a business owner, you might understand the importance of the business accounting data. If there is any slight damage or loss to the crucial business data, it might lead to severe loss to the company. Therefore, to keep you away from such instances, you must operate the QuickBooks Auto Data Recovery tool. Using this tool, it creates a backup of the data file whenever lost or damaged. 

Furthermore, read this illustrative post attentively to gain complete details on how to utilize the QuickBooks ADR tool. 

Are you seeking expert assistance to restore data with QuickBooks ADR Tool? Call us at @1855-603-0490 and have a conversation with our professionals for immediate help. 

Things to keep in mind before using Auto Data Recovery

ADR can help in QuickBooks data recovery through the following processes-:

  • Most transactions can be restored using a current Transaction Log file and a copy of the company file.
  • All lost transactions except the last few hours of transactions can be restored using a copy of Transaction Log file and the company file.

Before you move forward, there are a couple of things that you should keep in mind to recover lost data. They are as follows-:

  • Only QuickBooks Pro, Premier, and the enterprise version have the auto data recovery feature for Windows
  • The Accountant edition does not have the auto data recovery feature
  • The maximum size of the ADR file is 1.5 GB. A backup file greater than 1.5 GB will not work in the auto data recovery feature of QuickBooks.
  • For auto data recovery to work best, your QuickBooks desktop should be updated to the latest version with all the required updates installed.
  • Follow the solutions in the order that they are shown

How can the recent transactions be recovered using the original.TLG file with .QBW.adr file?

All recent transactions can be restored using the transaction log file and the company file. For that, go through the following steps-:

  • Make a folder by the name QBTest on your desktop
  • You will have to locate the folder that has the company file
  • The folder that has the company file will have the .tlg File. You need to find it.
  • If you can’t find the .tlg File, go ahead with these steps
  • a.) Open File Explorer by clicking on Windows+E
  • b.) After this, choose Organise
    , then Folder and Search options.
  • c.) Click on Hide Extension for known file types. 
    Now, hit the Apply button and then choose OK to move further
    • Copy the .tlg or transaction log file of the company file and paste it to the newly created QBTest folder
    • QuickBooks Auto Data Recovery folder is present at the location where the folder containing the company file is present. Open it by clicking on it.
    • In the next step, copy the .QBW.adr file and paste it to the newly created QBTest folder. 
    • Rename the .QBW.adr file by right-clicking on it. It should be present in the QB Test folder
    • Next, you need to delete the .adr file extension.
    • Again open up QuickBooks.
    • Verify all your transactions once by opening the company file
    • First click on File and then Utilities
    • Lastly, you need to click on Verify Data
  • If the company file is robust, the damaged or corrupt company file can be moved to a different location, and a copy from the QBTest folder can be transferred to the original location. 

Read more : Quickbooks error H505

How can the recent transactions be recovered using .QBW.adr and.TLG.adr files

Most transactions can be restored using copies of both .QBW.adr and.TLG.adr files. However, lost transactions for the last few hours can not be recovered using this. To do that, You need to follow the below-given instructions-:

  • The first step is creating a folder named QBTest on your desktop.
  • In the folder that hosts the company file, access QuickBooksAutoDataRecovery
  • Look for.TLG.adr and .QBW.adr files.
  • Suppose you are not able to recognize.TLG.adr and .QBW.adr files, then you need to follow the below steps.
  • Open up File Explorer by clicking Windows+E on the keyboard.
  • After this, locate Organize and then Go to Folder and Search options.
  • Following this, opt for the Hide Extensions for known file types.
  • Select Apply and then OK
  • Copy.TLG.adr and .QBW.adr files, and you need to paste them to the newly created QBTest folder.
  • Remove an extension from both the files. This leaves you with.TLG and . QBW files.
  • Launch QuickBooks once again
  • Access the company file and check all the transactions
  • Select File
  • Now, choose Utilities
  • After that, you need to go to Verify Data
  • If the company file is up to the mark, you can move the corrupt File to a different location, and a copy from the QBTest folder can be brought to the original location.

Conclusion

With the help of this post, we give you the surety that now you can easily restore your lost data with QuickBooks ADR Tool. If you are still trying to restore the lost data, you can connect with our professionals. You can consult our experts through the live chat facility and resolve your issue within the shortest time.

Frequently Asked Questions(FAQs)

Q1. Does QuickBooks allow you to recover lost data?

Ans. Yes, QuickBooks allows you to recover lost data through the Auto Data Recovery feature of QuickBooks.

Q2. How can you recover lost transactions in QuickBooks via the Auto Data Recovery feature?

Ans. Most transactions can be restored using your current transaction log file and a copy of your company file.

Q3. How can all transactions be restored except for the last few hours of transactions?

Ans. All lost transactions, except that of the last few hours, can be restored by using a copy of both your transaction log file and the company file.

Q4. Does the ADR file size have a limit?

Ans. The maximum size limit of the ADR file is 1.5 GB. The QuickBooks Auto Data Recovery feature does not work when the backup File is more than 1.5 GB.

Q5. Which versions of QuickBooks have the Auto Data Recovery feature?

Ans. Auto Data Recovery feature only exists in QuickBooks Pro, premier, and the enterprise version. You can’t utilize this feature in the accountant version of QuickBooks.

QuickBooks software has smoothened the business accounting process, but it also has several bugs that can disturb your working with it. You have opened QuickBooks, and it QuickBooks stopped working or not responding. Such issues can be so frustrating because you have a lot of work pending and the software is also stopped working. To get rid of this problem, you have to go through various methods mentioned in this blog.

The error is identified with its multiple reasons that are responsible for its occurrence. An alternate and quick way to fix this error is to call the QuickBooks not responding and get the essential solutions.

QuickBooks Not Responding Message

What are the Causes Behind QuickBooks Not Responding Error?

QuickBooks Not Working is a standard error that occurs because of various reasons listed below.

  • A hard drive is damaged
  • Missing or damaged QBWUSER.INI file
  • Crashed Windows Operating System
  • The company file is long
  • Invalid Installation file
  • Corrupted Program files on Hard Drive
  • Low system resources

Symptoms of QuickBooks Not Responding Error

The following indications can help you to identify not Responding error QuickBooks, and you will start looking for ideal solutions to fix this error.

  • The system is shut-down automatically
  • QuickBooks, not Opening problem repeatedly appears on your computer screen
  • The system is freezing and not responding to any command
  • QB software doesn’t open

Steps to Troubleshoot QuickBooks Not Working Error

QuickBooks can be problematic and irritative for you to tackle. You will be getting below quick fixing tips to remove this error and make the QuickBooks well again.

Method 1 – Download And Run QuickBooks Refresher Tool

  • First, close ‘QB software.’
  • Next, start downloading ‘QuickBooks Refresher tool.’
  • ‘Save’ the downloaded file on your computer
  • When the download process completes, press the ‘Run’ option to execute the ‘QBRefresher tool.’
  • It will diagnose the running problem of ‘QuickBooks’ and carry out resolving procedures

QuickBooks Not Responding

  • Finally, open ‘QuickBooks’ to check whether the issue is resolved or not.

Method 2 – Use Quick Fix My Program From The QuickBooks Tool Hub

Download and Run QuickBooks Tool Hub

  • First, close ‘QuickBooks software.’
  • Download ‘QuickBooks Tool Hub’
  • ‘Save’ the downloaded file on your PC to access it easily
  • Open the earlier ‘Downloaded file.’
  • Accept ‘terms and conditions and follow on-screen tips to install
  • After completing the installation procedure, put a ‘double-click’ on the icon to open ‘QuickBooks Tool Hub’.

Run Quick Fix My Program From Tool Hub

  • Users have to choose the ‘Program Problems’ in ‘QuickBooks Tool Hub.’
  • Choose the ‘Quick Fix My Program’
  • After this, Open ‘QuickBooks Desktop’ and then open the data file.

Run QuickBooks Install Diagnostic Tool from Tool Hub

  • Open ‘QuickBooks Tool Hub’
  • Users must check ‘Installation Issues’ in the ‘Tool Hub.’
  • Choose the ‘QuickBooks Install Diagnostic Tool’
  • Let the tool ‘Run’ and it will take up to ‘20 minutes’ or more.

Run Clean Install in QuickBooks Desktop

The clean install tool will assist you in renaming the old installed file. It allows the user to add new files.

  • First, open the ‘QuickBooks Tool Hub.’
  • After this, choose the ‘Installation issues’
  • Next, choose the ‘Clean Install Tool’ and then press the ‘OK’ option.
  • Select the ‘QuickBooks Latest Product Version’ followed by clicking ‘Continue’.

Method 3 – Make A New Admin User In Windows To Fix The Bug

  • First, click the ‘Start’ button and then open the ‘Control Panel.’
  • After this, press ‘Add or Remove User Accounts’ link
  • Once the ‘Manage Accounts’ dialogue box opens up, press ‘Create A New Account.’
  • Then, type the ‘Account Name’ and choose ‘Create Admin Account.’
  • Finally, Click on the ‘Create Account Button’ to create a new user account in Windows Operating System.

Method 4 – Assign A New Name to QB.INI File

  • Rename’ the ‘QBWUSER.INI file’ to fix the internal issue when you try to open QuickBooks Desktop
  • Rename the ‘EntitlementDataStore.ecml file

Method 5 – Run QuickBooks System Repair Tool

  • First, ‘Download QuickBooks Repair Tool’
  • ‘Save’ the downloaded file in the local folder
  • Next, shut-down all ‘existed open program’ followed by installing the tool
  • It will take around ‘20 minutes’ to run a scan in the complete device
  • Once the tool has repaired the ‘Program’, ‘Restart’ the ‘Console’ and go.

Method 6 – Restart the System By Deactivating Antivirus Program

  • First, ‘Restart’ the System
  • Confirm that ‘Antivirus’ is switched-off temporarily
  • Finally, contact the IT department to remove this issue.

Method 7 – Open The File From Another Location

  • Hold ‘Windows+E key’ to open up a new window on your screen
  • Search and find the data file with ‘.qbw extension.’
  • Do a Right-Click on it and choose the ‘Copy’ option
  • Go to ‘C: Drive’ and create a ‘new folder.’
  • Name the folder as ‘QBTEST.’
  • Open a ‘New Folder’ and ‘Paste’ the file in it
  • Open ‘QuickBooks’ by holding the ctrl key.’
  • Choose ‘Open’ or ‘Restore’ an Existing Company option
  • Open the ‘QBTEST’ folder and check if an error exists in it.

Ending Words!!

We hope with the help of this post you can now easily operate QuickBooks without receiving QuickBooks has stopped working issue. If you are still facing difficulty while running the application, connect with our QuickBooks Enterprise Professionals through live chat.

Frequently Asked Questions (FAQs)

1: What are the various instances of QuickBooks has stopped working?

QuickBooks has stopped working is a common error in the software. You may get various instances of this error on web as stated in the below-given list:

  • when opening company file
  • After login
  • When sending email
  • When printing
  • After update
  • When backing up
  • When updating company file
  • QuickBooks open but not showing
  • QuickBooks messaging has stopped working.

These are some common issues related to QuickBooks program users report every now and then.

2: How to prevent QuickBooks not responding issue from taking place?

QuickBooks has stopped working is definitely one of the most annoying errors that prevent you from proceeding further with an on-going task. Sometimes, all it takes a simple restart to resolve this issue; whereas, sometimes you need to perform proper troubleshooting solutions to eliminate it. However, it is wise to take preventive steps to keep this error at bay. To avoid this problem:

  • Make sure that you are using the latest updated version of the QuickBooks program.
  • Verify that the regional settings in the program are configured properly.
  • The Windows regional settings of the QuickBooks should be configured to US Locale.
  • Use a stable Internet connection to avoid network timeouts.

3: Why is it crucial to use the updated version of QuickBooks?

Using an outdated version of the QuickBooks makes your software prone to multifaceted glitches. Intuit releases new updates periodically wherein, all the known issues of the program are resolved. Besides, you may also access the improved features by downloading the latest updates.

Furthermore, it alleviates the compatibility issues in the program. Using the new updated QuickBooks ensures that you are using the least erroneous version of the program. If not updated, you may get various issues such as QuickBooks has stopped working.

4: Why do you end up with QuickBooks not responding error when printing?

QuickBooks enables users to print their documents from within the program. However, at times users might strike with QuickBooks not responding error when printing. As a result, it stops users from printing invoices, forms, etc. There are multiple reasons that can lead to the printing error in QuickBooks. 

5: What happens when QuickBooks not responding after update?

The reason for QuickBooks not responding after an update varies in different conditions. Below are some reasons that we are enlisting, and you must check out!

  • There is a corrupted hard drive.
  • Damaged program files and/or QuickBooks Desktop installation.
  • QBWUSER.INI file might be damaged, corrupt or missing.
  • Conflict in some program.
  • Installation Error.

A software perfect for managing your accounts, QuickBooks is the most user-friendly application designed for you. This can be used by businesses to keep a check on the payroll or for individual budget planning. You can choose from its two available modes: QuickBooks multi user mode and single-user mode, according to your needs.

This software is man-made, and therefore it does break down sometimes. One issue that many QuickBooks users face is its multi user mode. When an operator switch from single-mode to multi-user, there are times when QuickBooks stop working.

This post is for such users. Here, not only will introduce you to the problems but will also discuss their causes and solutions.

What is QuickBooks Multi User Mode Not Working Error?

QuickBooks multi user mode is for the people who want to work collectively on one single file. This is usually used by huge businesses where an entire team is managing finances. However, it has been noticed that sometimes QuickBooks stops running when the administrator device switches it from single mode. This can happen before of some very common problems that are associated with most QuickBooks errors.

Origin of QuickBooks Multi-User Mode Not Working Error

Keep reading this post further to know the origin of the QuickBooks multi-user mode not working problem.

  • Firewall or antivirus settings not allowing QuickBooks
  • The software is not present on the server
  • An error in the hosting settings
  • When the server does not allow QuickBooks company file to run
  • A problem in Windows permission settings
  • Damages or corrupted DNS settings

Fix QuickBooks Multi-User Mode Not Working Error

Thenceforth, you will find various troubleshooting fixes that can help you eliminate the issue with the multi-user mode of QuickBooks.

Solution 1: Use QuickBooks File Doctor

Just like you visit a physician when you are sick, the QuickBooks file doctor treats the QuickBooks application.

  • The step here is to install QuickBooks file doctor on your desktop.
  • After the download is done, install it by following the instructions available on your screen.
  • Now, open the software, and you will land on the homepage.
  • From the available tabs, click on the Company File Issues section.
  • Thereafter, you will find the green button ‘Run QuickBooks File Doctor.’ Hit that.
  • Once the scan is done, go and check if you are still facing the issue.

Solution 2: Run QuickBooks Database Server Manager

Running QuickBooks Server Manager can also help you resolve the issue. Go along the steps mentioned below:

  • On your PC, go to the Start menu and search for Database.
  • Once you locate the option, enter the window and in the provided space, add your QuickBooks company file folder.
  • Next, hit the Scan button and wait for a few minutes.
  • Lastly, check if the multi-user error is fixed.

Solution 3: Edit .TLG and .ND Files Name

Another solution to fix the issue is renaming the Network Data (ND) and Transaction Log (TLG) files.

  • Initially, open the company file folder of QuickBooks.
  • Here, press the F2 key and wait for the product information window to open up.
  • Now, look for the file information and copy the file location.
  • Thereafter, open the Run box, enter the file location, and hit OK.
  • Next, locate the TLG and ND files and right-click on each file.
  • Change the names and save the edits.
  • Now, see if the multi-user mode is running smoothly.

Solution 4: Check Server Settings

To see if the services on your host server can work properly, pattern yourself after the following steps:

  • Hit Ctrl+R keys on your keyboard simultaneously to open the Run dialog window.
  • To open the Services page, enter Services.msc in the search bar and press the Enter key.
  • Here, locate the QuickBooksDBXX (XX being the version of the software) file and click a couple of times on the same.
  • Furthermore, under the General section, go to Startup Type and change it to Automatic.
  • Also, ensure that the Service status is Running. If not, hit the Start button.
  • Finally, select Apply to save the edits.
  • Now, head to the Recovery window of QuickBooksDBXX Services window.
  • Here, select Restart the service on all three failure tabs, one by one.
  • Again, select Apply and finally hit OK.
  • Repeat the aforementioned steps on with the QBCFMonitorService file in step 2.
Solution 5: Configure the Settings of the Firewall

There is a chance that your firewall is restricting QuickBooks. Here is how you can make this edit:

  • To make changes to your firewall settings, type Windows Firewall in the search bar of the Start menu.
  • Now that the Firewall window of the Control Panel is on click on the Allow an App Through Windows Firewall option.
  • From the scrolled-down list, select Change Settings and choose QuickBooks below the Public list.
  • Save the settings by clicking OK and changing the status to Public.
Solution 6: Add Server to Host File

Adding your server can help Windows to recognize the host file and run it uninterrupted.

  • To perform this fix, open Notepad in your Windows.
  • Here, open the host file from C:\Windows\System32\Drivers\Etc\ direction.
  • Now, under the last IP address, enter the admin server IP address.
  • You can do it with the help of the Tab key on your keyboard.
  • Thereafter, save the document and turn off the application.
Solution 7: Open Workstation to Ping the Server

You need to turn on Network Discovery before you start with the steps.

  • Head to Network and Sharing Center on your desktop from the Start menu.
  • On the left side of the page, click on Change Advanced Sharing Settings.
  • Here, under the Private section, select Turn on Network Discovery and File and Printer Sharing.
  • From here, note down the server name.
  • Furthermore, close the window and open the Run box with Ctrl+R.
  • Put in CMD in the bar and hit OK.
  • In this tab, enter ipconfig/all and continue.
  • Now, you have the hostname. Save it somewhere.
  • It is now time to test your server.
  • Go to the Run window again and type ping_(server name), and that is it.
Solution 8: Generate a New Company File Folder

If you are still struggling to work on QuickBooks multi user modethere is a chance that the issue exists in your company file folder. It can be corrupted or damaged. 

  • To start this process, create a new folder on your host PC.
  • Now, change the permissions of this folder so that Windows has access to the same. 
  • Once done, copy the .qbw to this folder and try running QuickBooks again. 

Final Statement

QuickBooks is a software that is used for individual as well as collective purposes. If you run a business and use QuickBooks for bookkeeping, you must have issues with the QuickBooks multi-user mode. If so, then you can try different solutions from this post to resolve the problem. Make sure you follow each step carefully.

Posts pagination